This is a repost of an article from my old site originally posted in 2017, in the hopes that the information within still proves useful for somebody.
Background
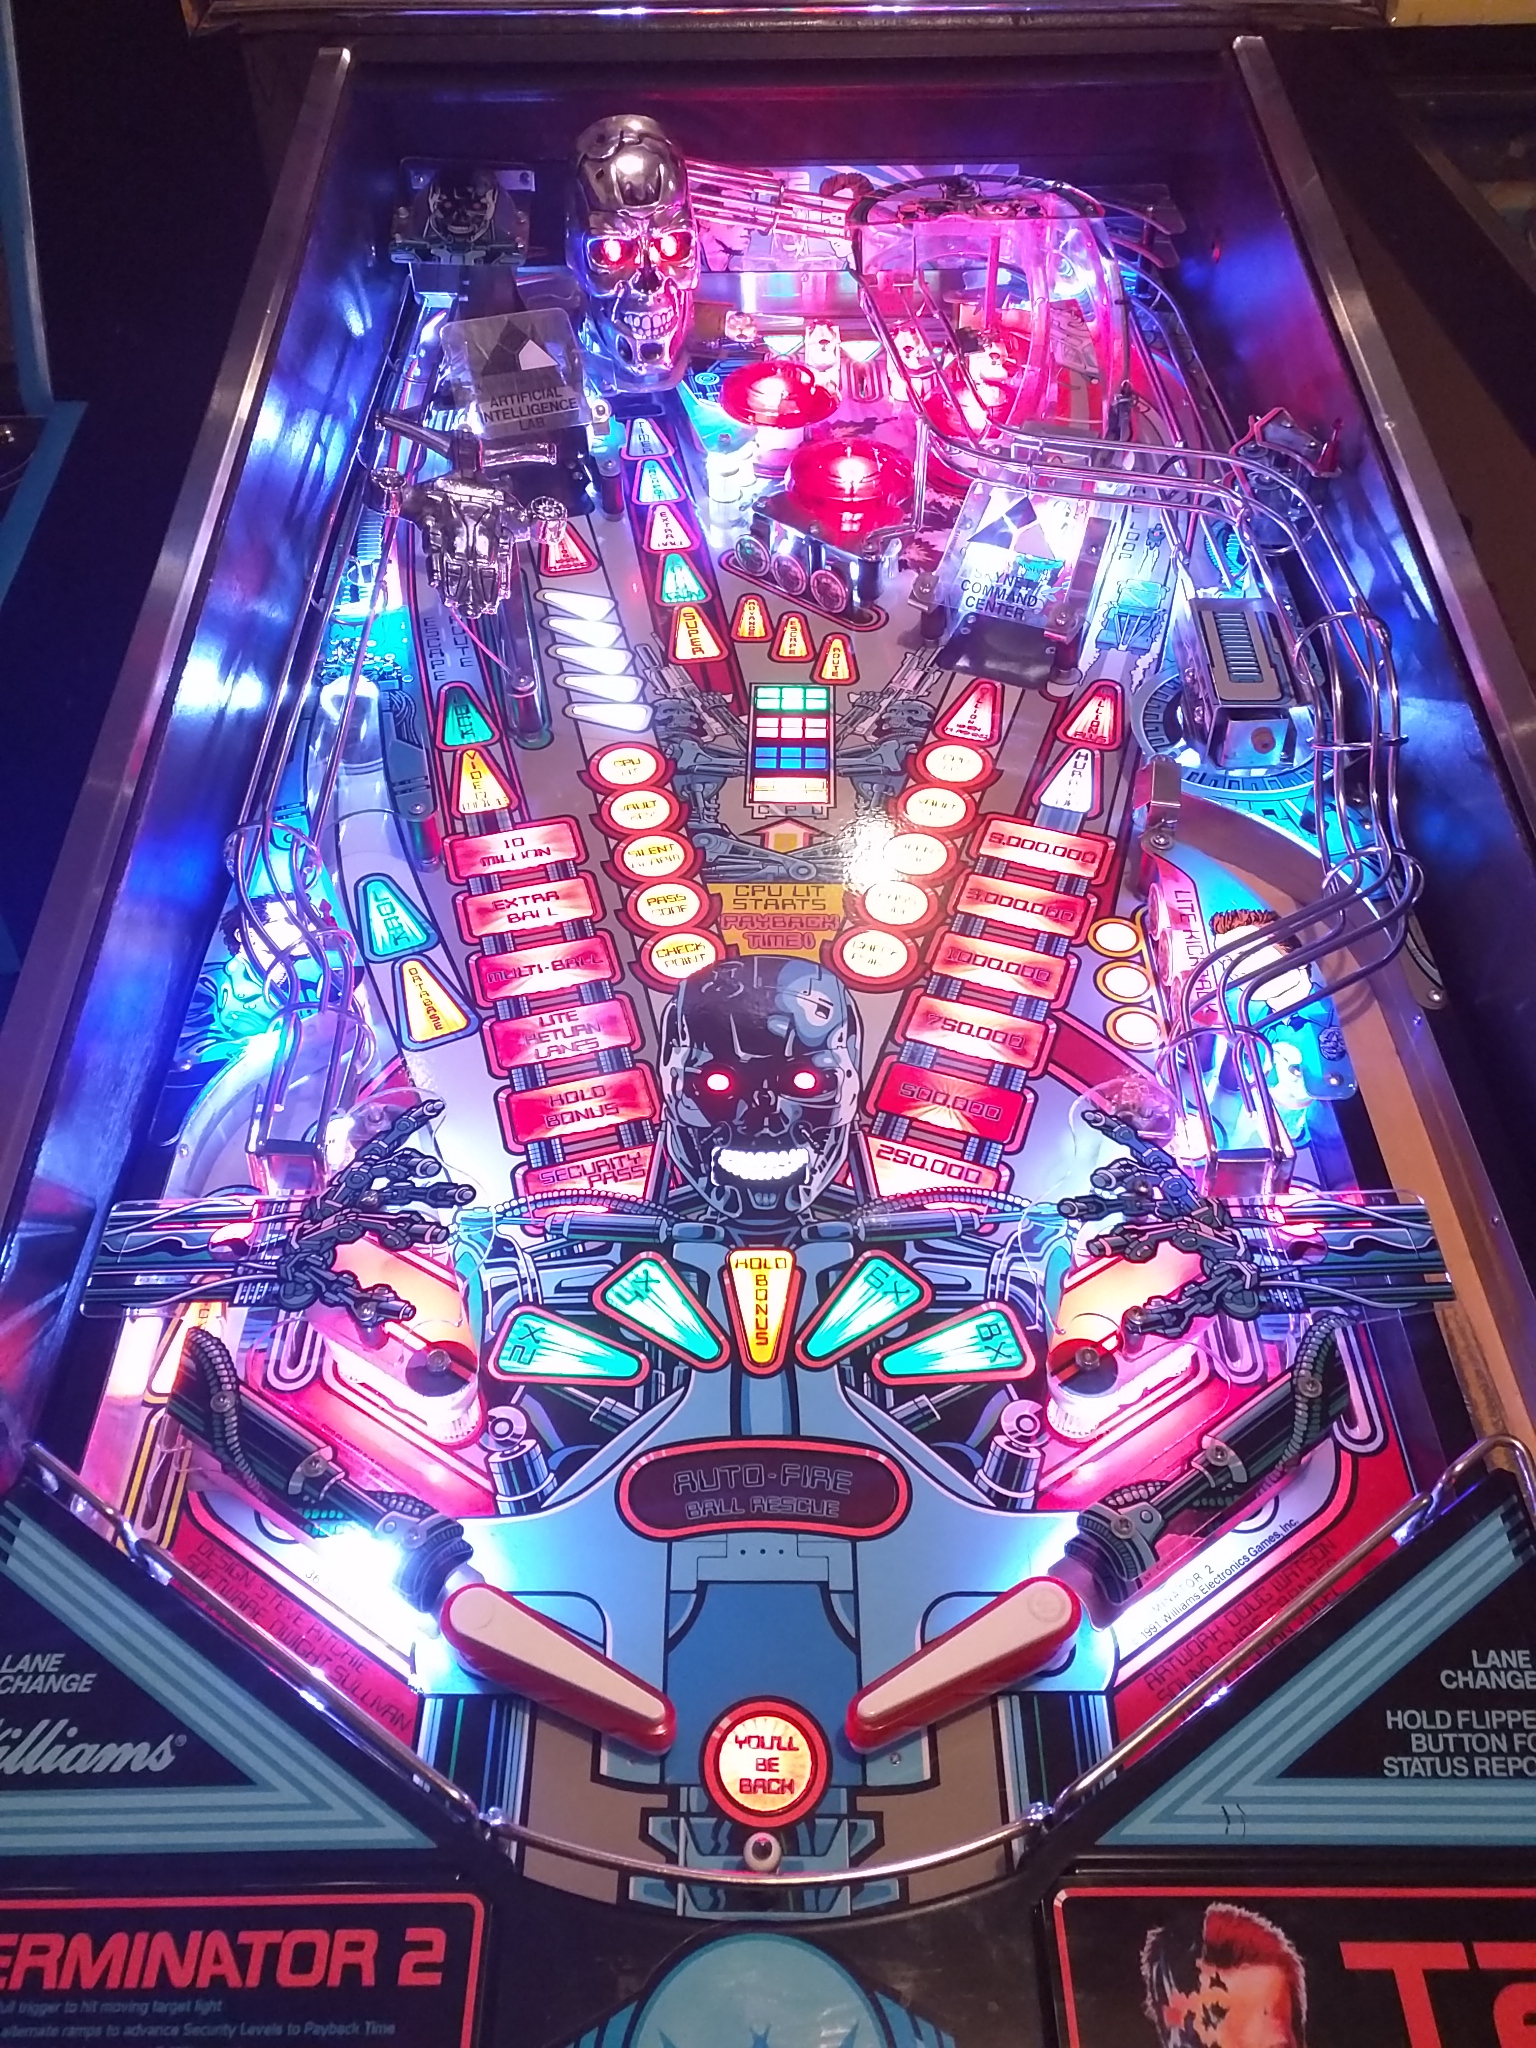
Just a few days ago, I received Terminator 2. This machine is awesome! Talk about a powerhouse packed with great sounds and visuals, alongside easy-to-pick-up gameplay and an instantly recognizable theme.
A quick trip down T2’s history - This machine was released in 1991 and designed by Steve Ritchie, who has designed several other excellent games at Williams (Black Knight, Firepower, F-14, Star Trek: TNG, etc). He continues his work at Stern Pinball today, as of this writing. This was the first pinball machine designed to use the Dot-Matrix Display (DMD) and the first to include a video mode, although Gilligan’s Island was first released with a DMD because of a shorter design and release cycle.
When I bought this machine, I was looking for a little less work on the LED and maintenance side of things because of my previous work on my BSD, and specifically sought out a machine that had an LED kit installed with no serious malfunctions. I’m hoping that in here, I can document a few of the (smaller) maintenance issues and oddities I had with the machine.
I assume that the reader is unaware of most pinball/video game technical concepts and will work off that baseline. I myself am still learning a lot about these machines, and can certainly get something wrong. I always welcome updates and corrections. Hopefully, I can keep this going and do a few more posts on the work I do. Either way, I hope that somebody can get a decent read out of it!
Initial Observations
Immediately after being dropped off and before the driver leaves, I power it on. Everything seems to light up, and I could hear the thudding sound of the T2 logo intro. Cabinet looks alright.. A few dings, some fading on the right side.
I need your clothes, your boots, and your motorcyle.
A little bit later, I get the chance to take a closer look at everything and see what I’m really dealing with. Starting up a game, I’m immediately greeted with a PINBALL MISSING error, and a cacophony of solenoids going off. Great.. I thought I saw 3 balls in the trough? Checking the manual, I do verify that T2 is indeed a 3 ball game. Taking the glass off and putting a pinball into the shooter lane results in the ball being shot into the playfield and out of existence again once it drains. Great.. let’s open her up and check the switches.
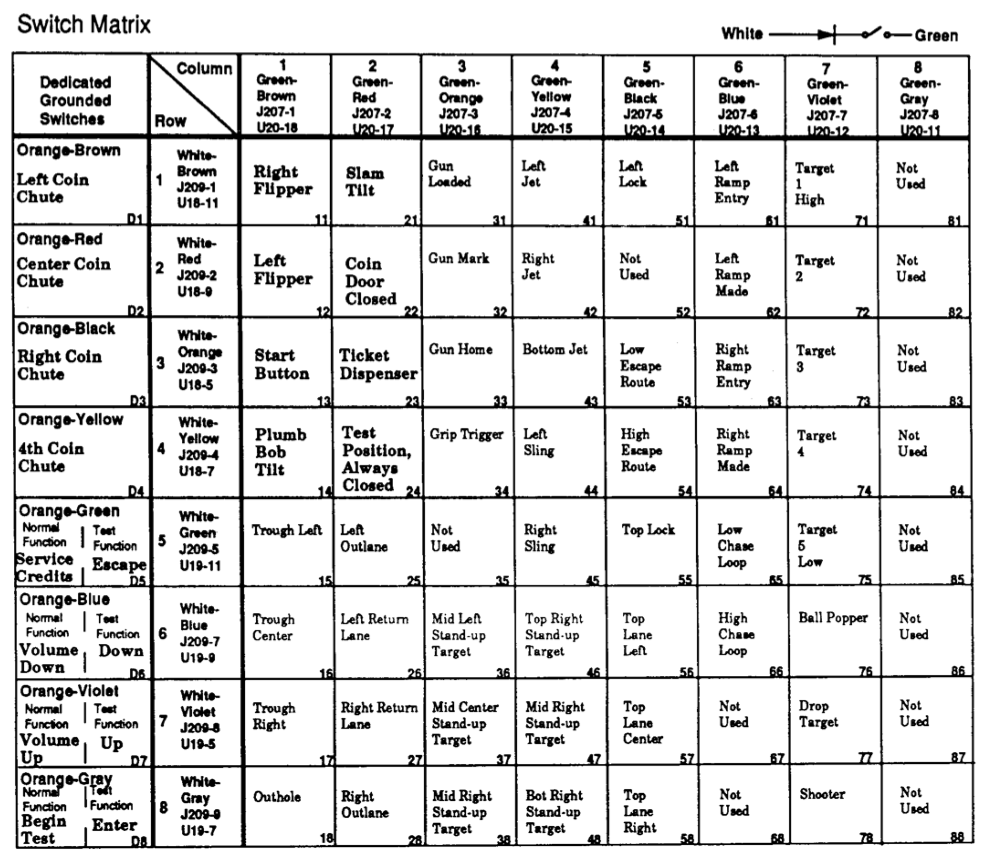
Switch Matrix
Thanks to the awesome diagnostic capabilities in WPC (Williams Pinball Controller) machines, we can check which switches are giving us trouble.
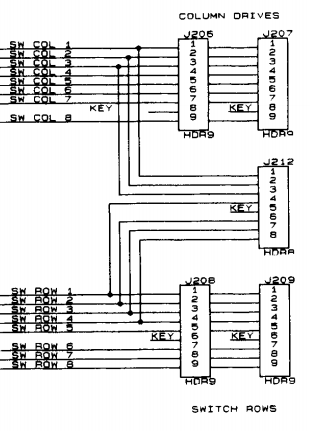
For casual readers that are unaware of what the switch matrix may be, it’s an array that drives all the switches in a solid-state pinball game.Generally, these are rollover switches, but can be anything from the flipper buttons, to an optical sensor (generally called optos) that is checking if a ball is physically blocking the beam (and hence is positioned in a certain spot).
The way it works is by using a number of rows and columns to read switches instead of a large number of individual circuits. The columns are pulsed at a rate of 500 per second, while the rows are constant. When a switch is engaged, and that column is pulsed, the current returns back through the row to an input on the main board, and the CPU knows that the switch at that row and column is activated.
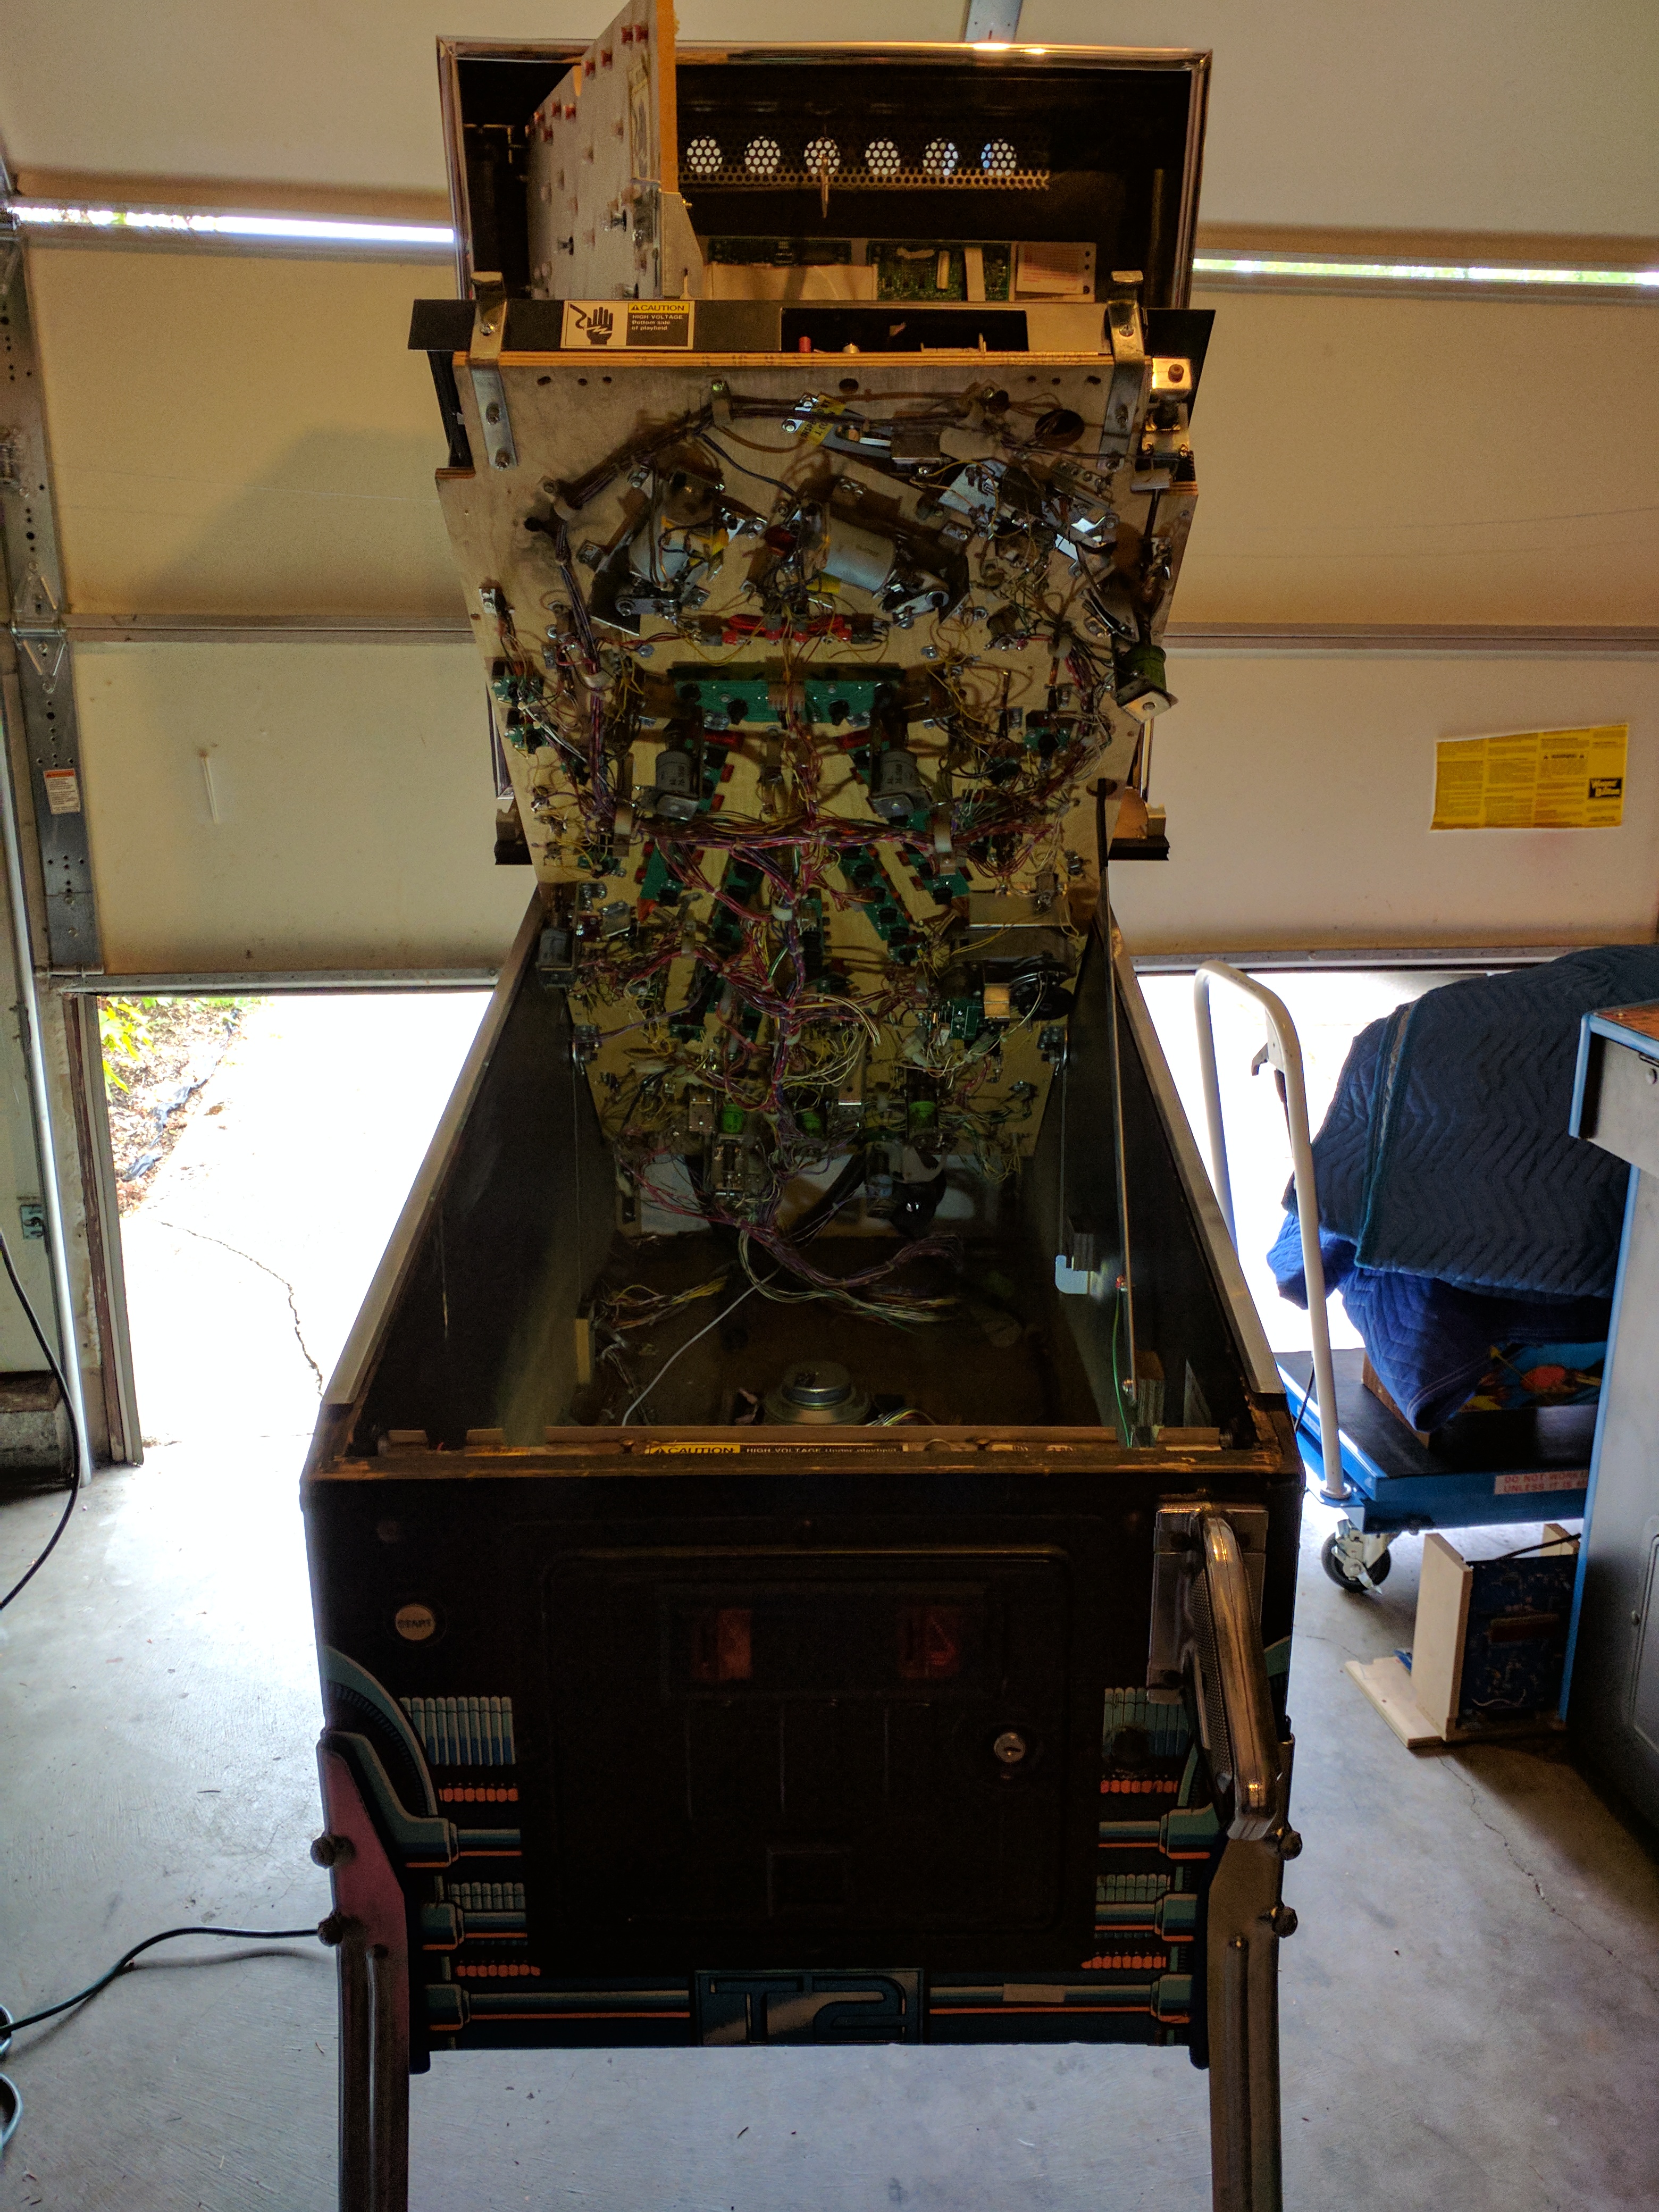
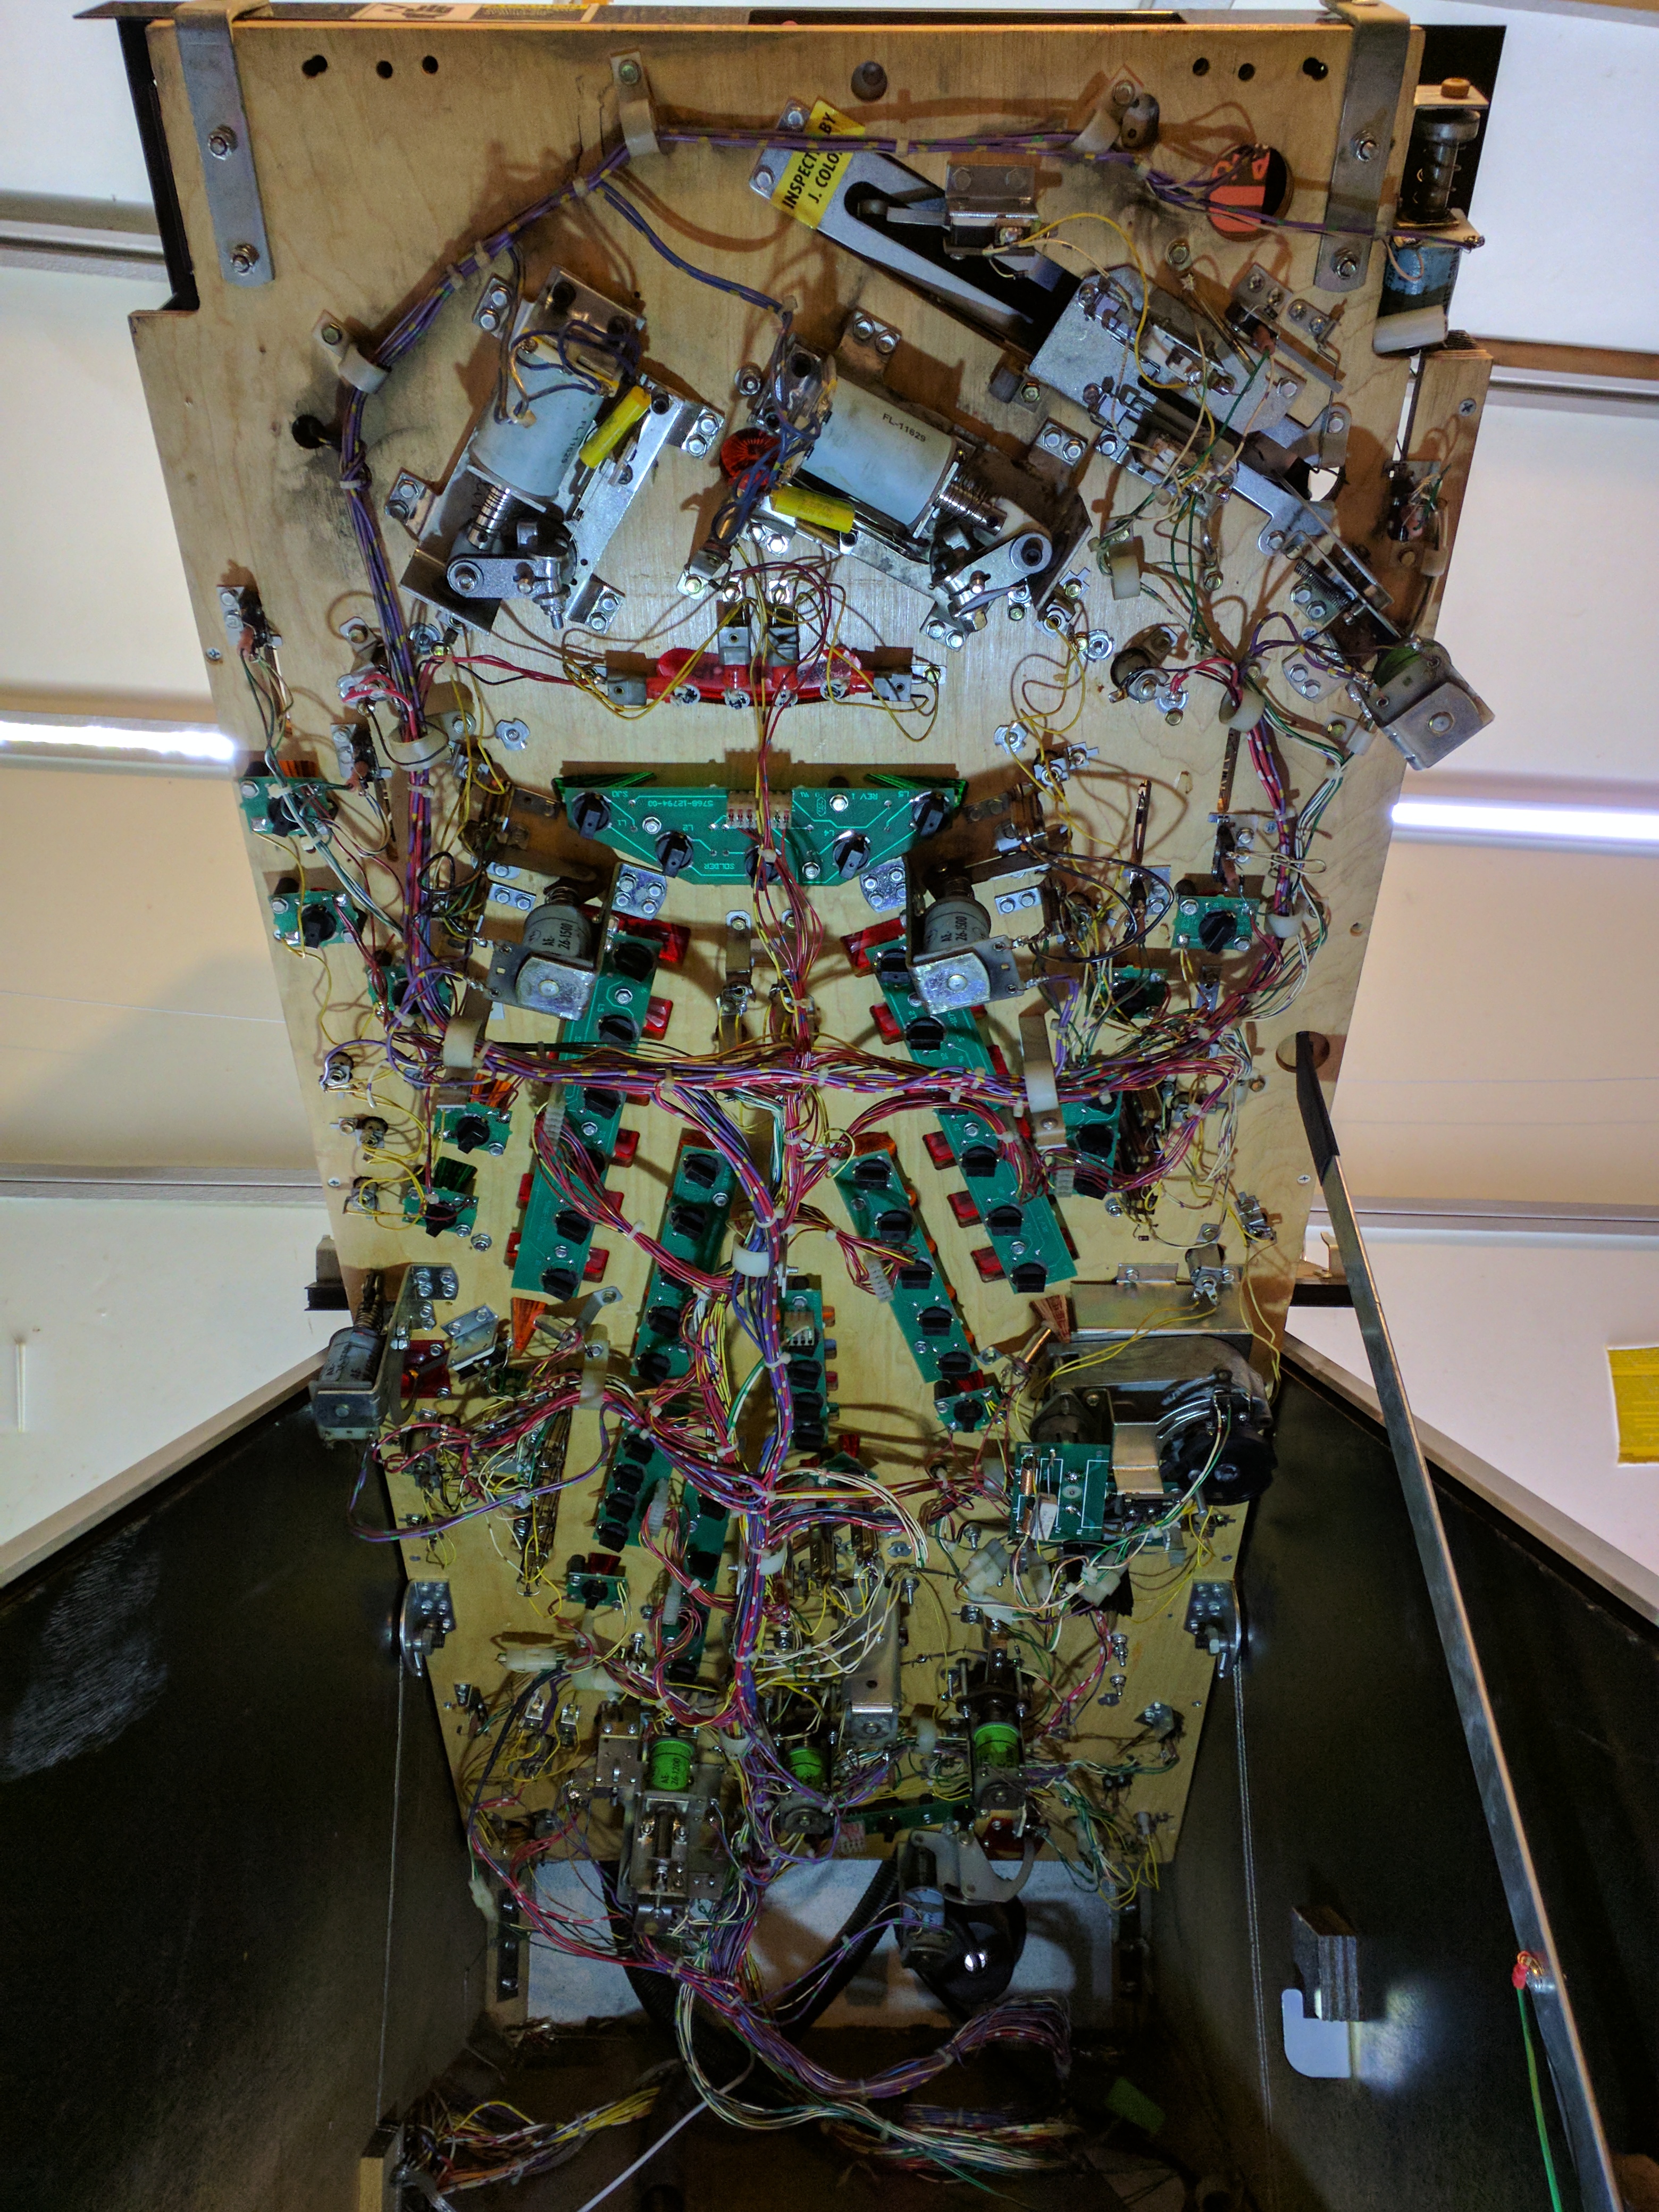
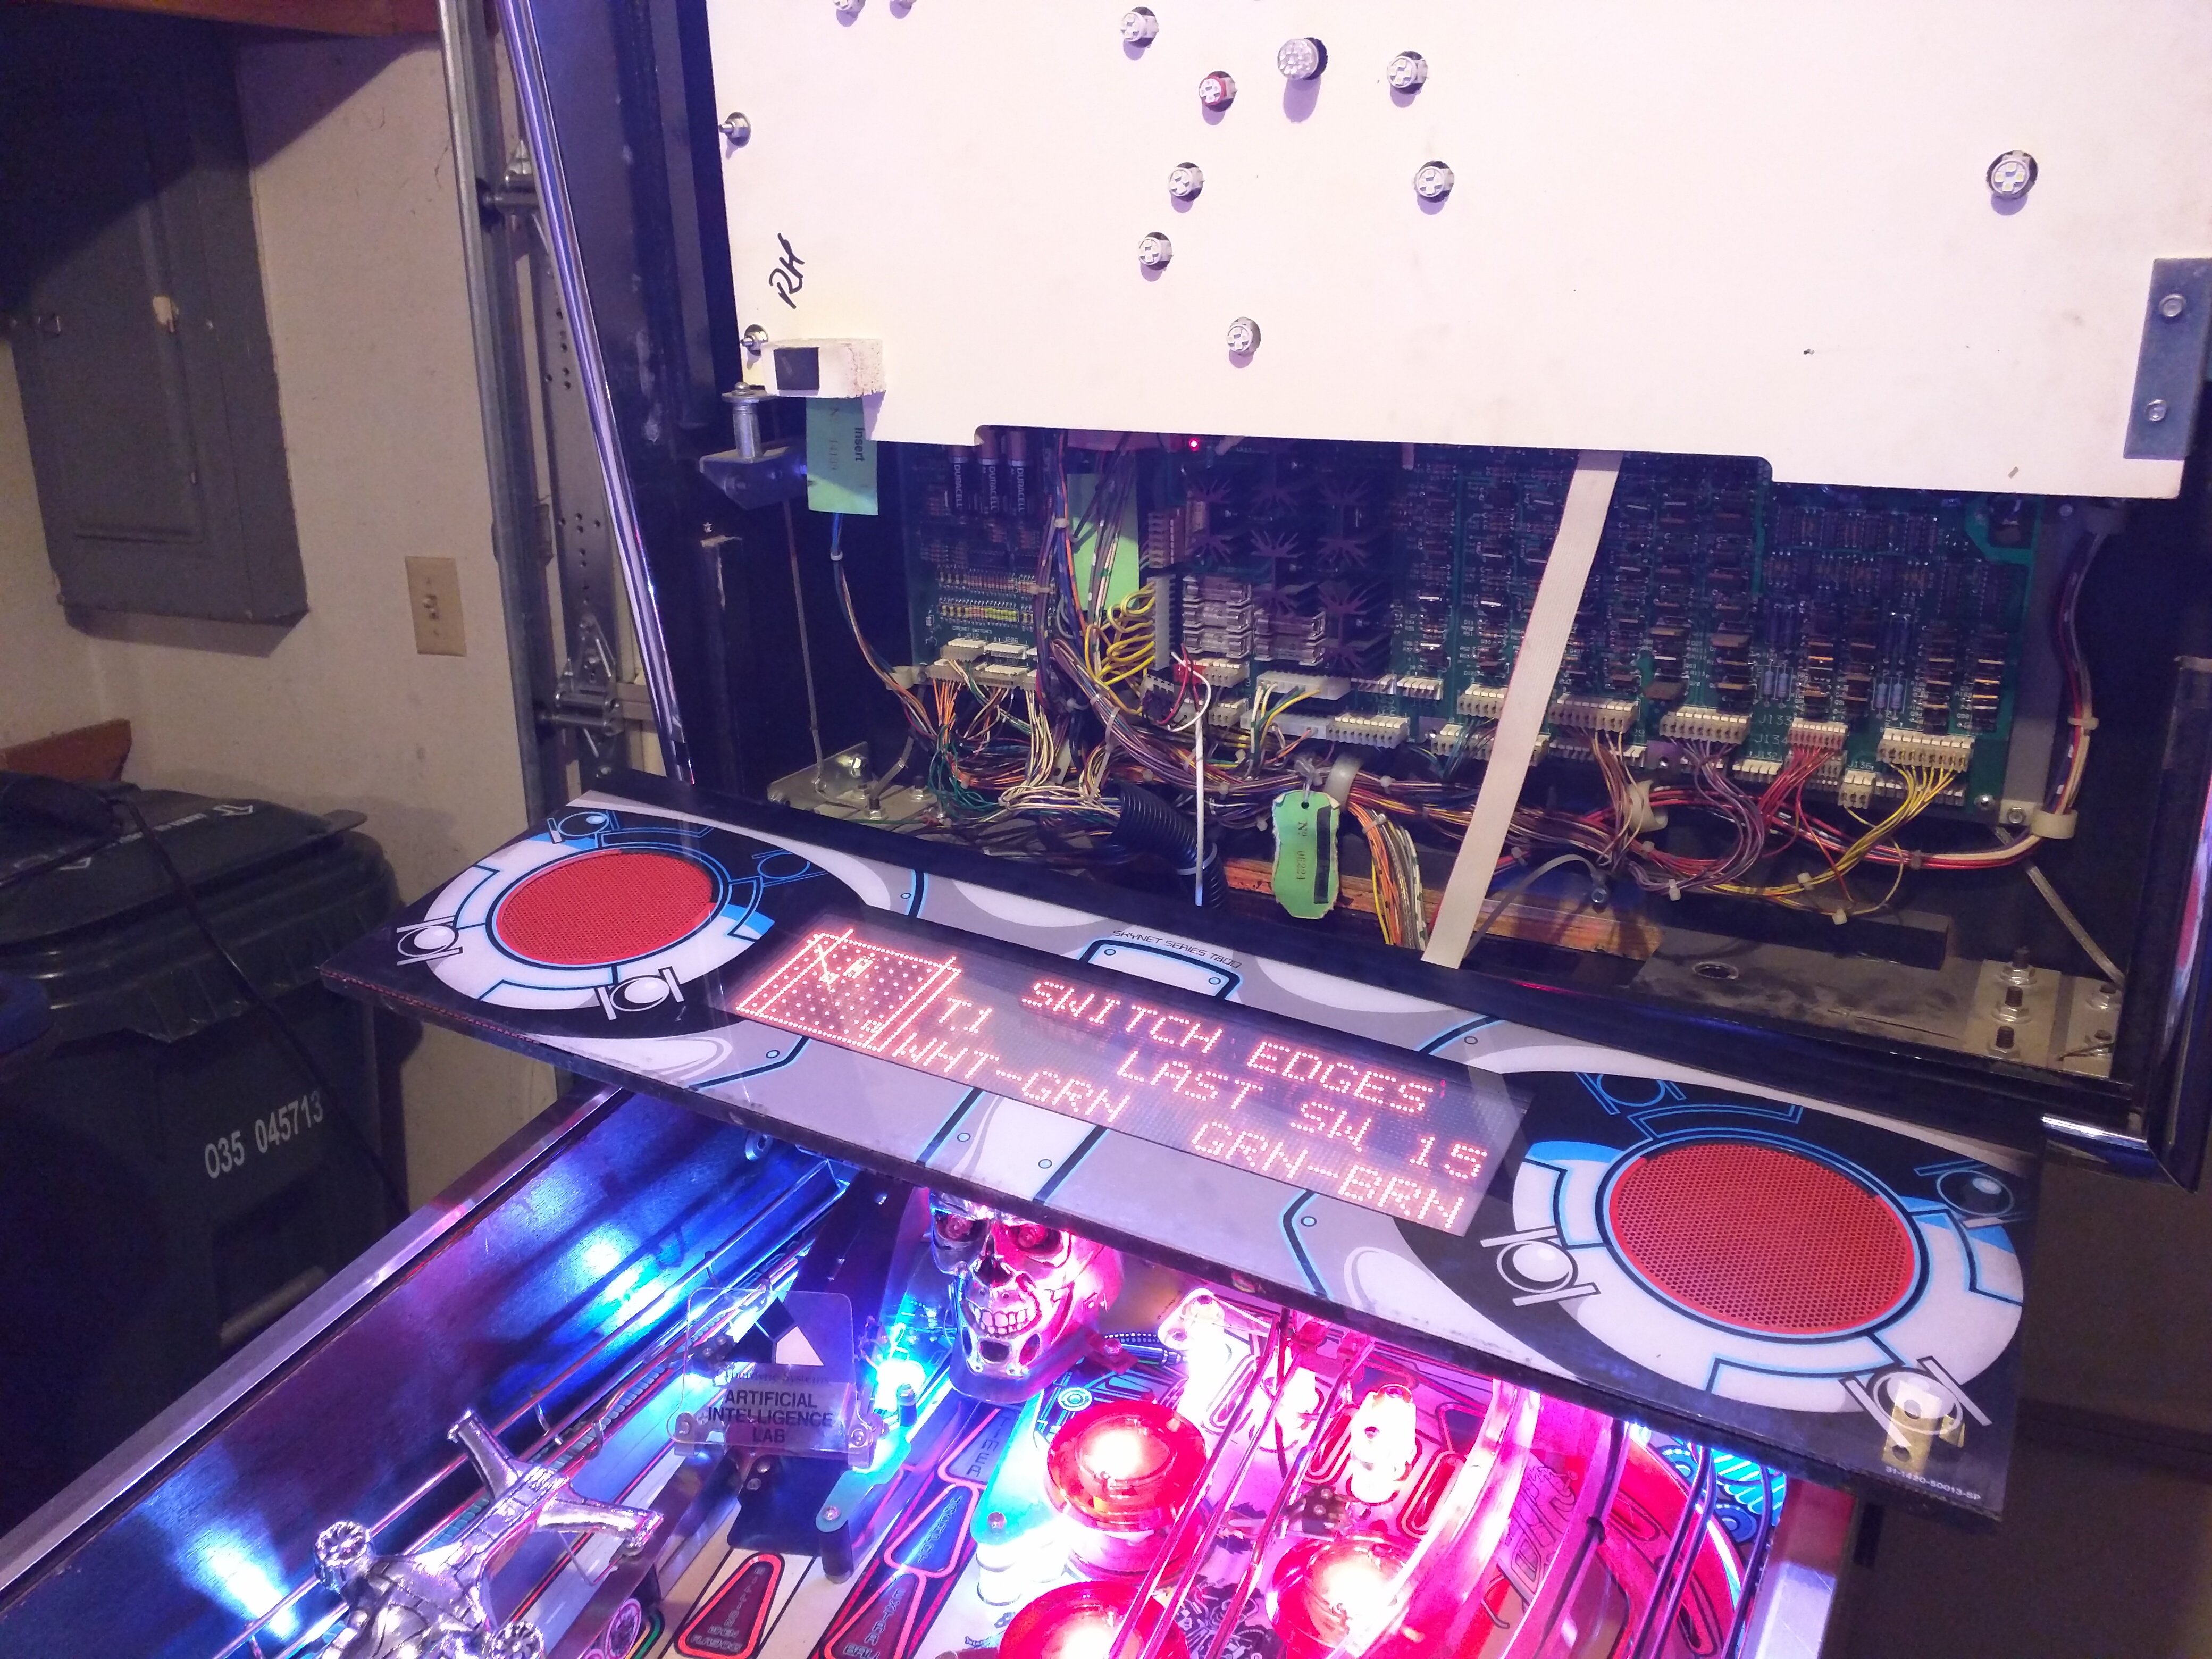
Continuing on, I can enter the service tests menu and check the switch edge test. I can tell that the outhole and trough switches are not responding. Let’s lift up the playfield (make sure to pull out the pinballs! I find an extending magnet to be perfect for pulling these out, and just overall useful) and see if something came undone on the wiring here. This also gives us a chance to check out the inside of the cabinet some more.
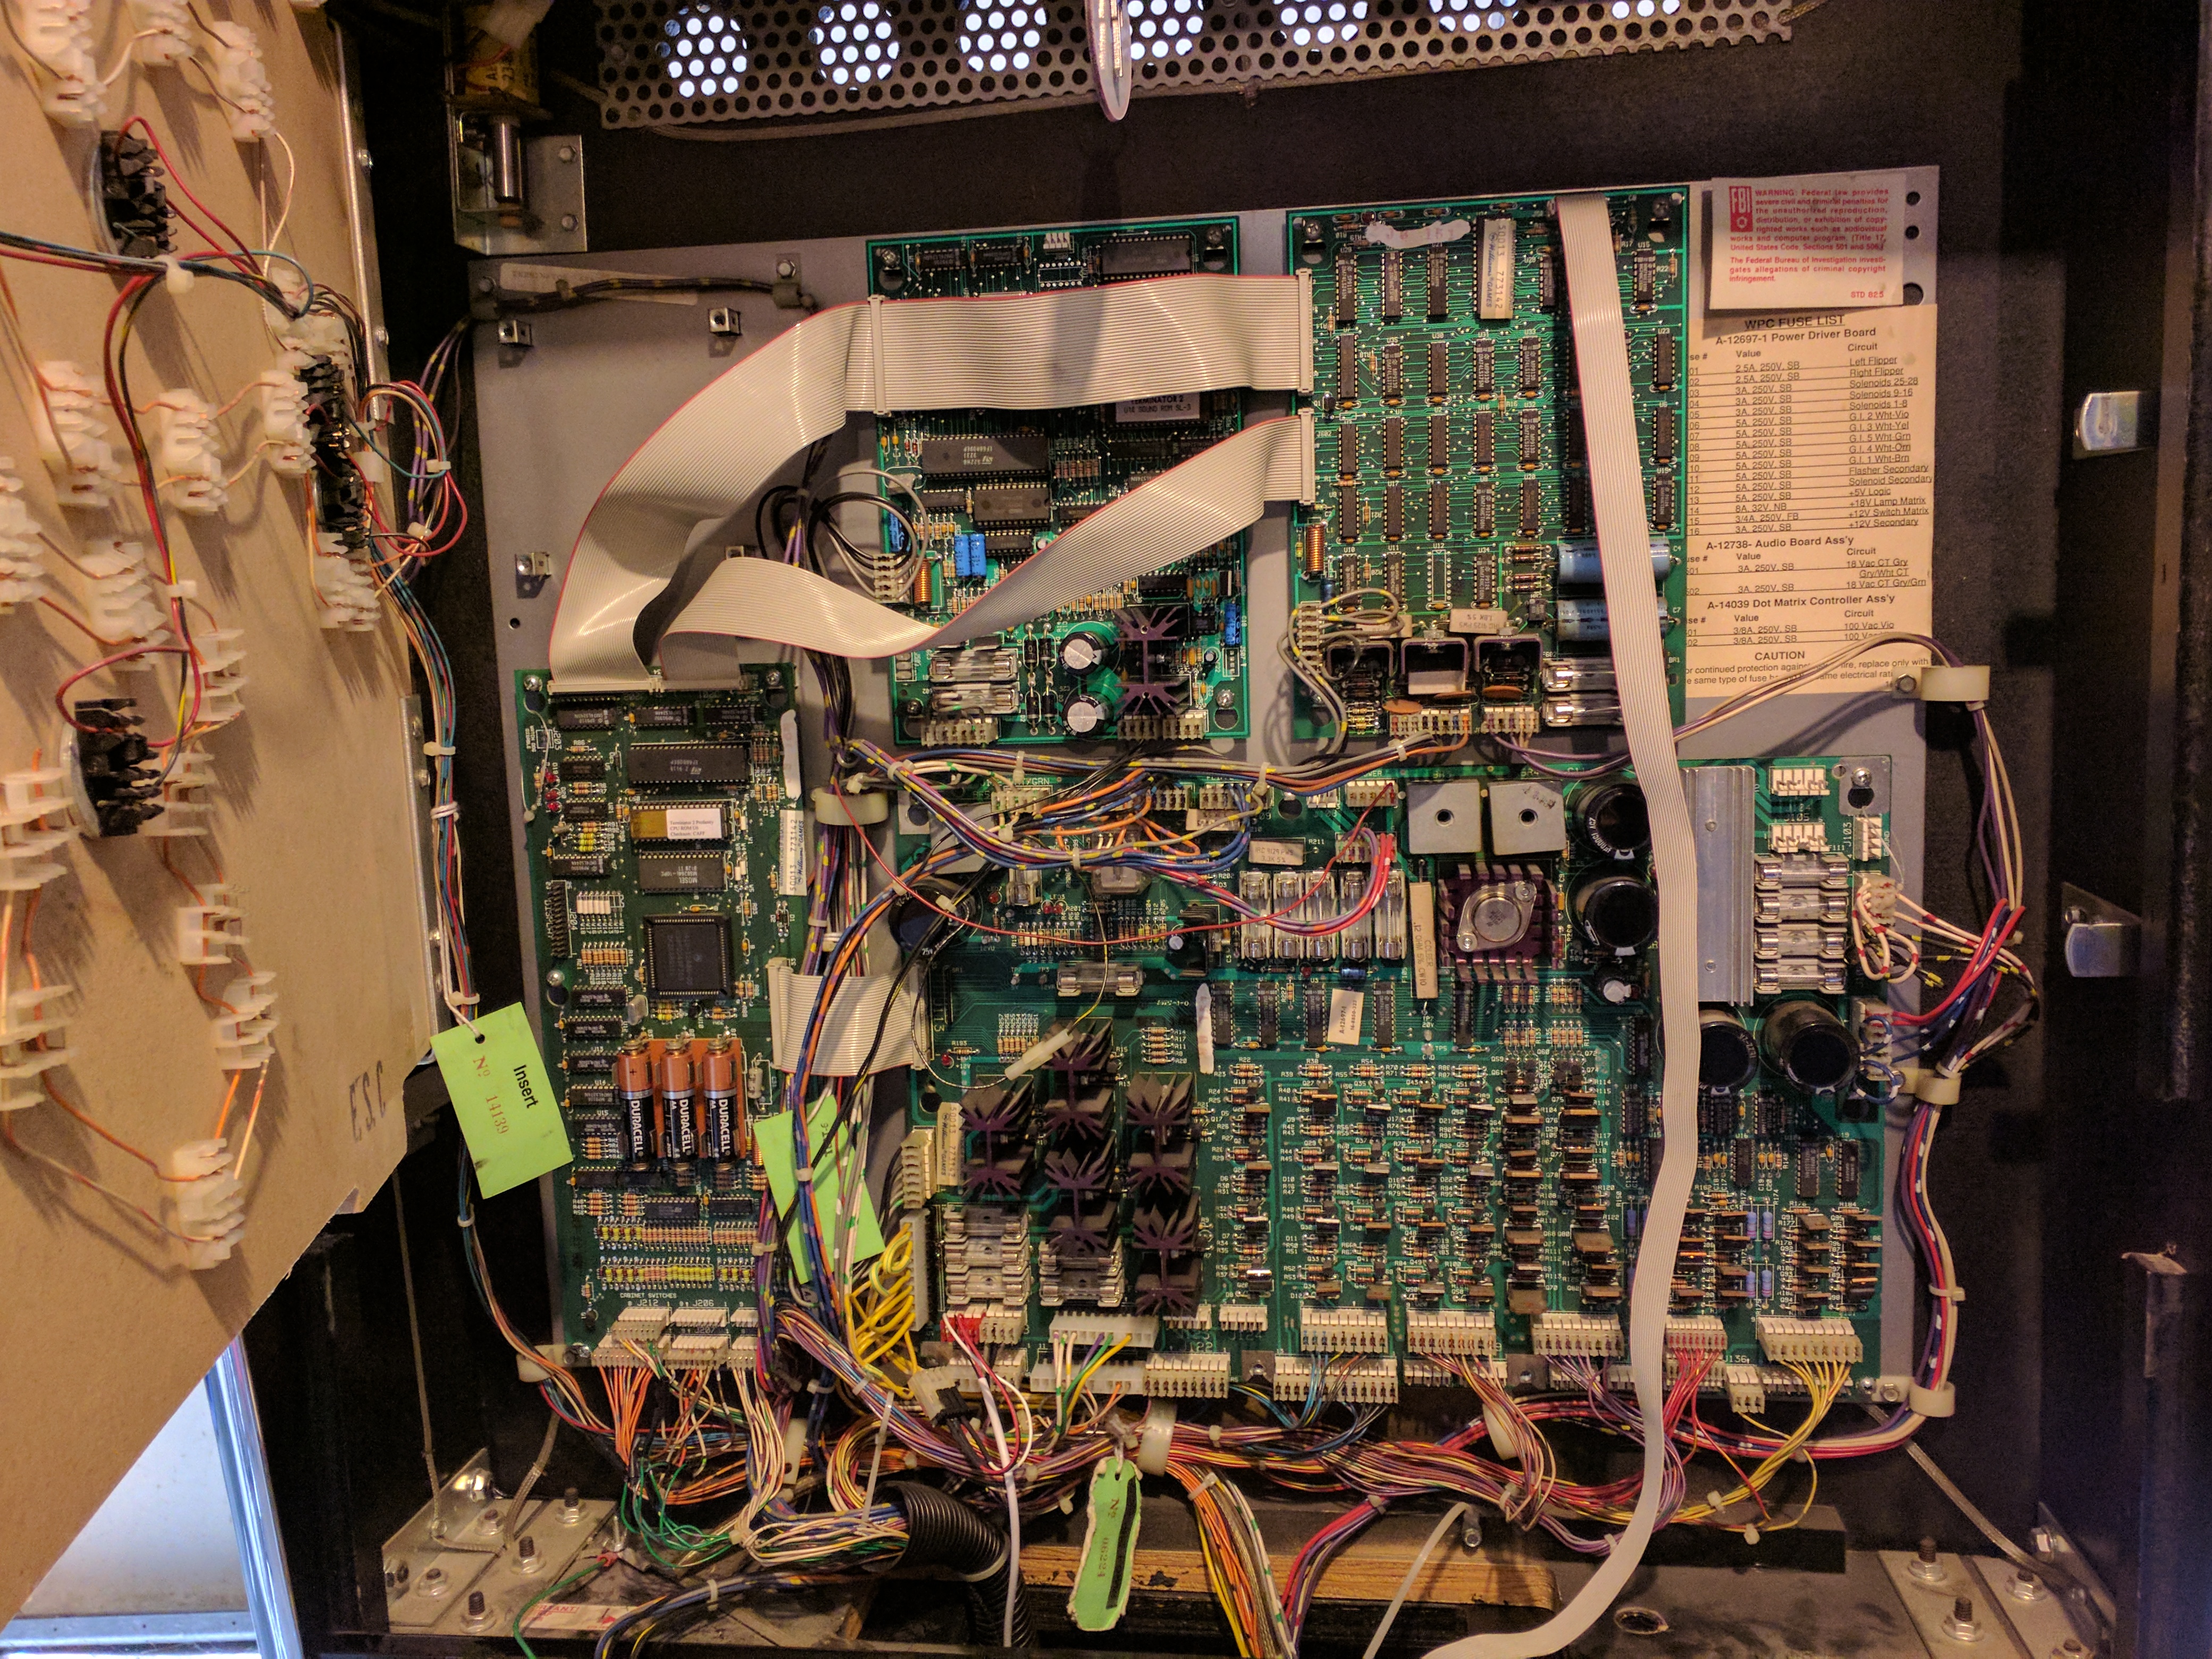
I don’t see anything immediately noticeable with the under-playfield wiring. Moving on to the backbox, we can remove the backglass and speaker panel to see what’s going on with the circuit boards. According to the switch matrix diagram in the manual, I can see that every switch in the column is not responding, which happens to include everything in the ball drain and trough. I can also see that the column connector is J206. These are numbered on the PCB for us, so we can check which connector is going where.
You might be asking two things at this point:
Okay, if the column isn’t working, then why are the flipper buttons, start button, and plumb bob tilt working? Clearly, they’re on the same column as seen on the diagram.
What? The row (and column) connector is plugged into J209 and J207! The same diagram says these should be J206 and J208.
For #1, cabinet switches actually go to a whole ‘nother connector at J212.. confused yet? Although I didn’t immediately deduce it at the time, this should have clearly indicated to me that there was some issue with columns connector for playfield switches. Plus it has a nifty little label right above it.. cabinet switches…Regarding #2, the connectors J206/J207 and J208/J209 are supposed to be electrically the same, and thus interchangeable. I haven’t really tested it, but you can see that the traces seem to connect both connectors, and the schematic for the WPC89 CPU board does show them connected.
Taking a look right at J207, I can already tell where the problem is going to be. Looks like somebody hacked the connector together.. awesome. The wires have been jammed into the connector, and they have been twisted together with the old switch column wires and taped over with electrical tape. I pop open the switch test and jiggle the wire at J207 column 1. The trough switches intermittently light up.I want to address this connector further, but for now, I pull out column 1, cut the tip off, strip it, and reinsert the wire (While this happens, column 4 breaks off, and I have to do the same thing to it). When I get a chance, I will probably in-line solder the wires together and cover with heat-shrink wrapping. Finally! We can play a game!
First Game
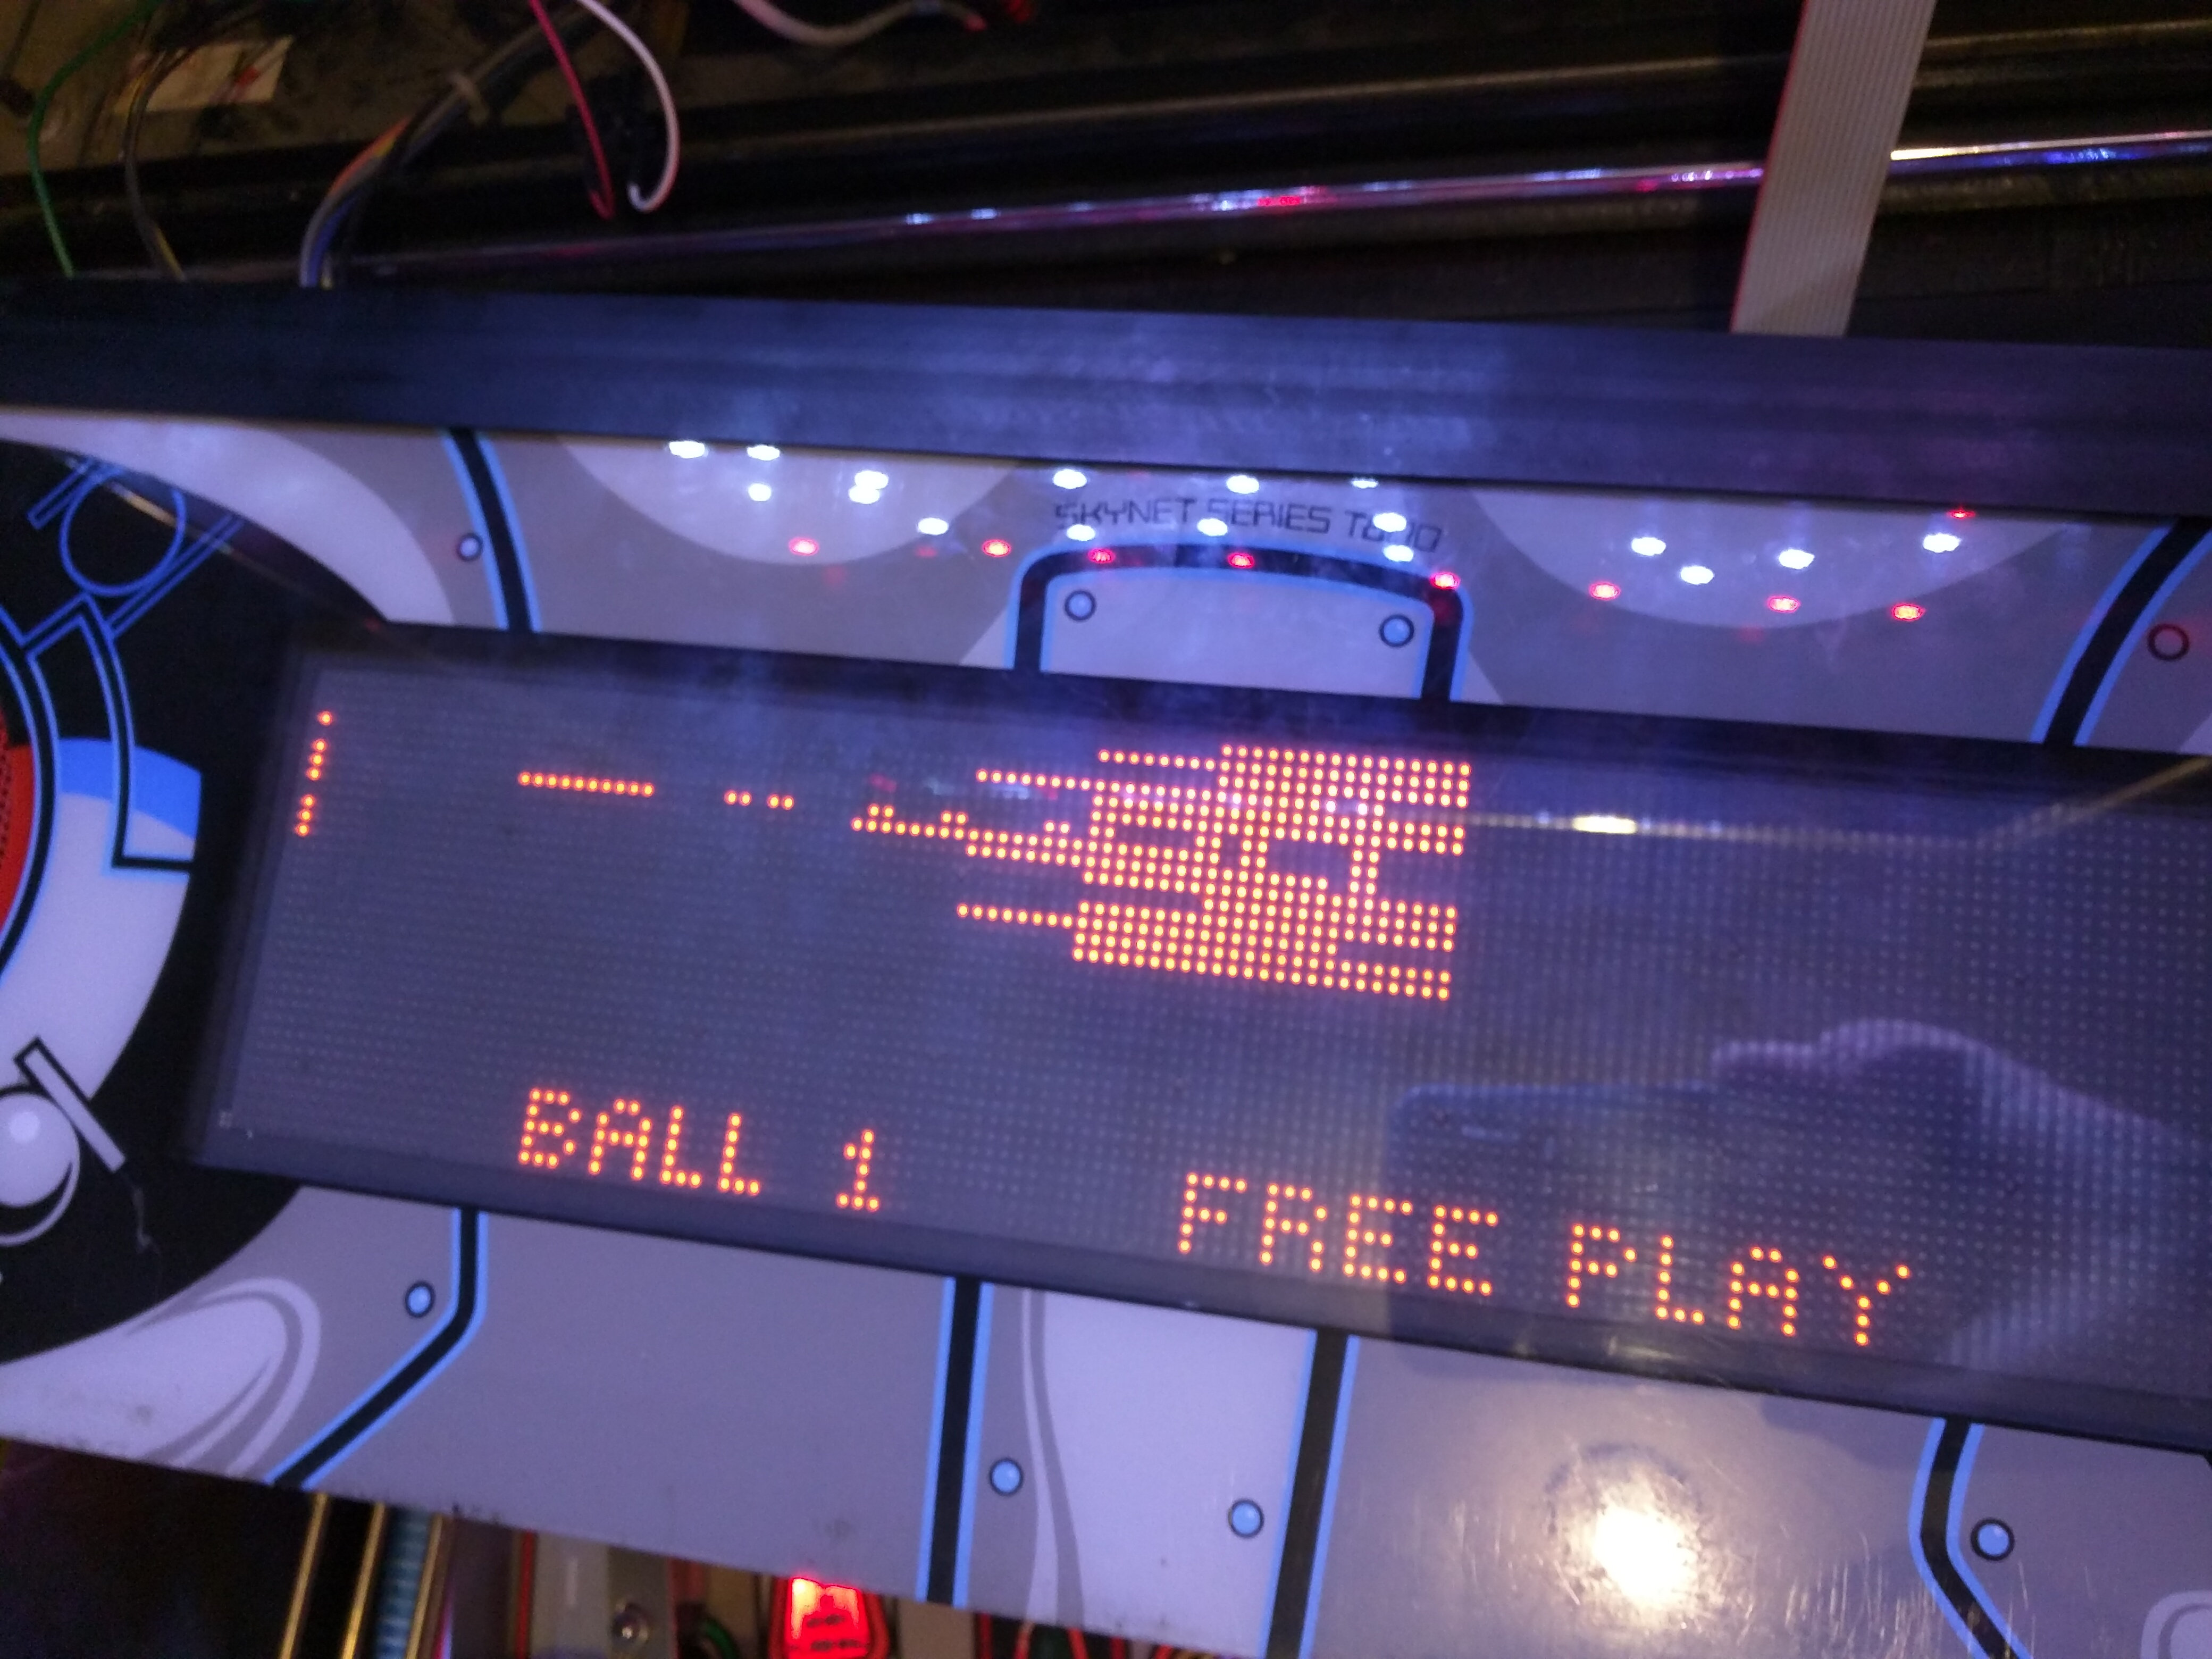
With the game closed back up, and switches supposedly working, I hit the start button. Instead of the PINBALL MISSING error, a ball is deposited into the shooter lane. Awesome.I immediately notice that the skillshot is off.. like way off. It pretty much hits completely above the top target.
Ok.. well the rest of the game seems to work. The playfield is in great shape, and the ball doesn’t have any issues going up the ramps. Finally, I get a ball into the skull, and it shoots off into the cannon. The motor starts whirring and the cannon comes swinging around, I eagerly await for the cannon to point at the center target.. and.. pull!
Nothing happens. The cannon hits the bottom of it’s arc, swings back up, and automatically fires the ball (at the wrong target). Seriously? I just used the trigger to launch the ball.. and proceed to do so again.
I start to notice that a number of LEDs are not working. The outlanes don’t light up, some of the skill shot targets don’t seem to light up, and I look up and notice that 2/3 of the back board GI (general illumination) isn’t lit (Anymore? I was almost positive these were lit when I first powered it on). This time, when the ball enters the cannon.. it doesn’t fire at all. In fact, the cannon just stops back upwards at home with the ball still in it!I go ahead and enter service mode, and fire up the solenoid test to verify this, moving it to solenoid 2 (Gun Kicker). Sure enough, nothing happens.To top it all off, there’s something wacko going on with the DMD (Dot-matrix Display). There’s some weird corruption going on. Although most animations are only affected to a small degree, some displays, like the score itself, have been majorly affected:
Whew, let’s catch our breath and see what’s going on:
GI and insert lights going out
Over half of backboard GI out
Skill shot way off
Cannon not firing by trigger (at first), and now the solenoid is not firing at all
DMD screen corruption
Lighting Issues
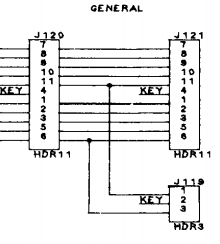
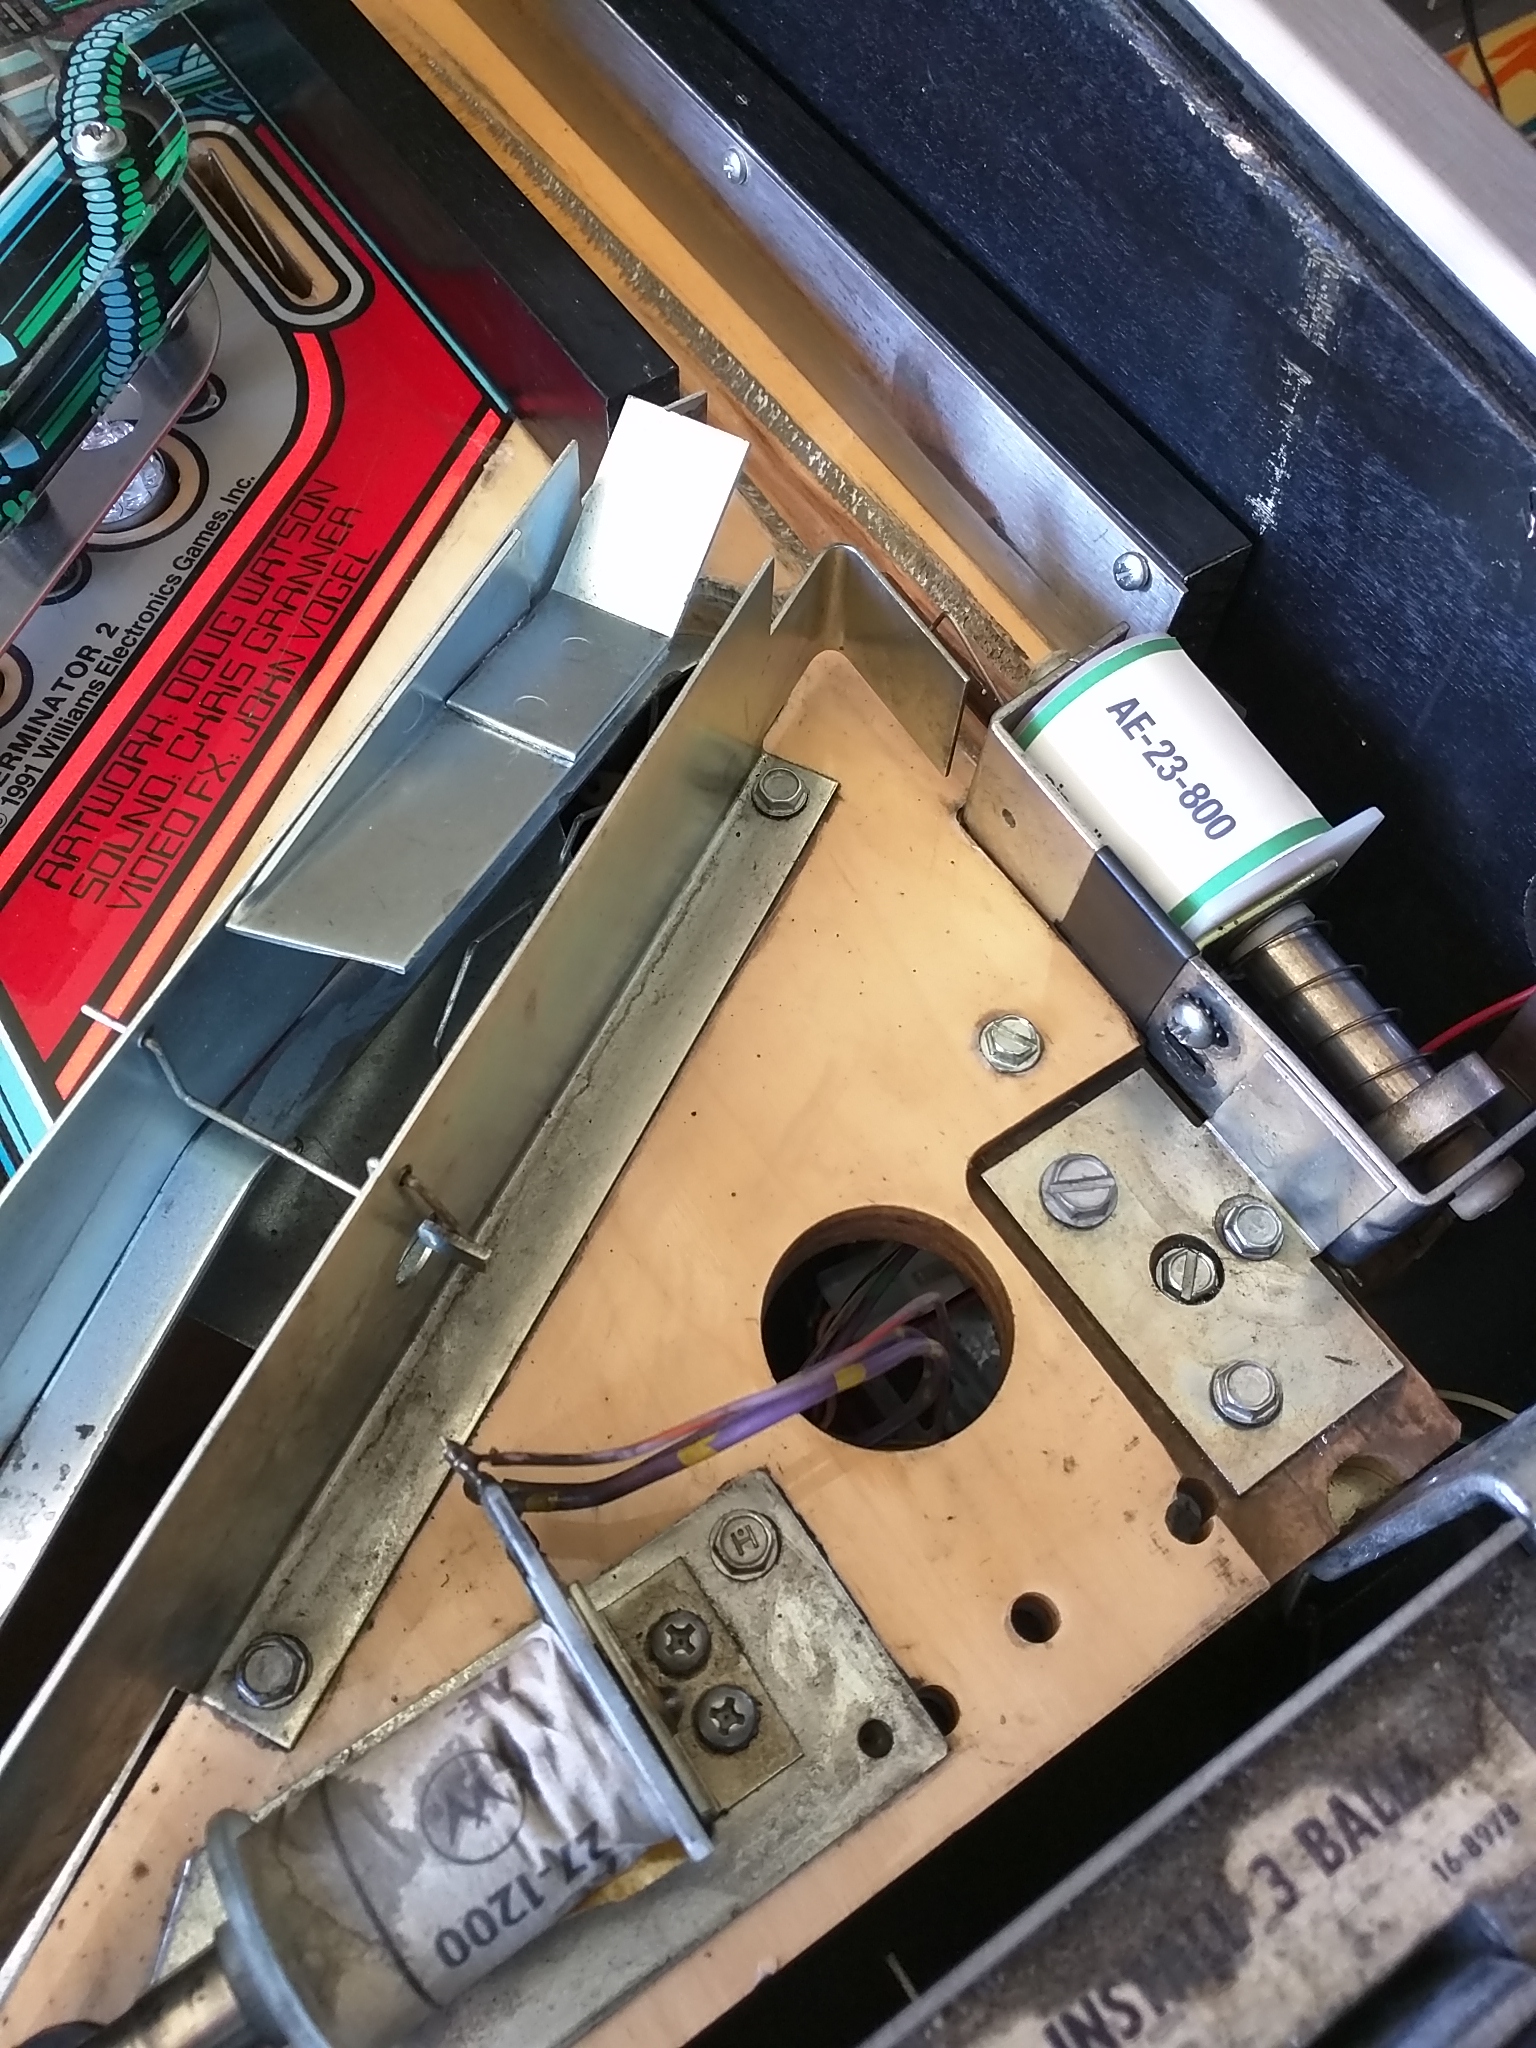
Well, the lighting looks like the easiest to dive into, so I pull the backbox open again and take a look at the lighting circuits. Tracing the main cabling from the backbox panel back to the power driver board, I notice the rest of the backbox lighting flip on for a second. Hm, so it is wiring! Following it to connector J120, I tweak the connector a bit, then pull it out and reseat it. I also do connector J121. The playfield and backbox GI lighting can use both of these connections. In fact, they’re linked!
The majority of the lighting comes back on after this. Hey, they don’t all have to be complex fixes.
DMD Corruption
Next, I try to figure out what’s going on with the DMD. As a quick test, I have the old DMD from my Bram Stoker’s Dracula laying right here (It got the excellent Color-DMD treatment), so I pull it out of the box, and swap it out. Unfortunately, due to the trim around the T2 DMD, I can’t fully seat the Dracula one in there. I switch it on and play a quick game, however, and see that I still have display corruption. I check the display board and notice nothing out of the usual, but reseat the data ribbon cable firmly to verify. After placing the original DMD back, I power on the game and notice the corruption is gone! Man, these cables can get out of hand. I didn’t take any pictures of the DMD itself, but looking at the backbox picture above, it’s the long skinny ribbon cable on the right side of the box.
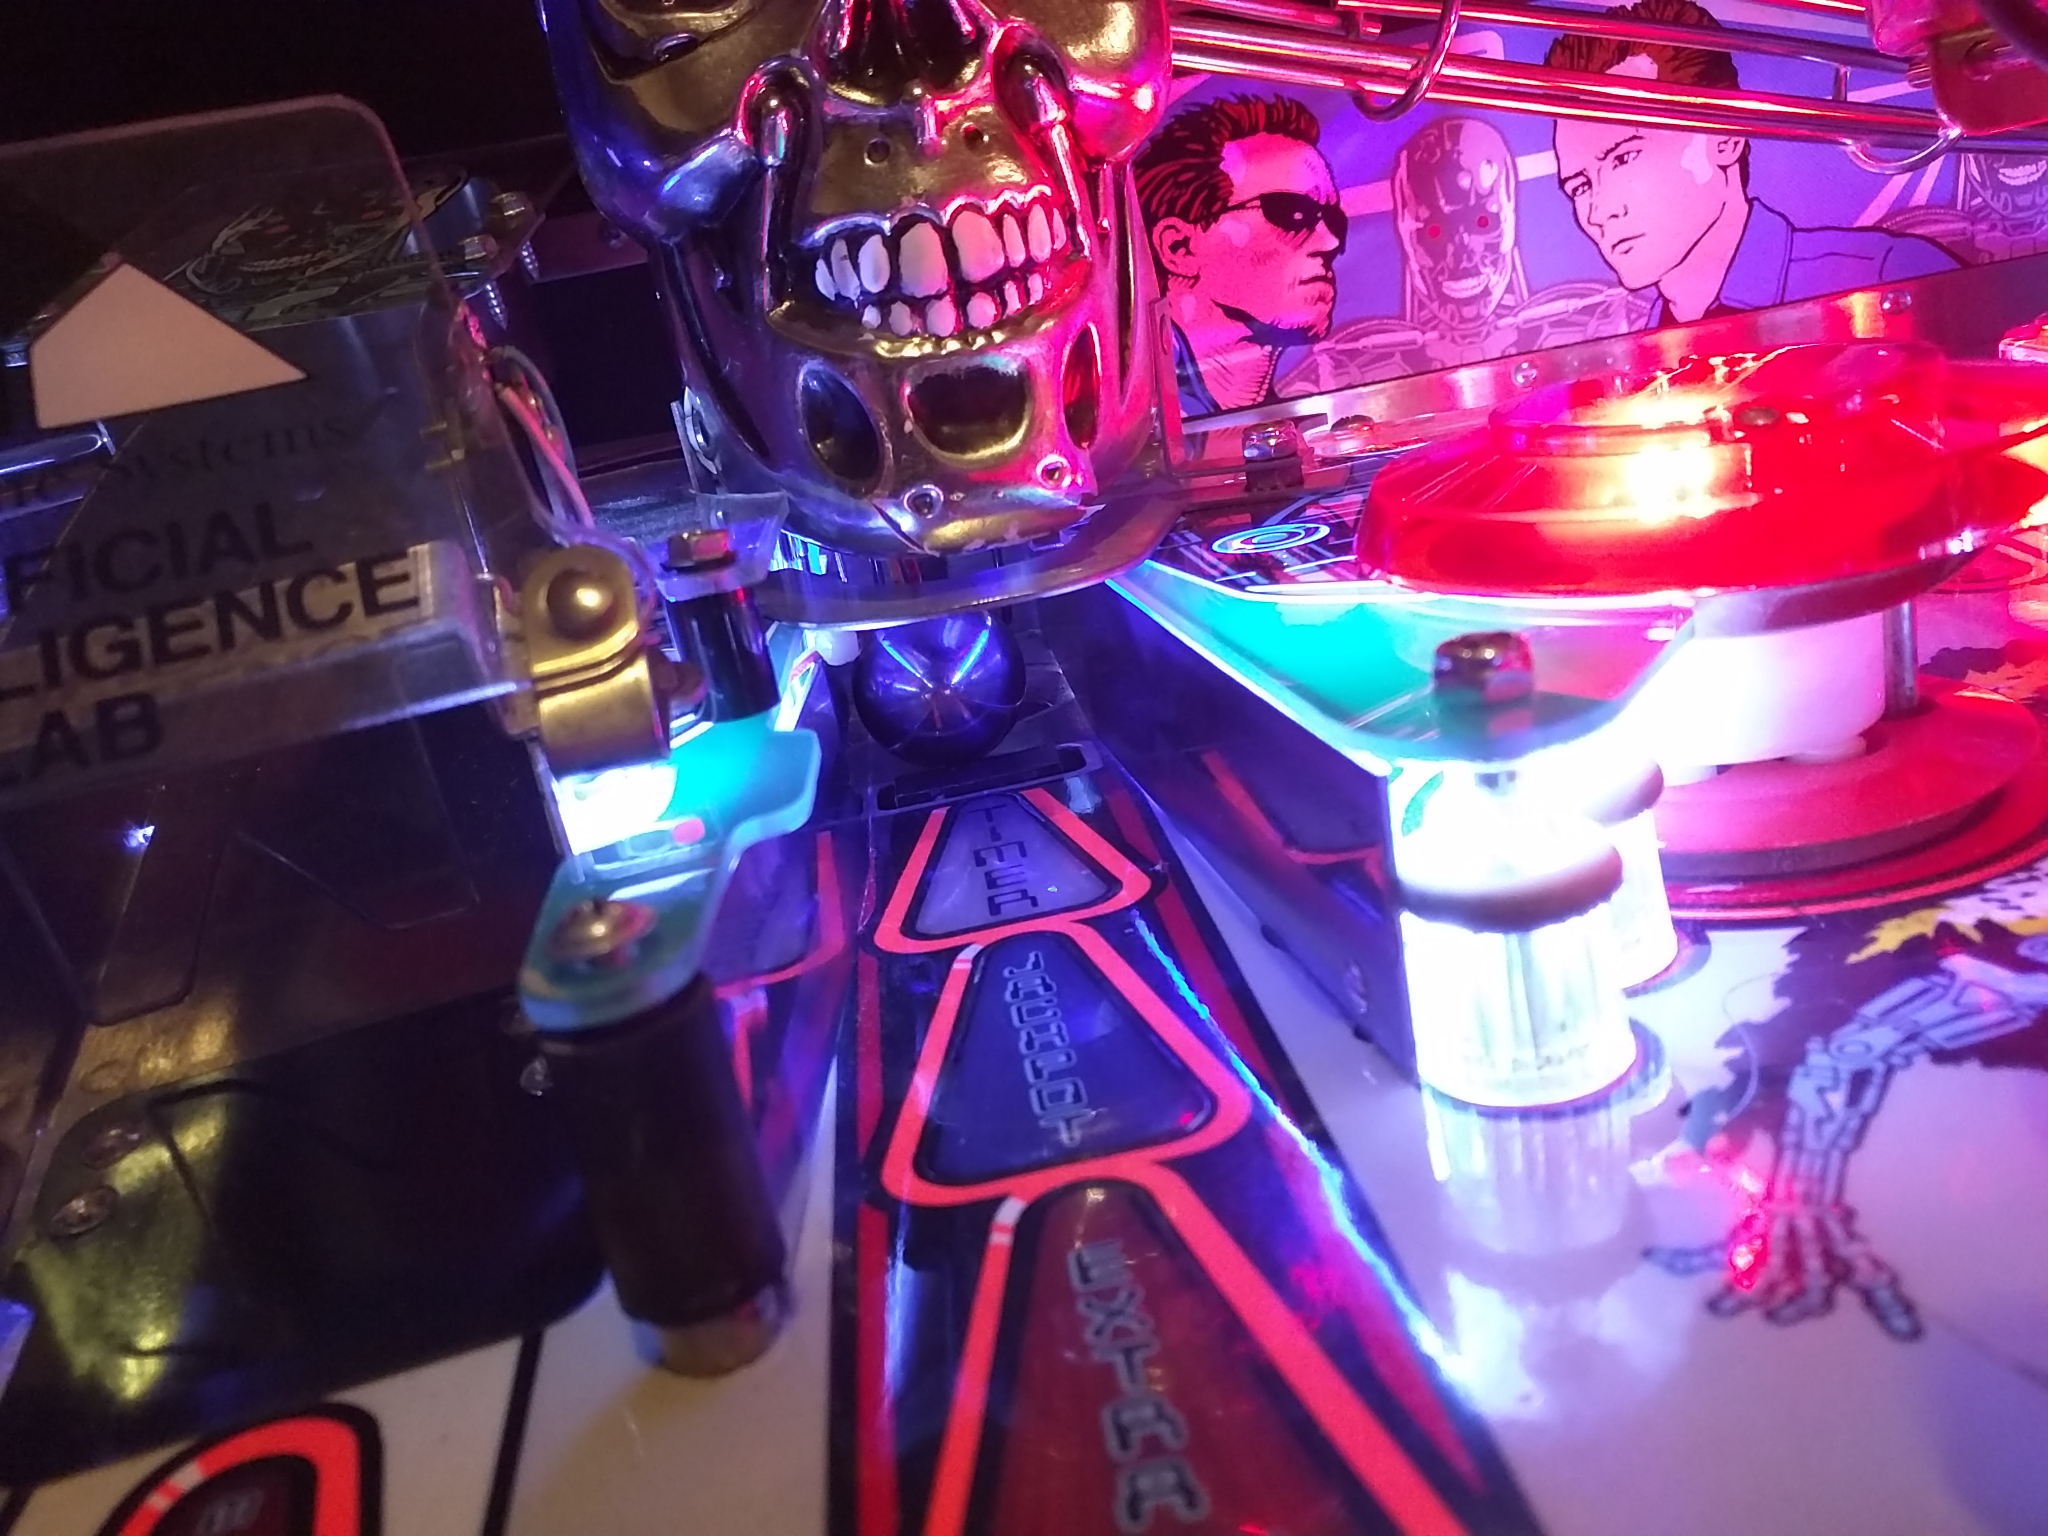
Diagnosing the Cannon
Hey, we’ve got some of those issues out the way pretty easily. Let’s see if the cannon is something bigger. “Gun” and “Cannon” here will refer to the same device.
Last we checked, the cannon was not firing at all, so we need to do a solenoid test. I would give a basic overview of how solenoids work here, but I’m going to save that for the next section. What matters is that when I take the glass off and start a game, then place a ball directly into the cannon, it is capable of spinning around and firing the ball automatically again (The trigger still doesn’t seem to fire)!
I never completely figured this one out. I think that they may have been some kind of short that occurred relating to the GI issue that I resolved by reseating connectors and moving cabling around. If I ever get a more clear reason, I’ll be sure to update this section.
So how is it that the gun trigger won’t fire the cannon, but can still launch the ball? After all, the trigger switch tests just fine in the switch test.
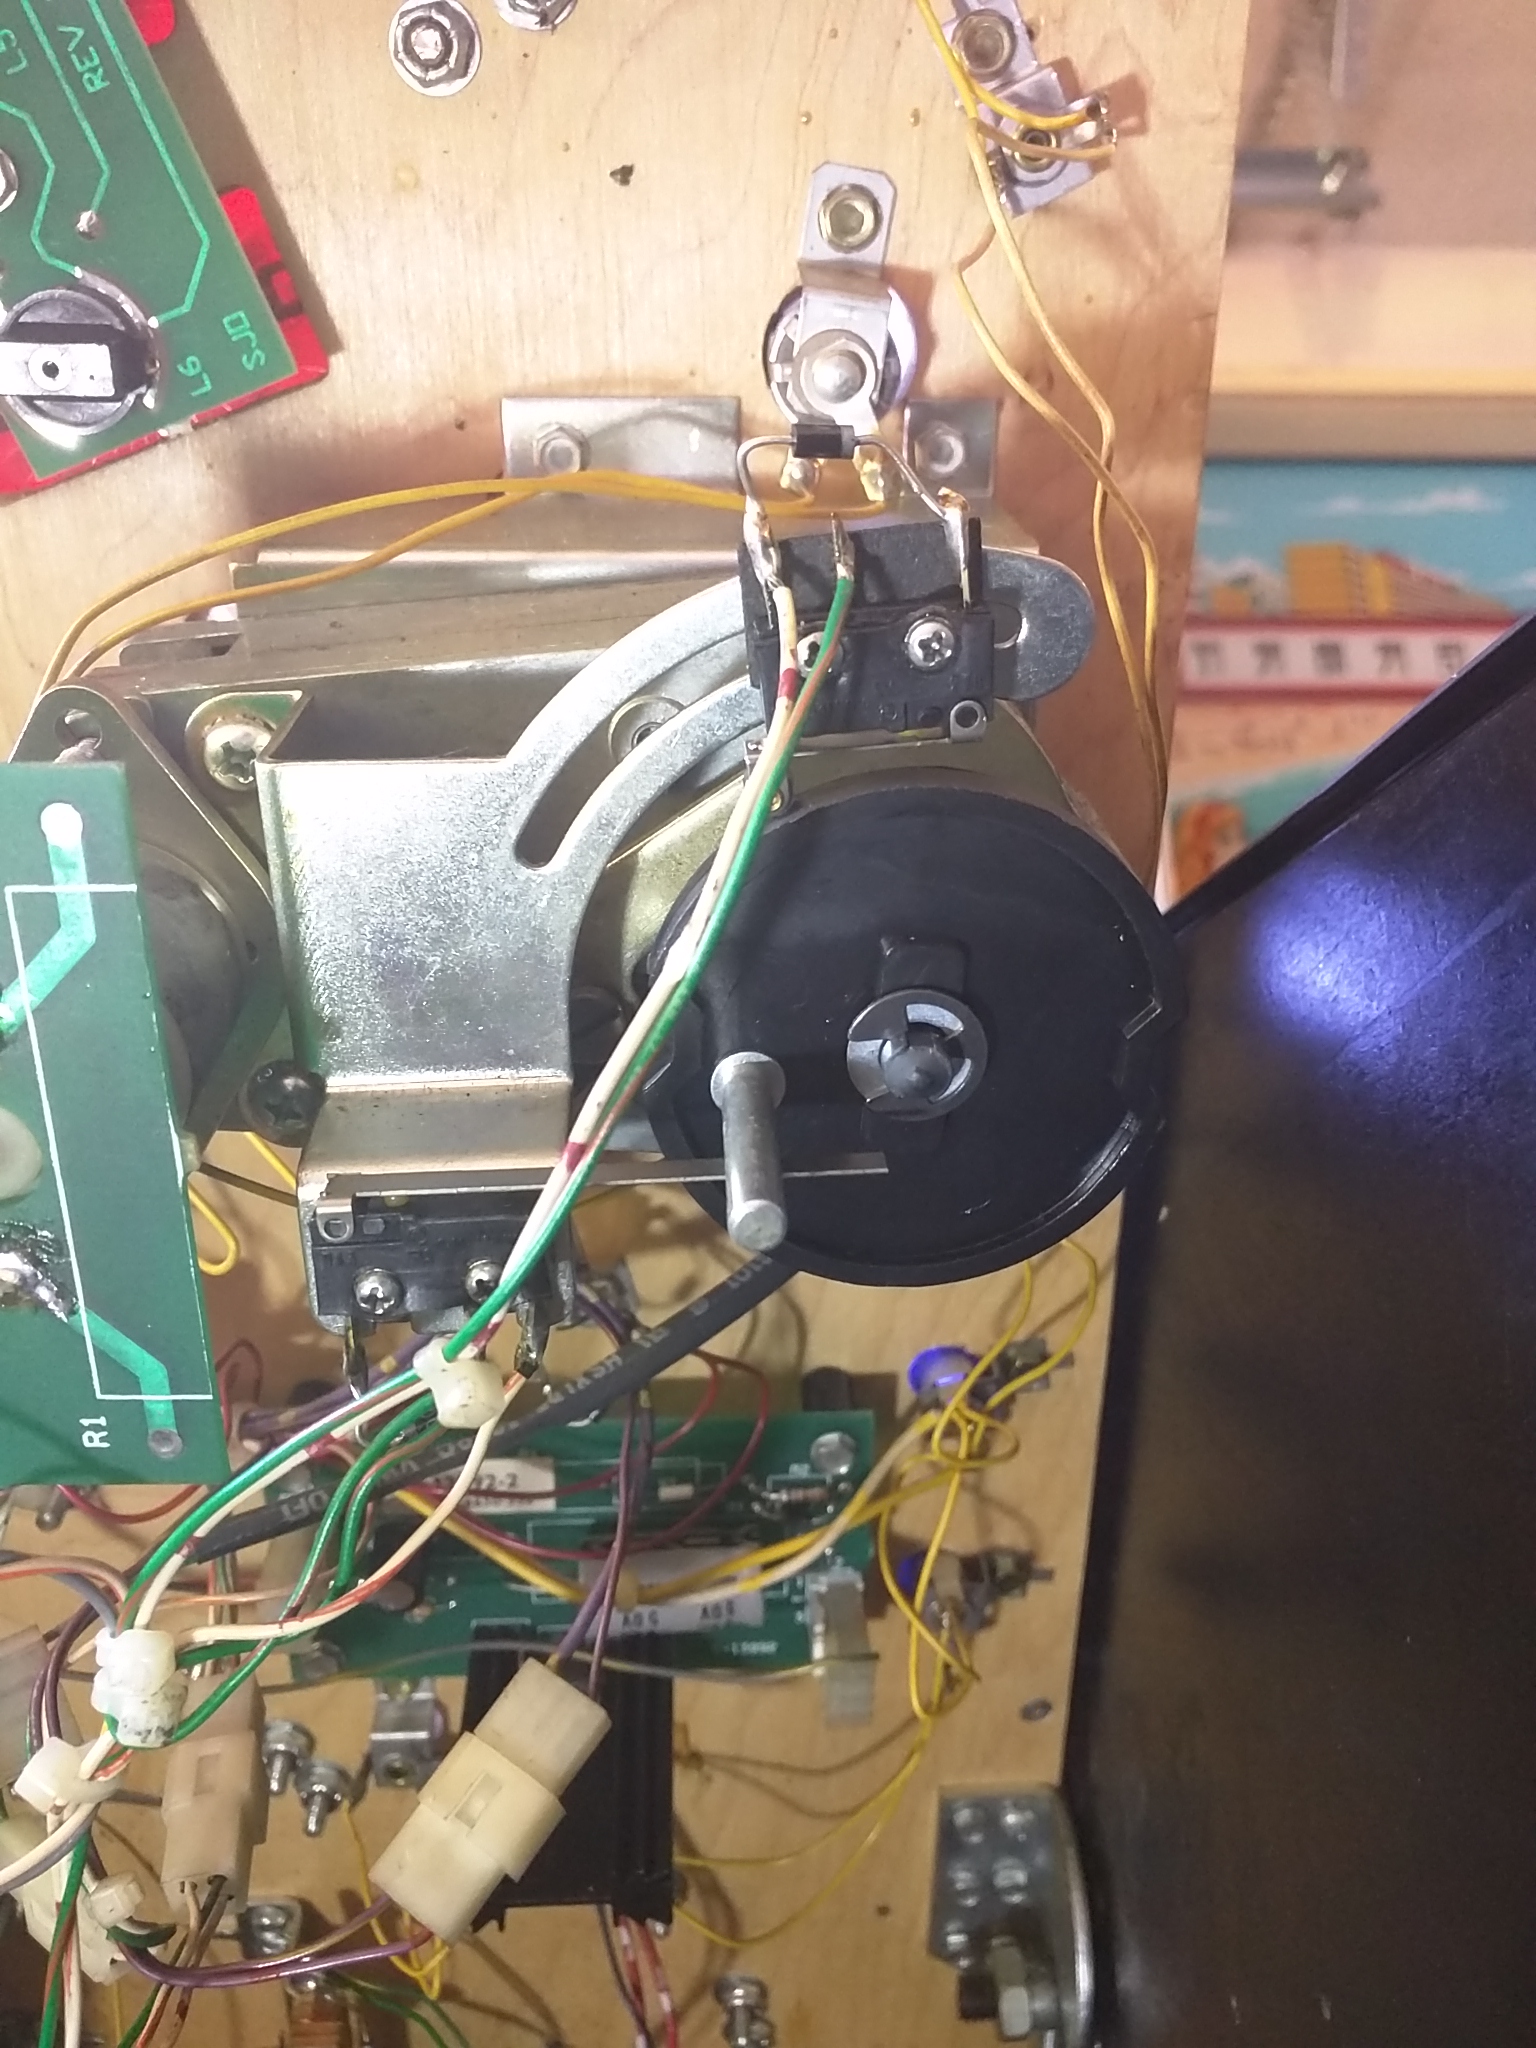
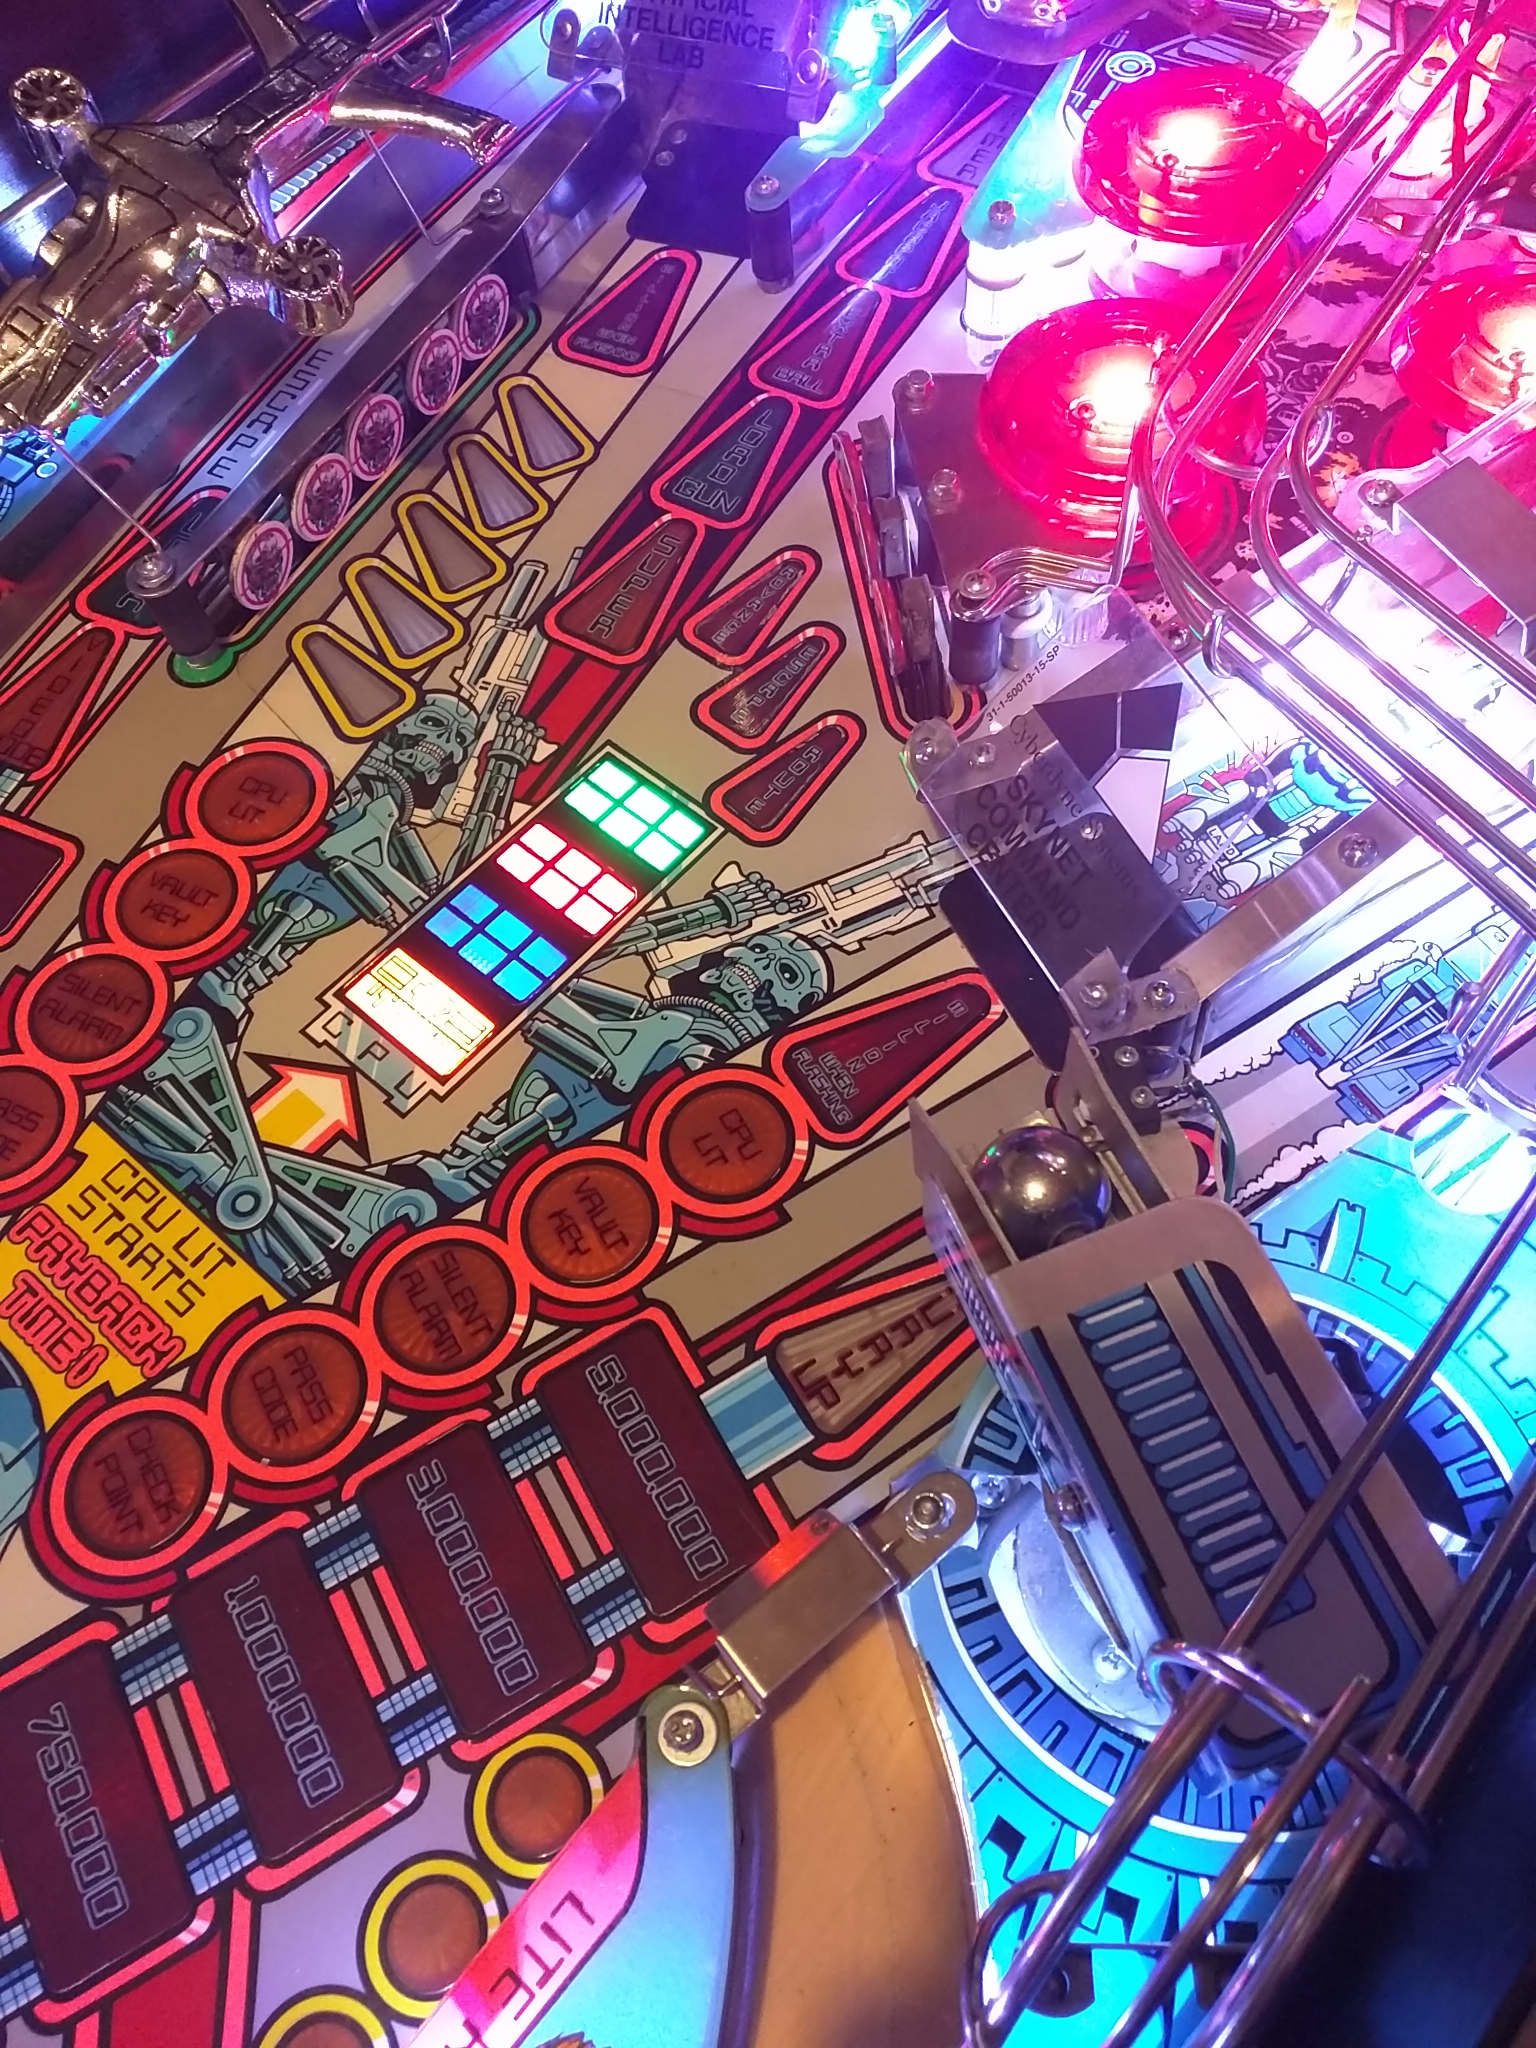
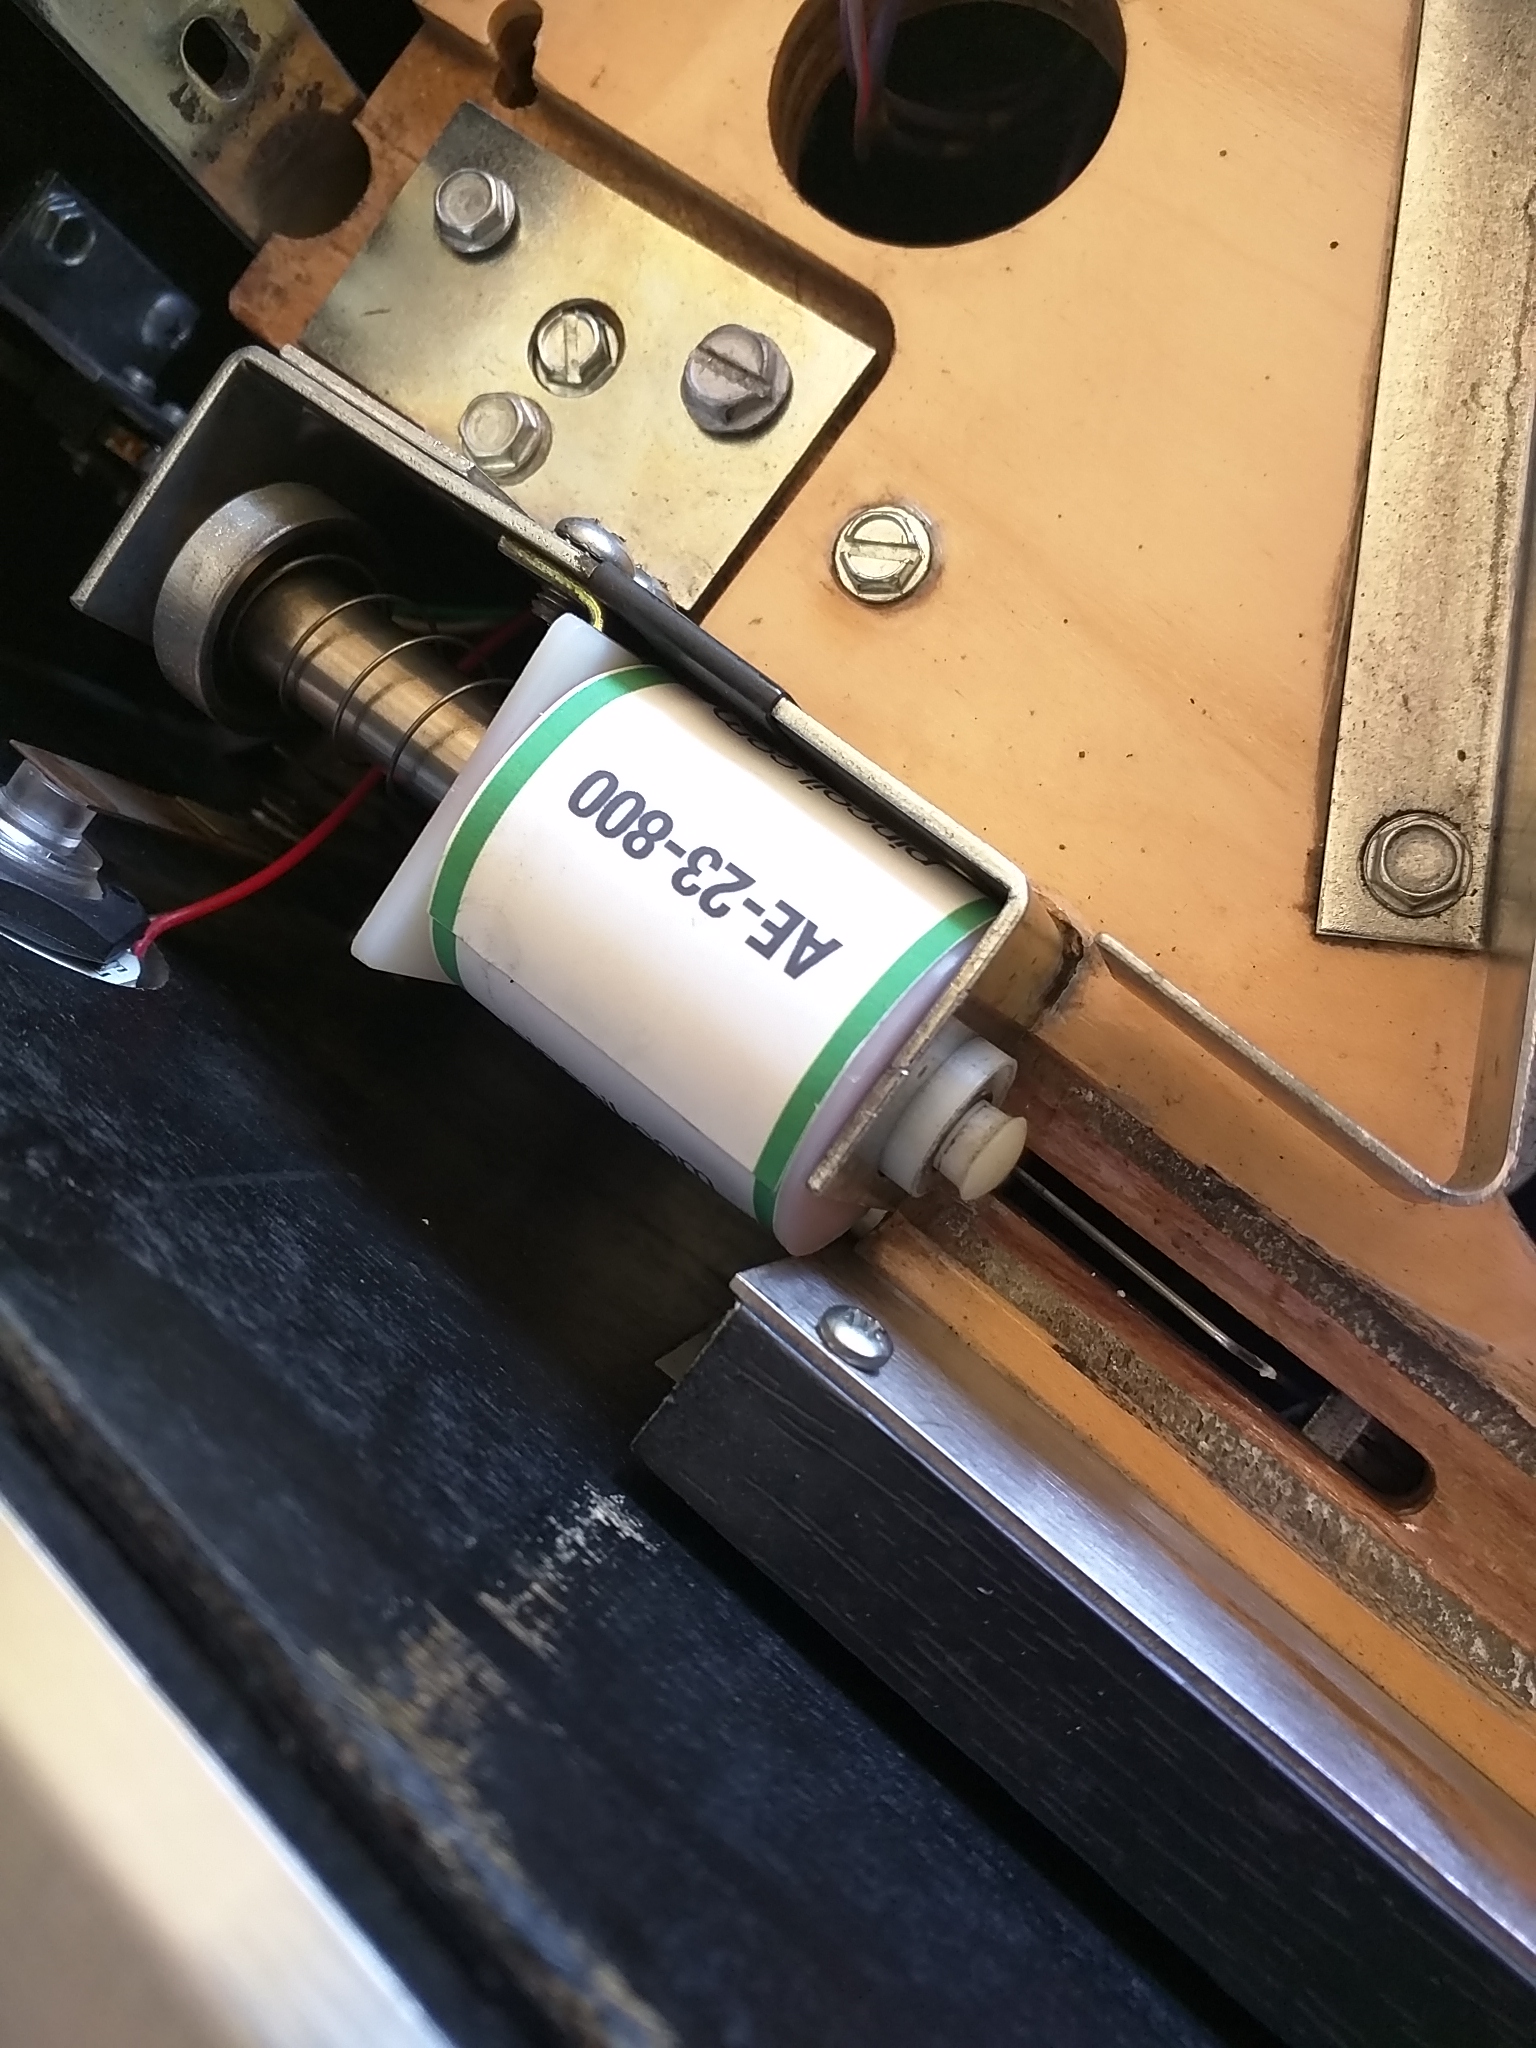
Well, it turns out that there a number of switches related to the cannon that affect it’s state and operation. Looking at the switch matrix, we can see that these are 31 - Gun Loaded, 32 - Gun Mark, and 33 - Gun Home. These serve the following purposes:
Gun Loaded - This is a small switch located inside the cannon that is depressed when a ball is in the cannon. Without this, the cannon has no ball in it as far as it is concerned. I once saw the ball get loaded into the cannon once, and actually sit on top of the switch. Luckily, this hasn’t happened again yet.
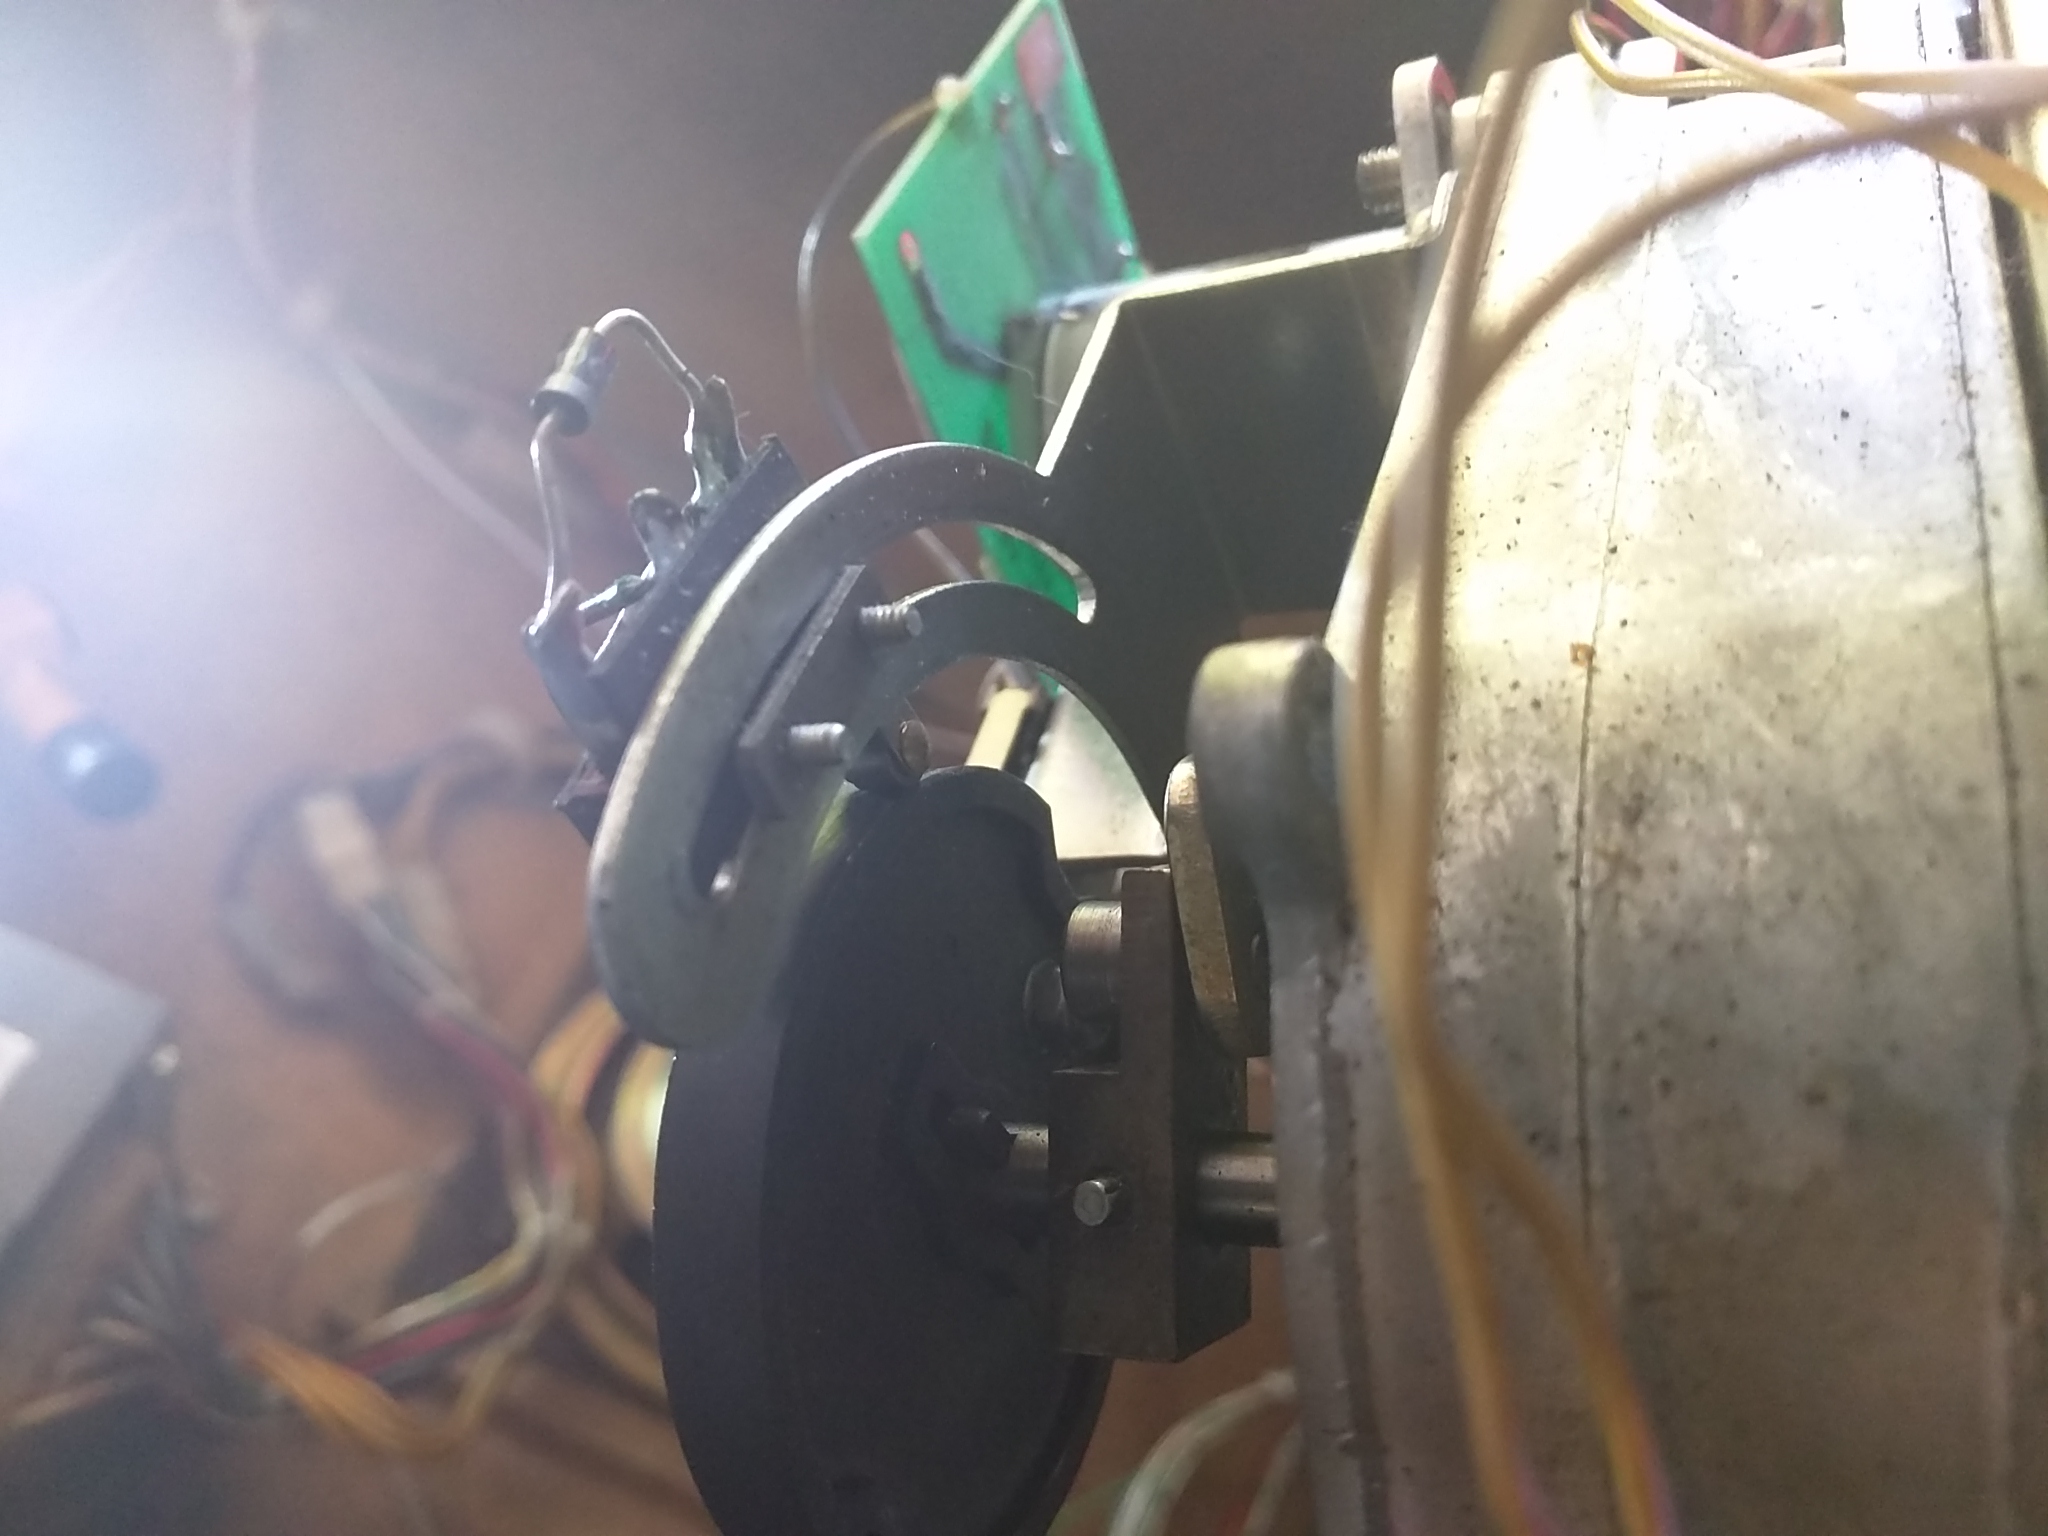
Gun Mark - The most confusing switch. This is a switch underneath the cannon that rolls along a circular disc underneath the cannon. This disc has two half-circles cut out on both sides, and the switch is screwed into a track on an arm and can be adjusted. As the cannon rotates, the disc moves along with it, and the switch is engaged when it hits the depression. It is used to basically detect when the gun is in the proper position to start being able to be fired. This is so that you can’t just shoot it right away and fire the ball into the ramp sign or wherever.
Gun Home - The same disc from above has a rod that protrudes from it. When the disc rotates enough, the rod hits this switch, signifying that the gun has reached it’s home “rest” position and can stop.
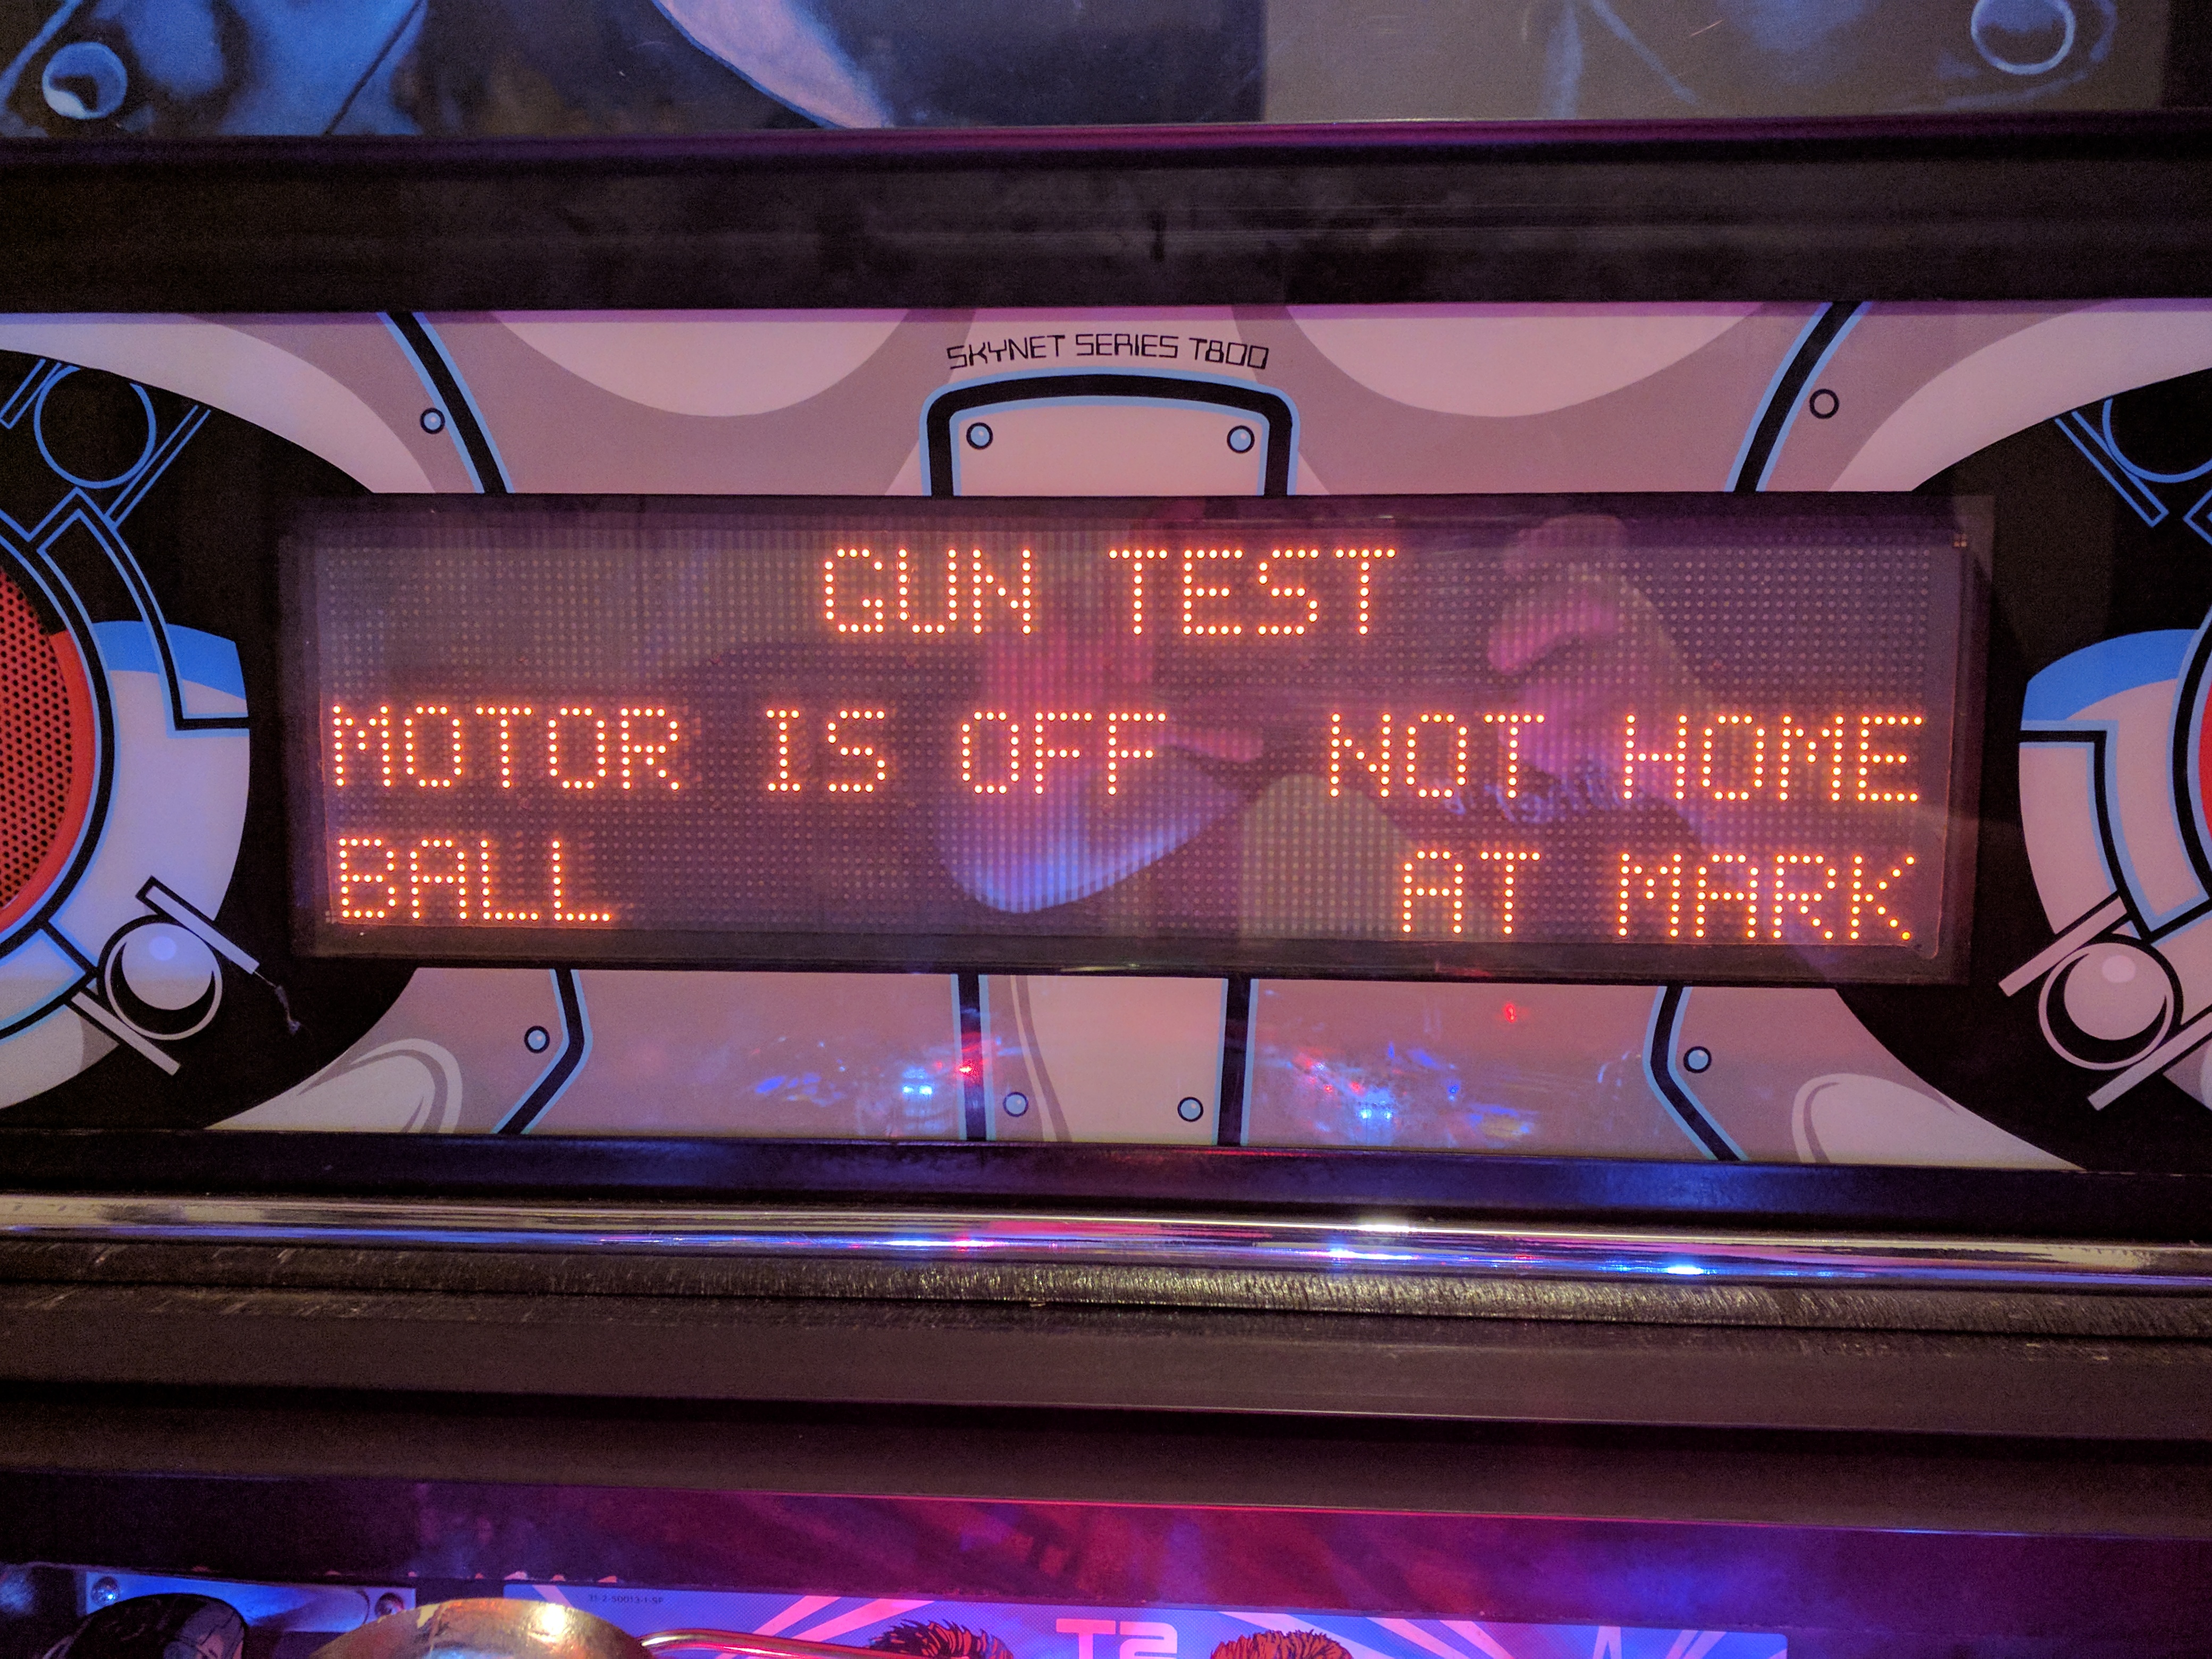
There is a very handy “Gun Test” in the tests menu that will allow you to fine-tune the alignment of the switches and verify operation of the gun. This test is detailed in the manual, but the gist of it is that you can use the Down button to automatically move the gun to either the mark or to the home position.
The Up button manually moves it to each position (You can release the button and the motor will stop half way).
The Enter button will actually fire the cannon solenoid, so feel free to place a ball in the cannon and fire it off (don’t destroy your plastics).
Note that when you leave the Gun Test menu, the game will calibrate the gun for a little bit by running it through it’s cycle numerous times. It’s natural for this to take a minute or two.
So let’s return to the original issue, where the cannon would not fire at the targets. If I have the test move the gun to the Mark position, and fire a ball off, it actually lands somewhere near the middle target. Hmm, if the Mark position signifies that gun can start firing, then that means that I can’t fire during at least half of the cannon’s travel.
By adjusting the two screws on the bottom of the mark switch (seen in the left two pictures), I can slide the switch a little further down the arm so that it hits that depression sooner.
With a little adjustment and test firing, I get the mark position properly set up to hit the correct position as prescribed by the manual: “the bottom of the left ramp and above the Top Stand-up 5-bank Target.”
After a test game or two, I determine that I can usually fire and hit the targets now! At this time, I think the Mark position is still a little too far down, because when aiming at the top-most target, I still occasionally have the cannon not fire when I’m absolutely positive I’m aimed at the target. I’ll need to go in and adjust a little more.
Skill Shot
Alright.. one of my least favorite issues. I’ve played this game a few times in real life (before owning it) and tons of times virtually. All of them were pretty good about hitting the center target. I love skill shots and getting the timing down just right. So to have this game massively fail to even hit the targets at all was a major disappointment for me.
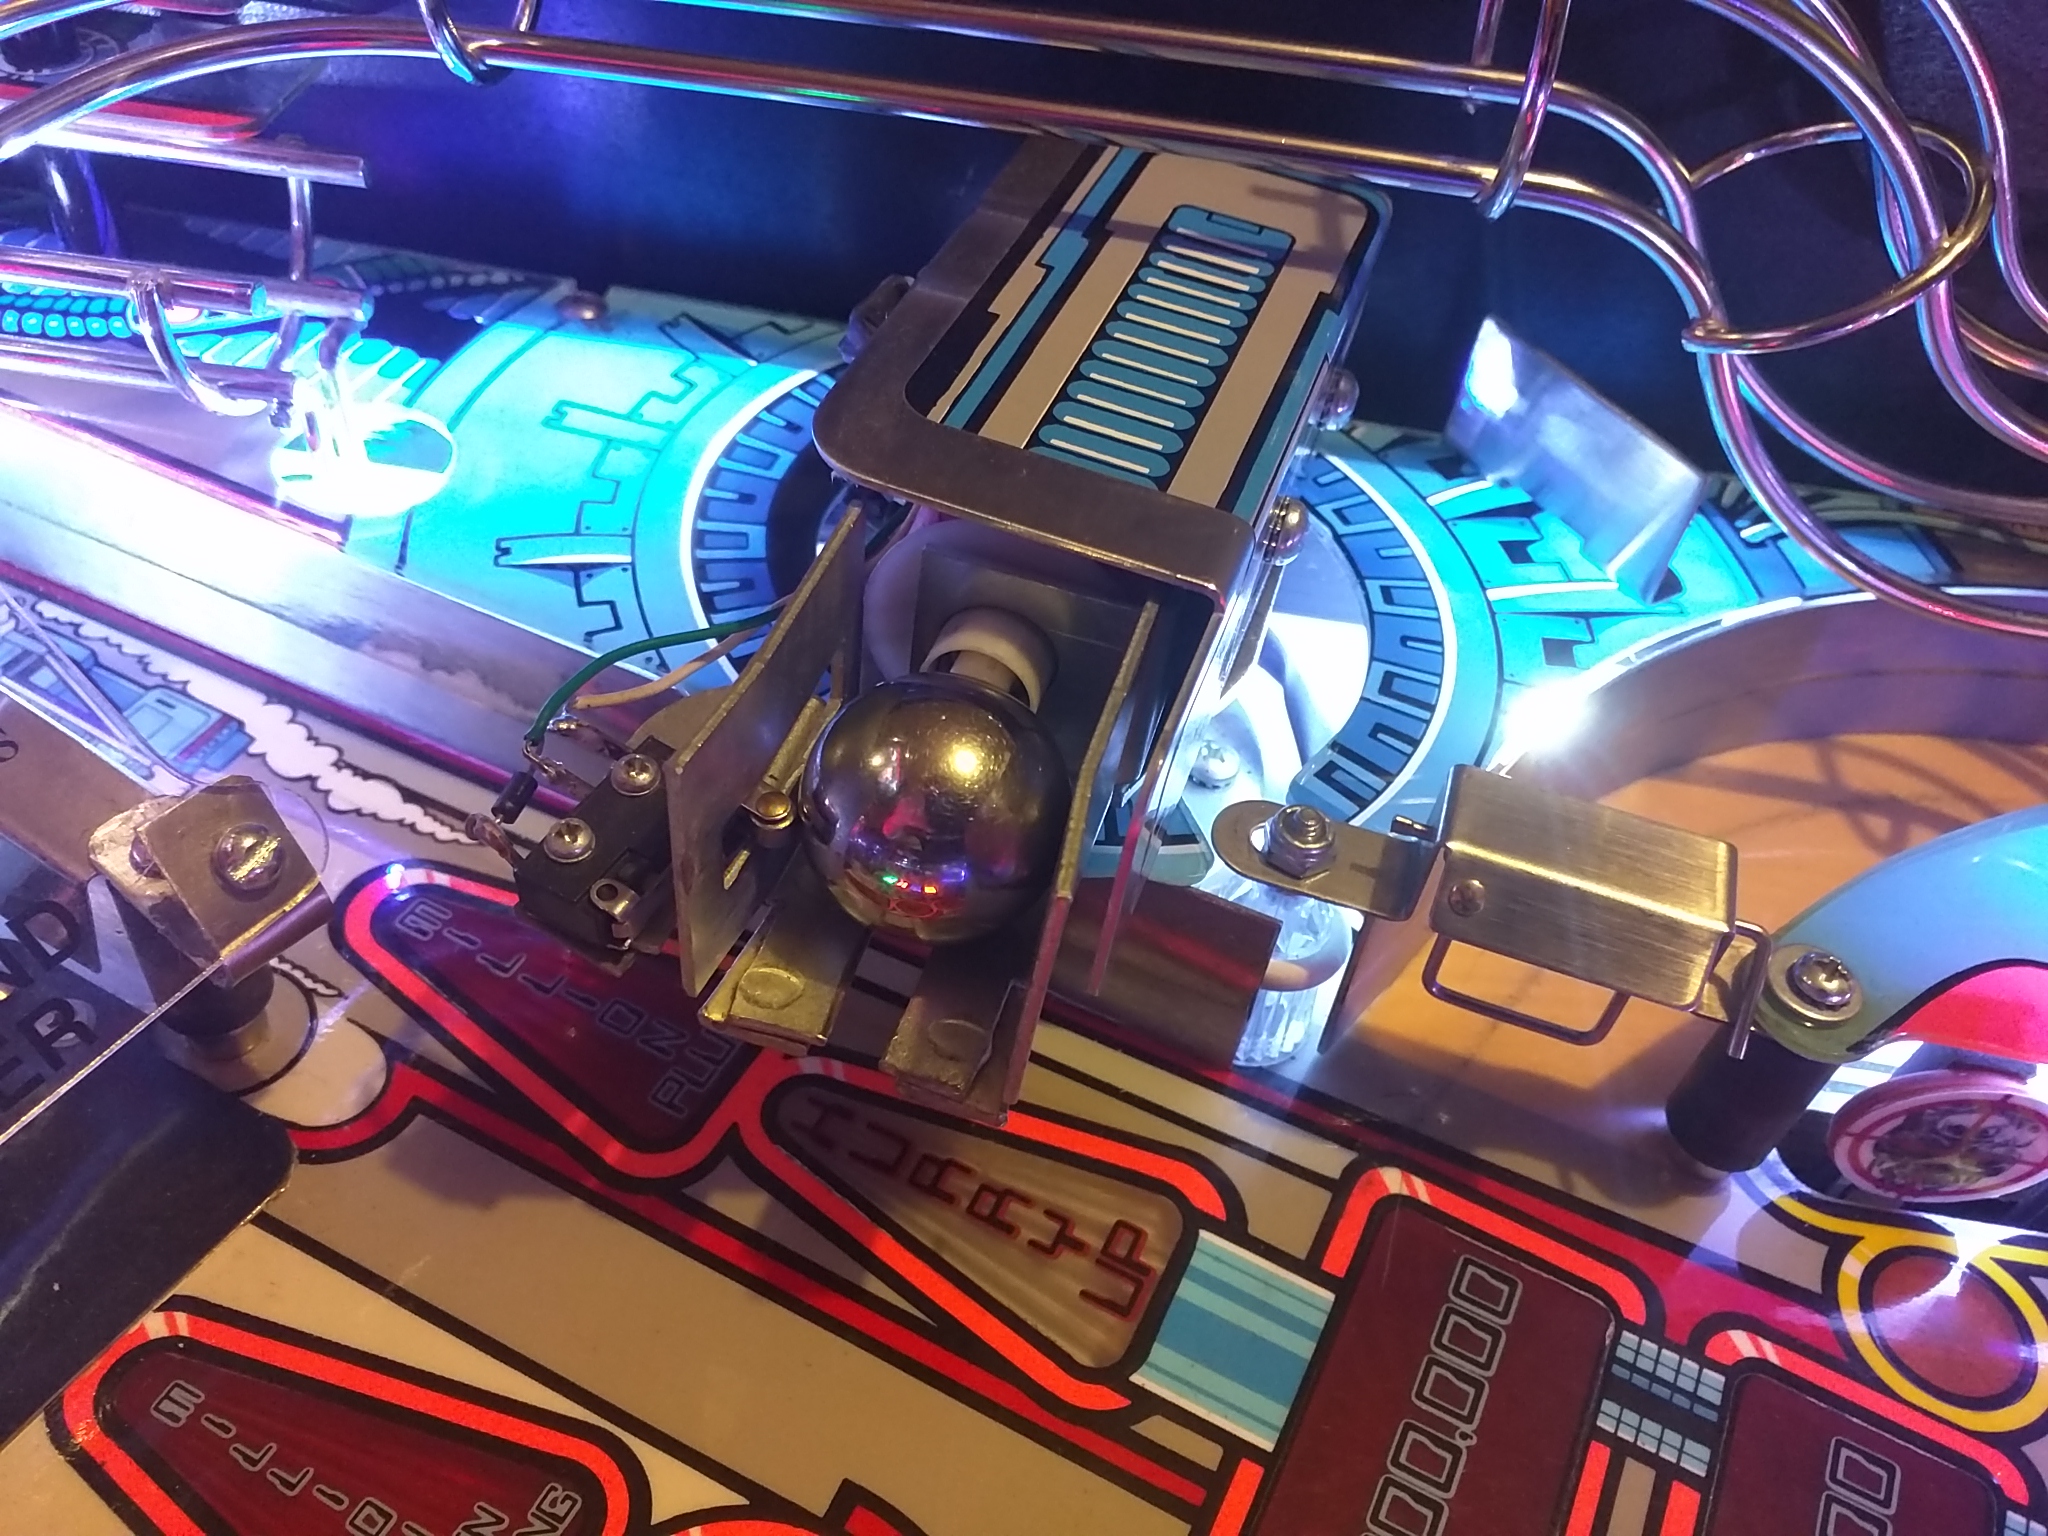
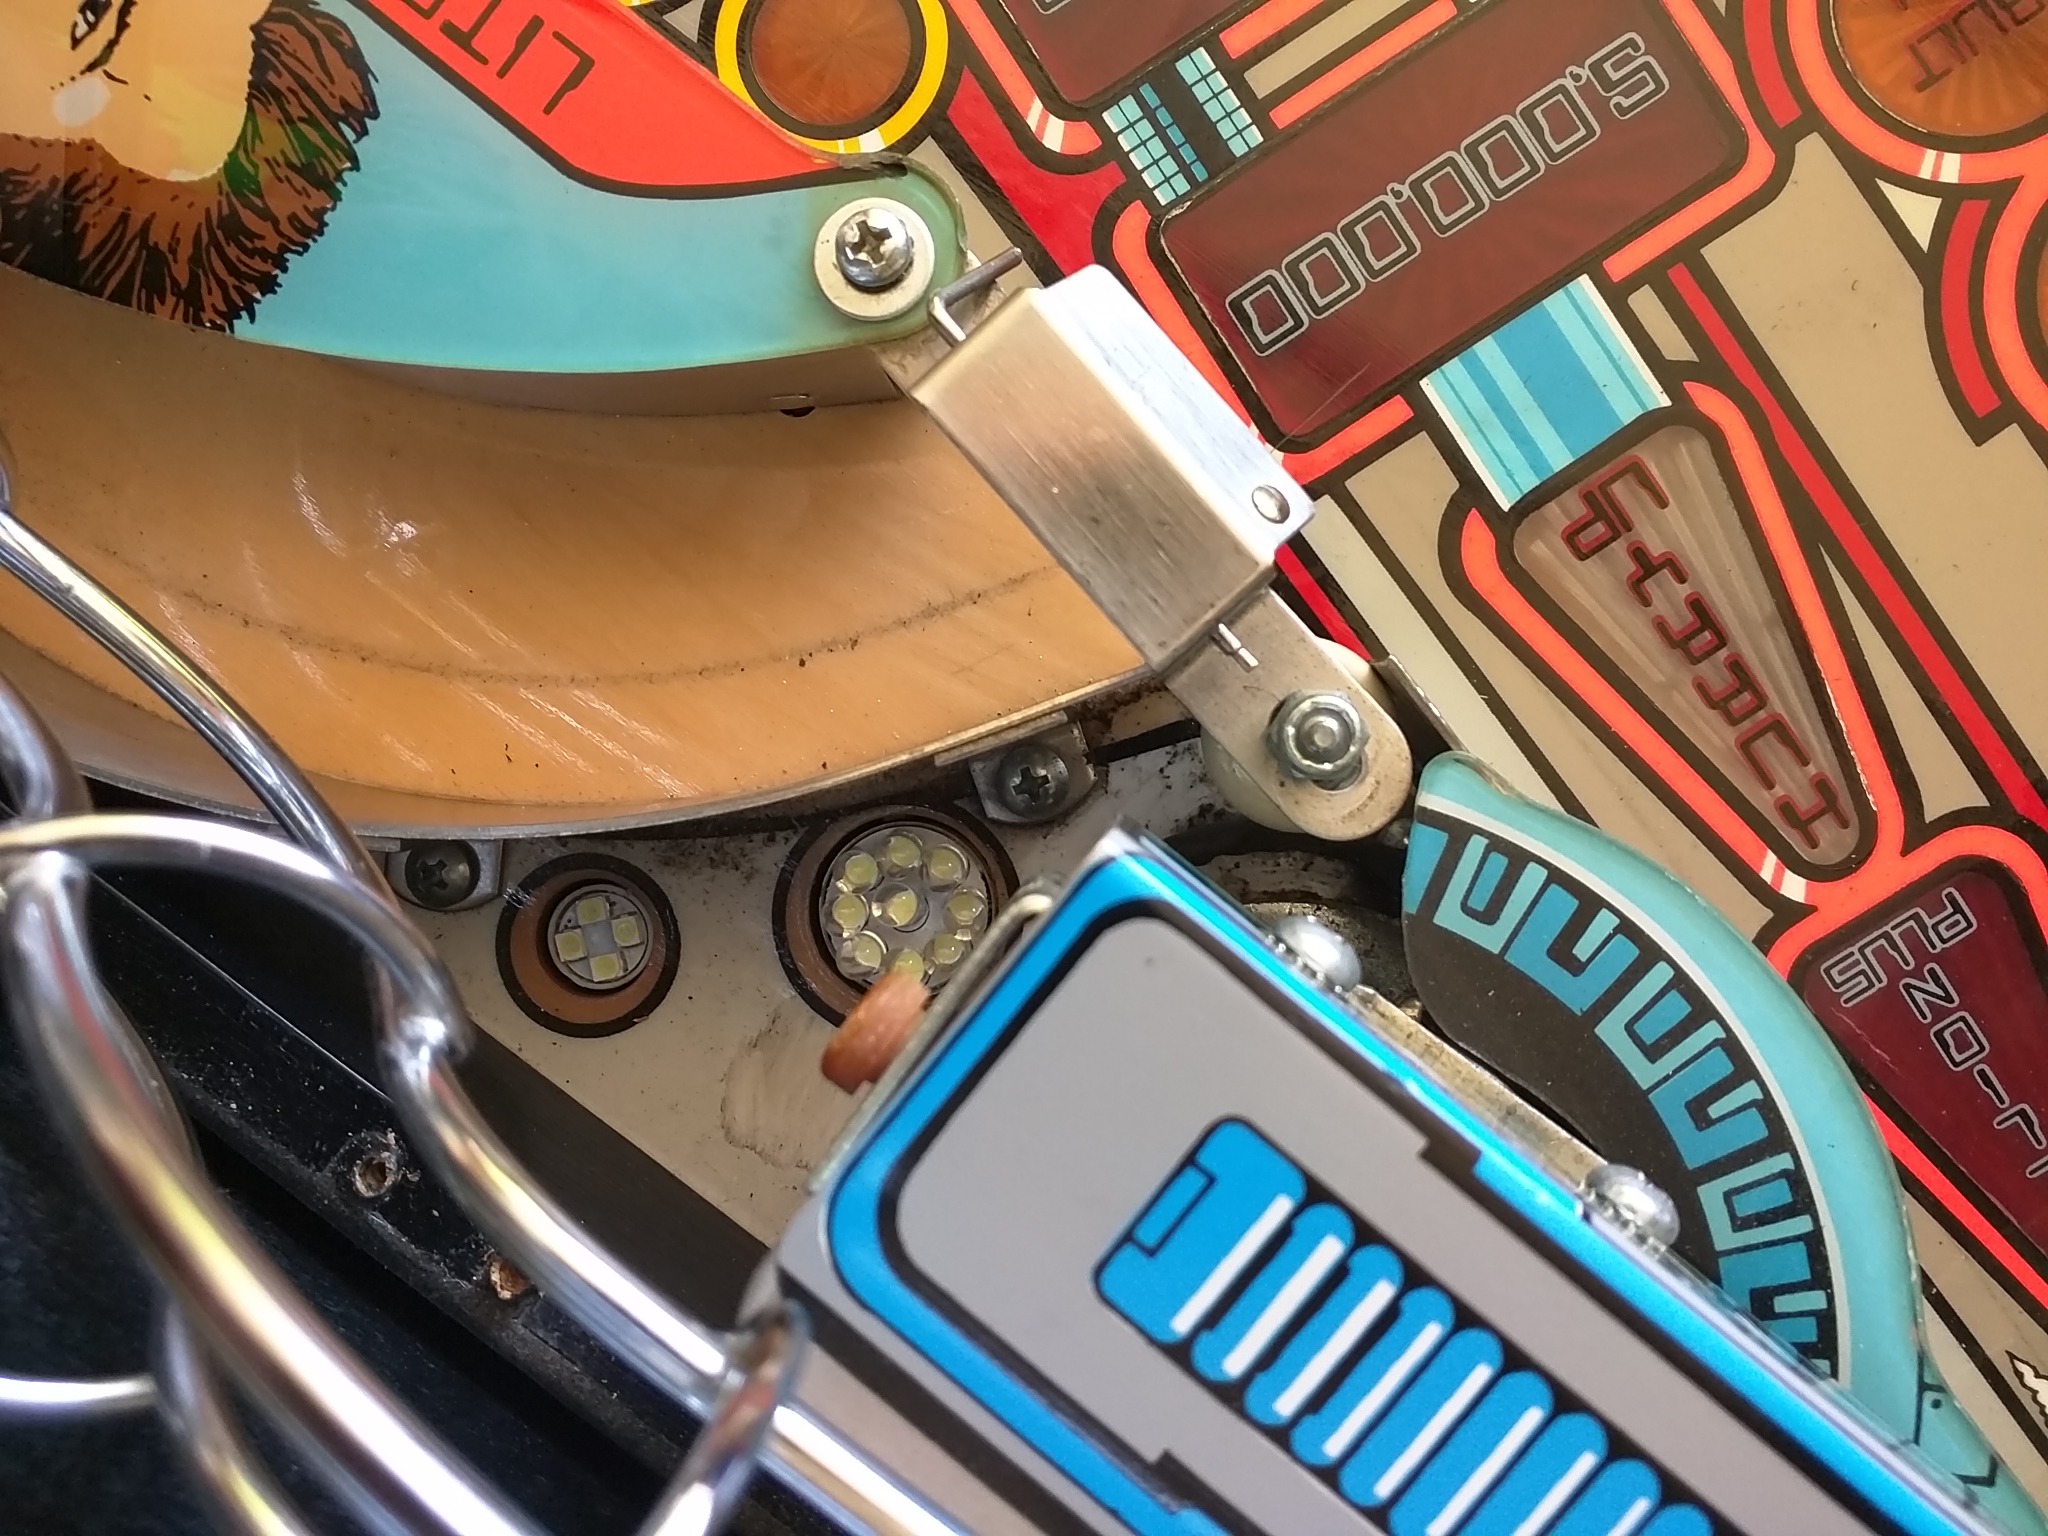
Looking at the picture above of the cannon pointed above the targets.. that’s where the skill shot was currently hitting.
For anyone that is not aware of T2’s skill shot, the goal is to launch the ball and hit the currently lit stand-up target with it. This is intended to be the center target, although you will still get the skill shot if you hit any other targets that are currently lit as well. The lit target cycles up and down the 5 targets, and speeds up after every successful skill shot that you make.
A common theme amongst pinball machines is that they are always programmed to handle most failure states!
This is just one example, where if the skill shot is not hitting center, it still rewards you for hitting whichever one is lit that the plunger happens to fire the ball to.
Another example is in Dracula. Normally, when you get enough shots on the ramp by the coffin, the ramp lifts up and allows you to lock balls into a hole underneath the ramp, which deposits them elsewhere.
If the mechanism to lift the ramp was malfunctioning and the ramp couldn’t lift up, the game still “locks” a ball for you even when it continues going up the ramp like before.
One of the first things I checked was the playfield incline. It could be that the feet have been fully extended out for shipping, and sure enough, that is the case. I end up adjusting them to make for a very steep playfield (back feet fully extended, front feet retracted).
This causes the pinballs to roll much more quickly back down the playfield and generally creates a “faster” feeling game. After starting another game, the ball finally hits a target - the top-most one..
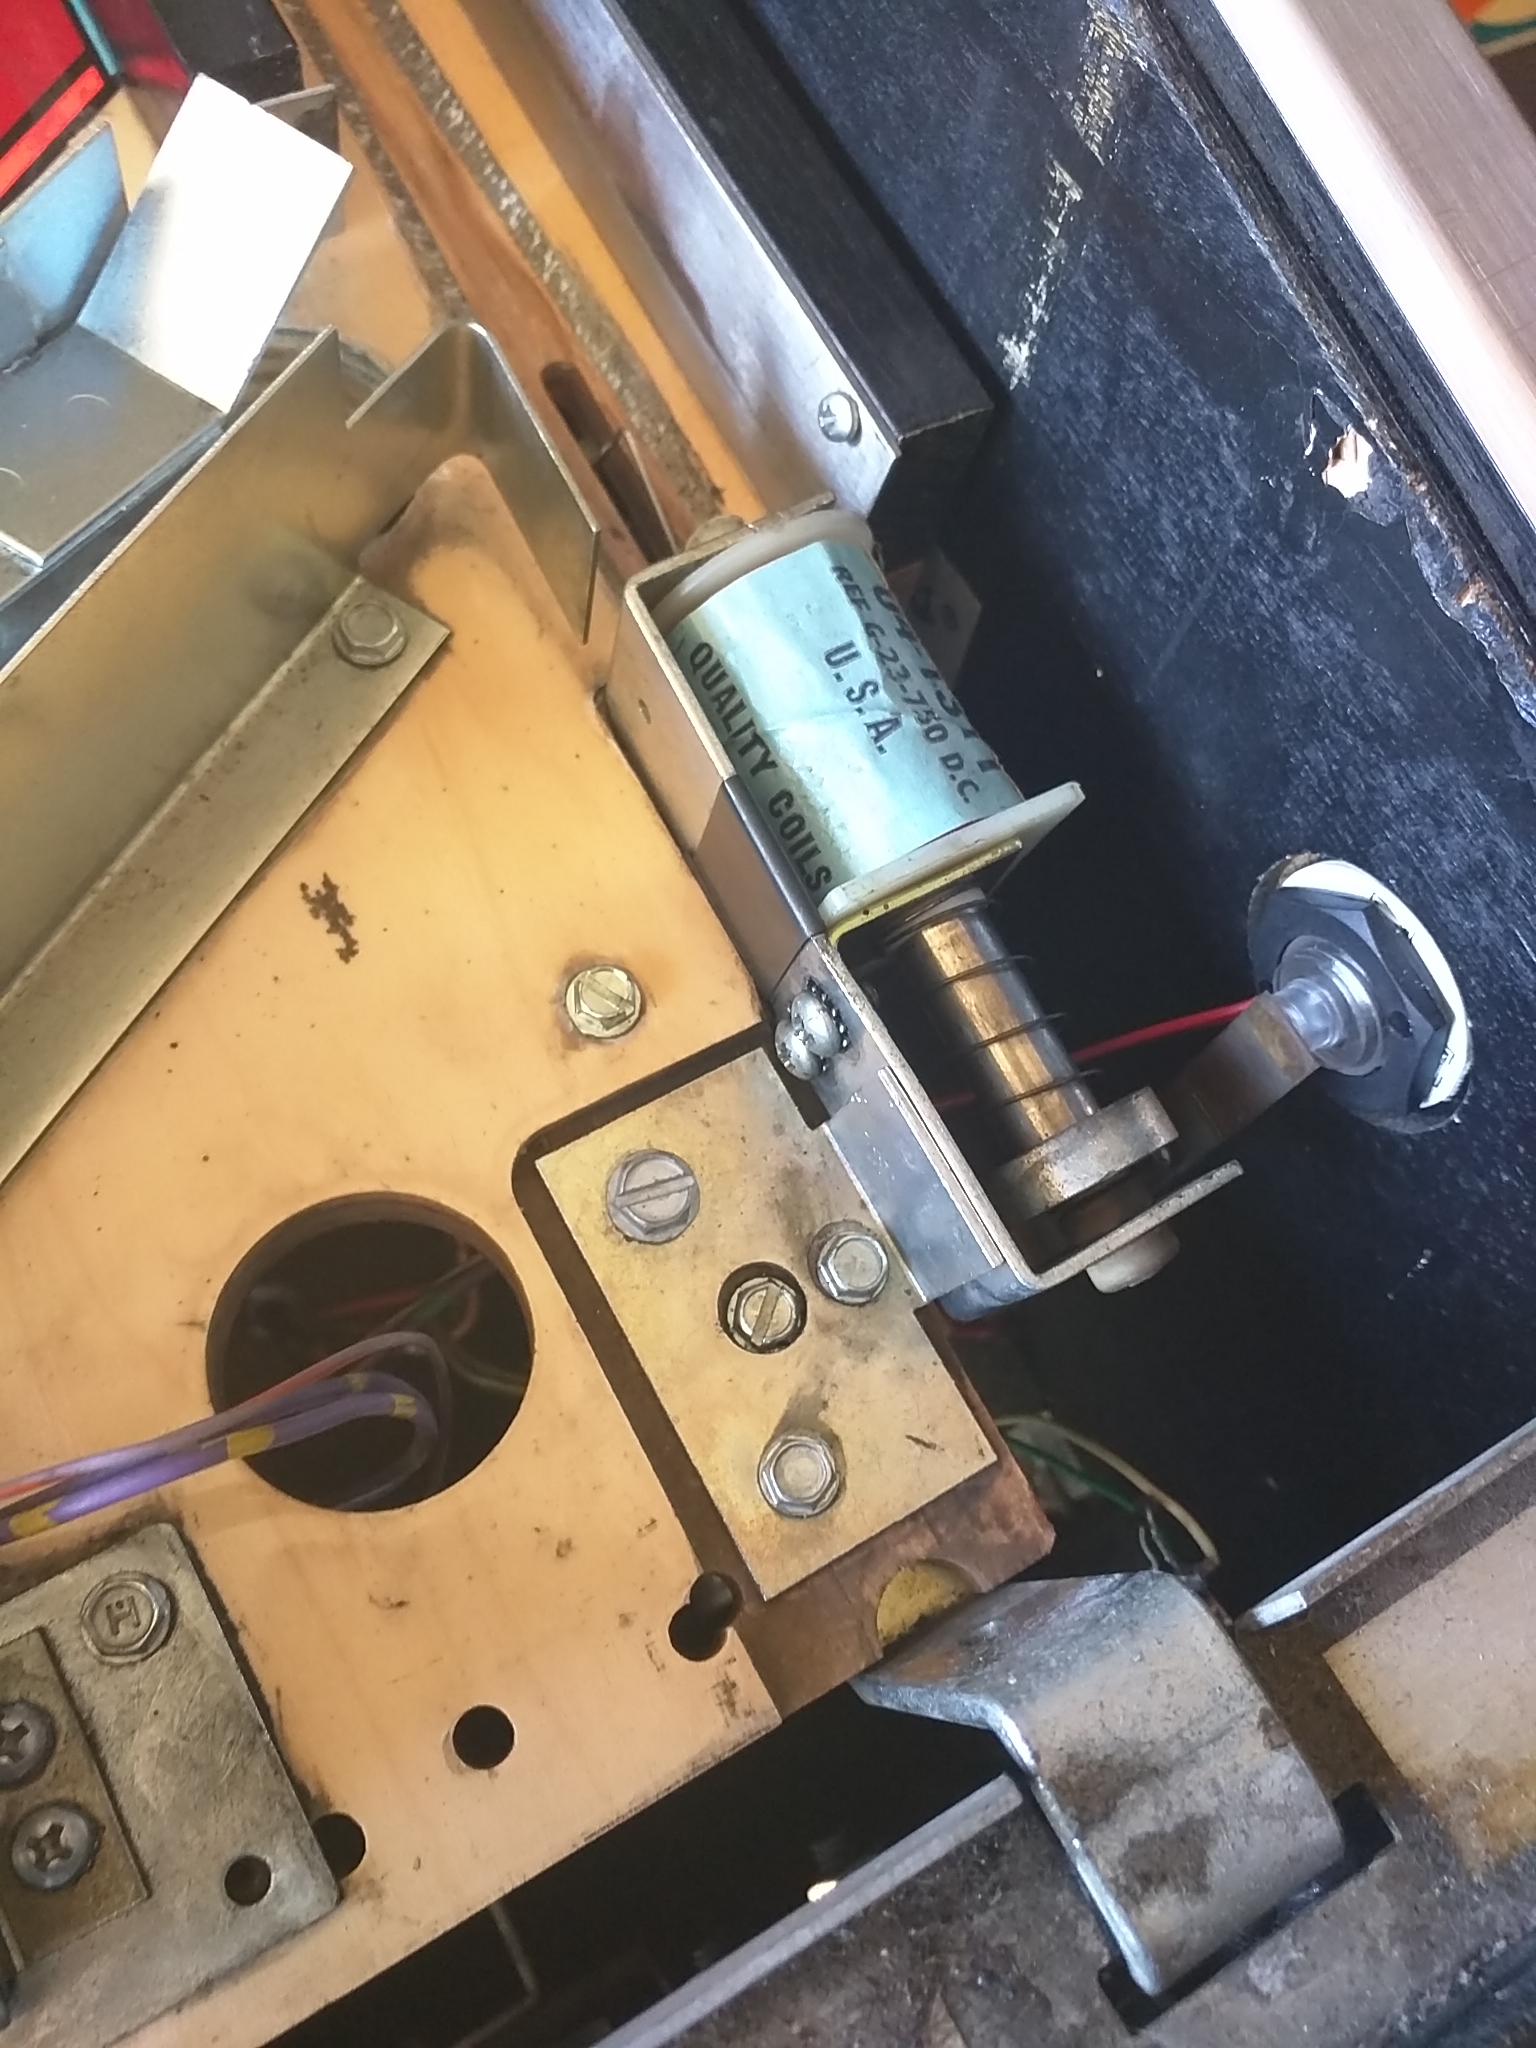
I dealt with this for a bit, but kept looking into a solution. My idea was that the plunger did not have enough power to launch the ball at the intended speed. A faster launch would angle the ball more downwards as it exited the shooter lane. With that idea, I took off the apron (the bottom portion of the playfield that covers the ball trough and plunger. It usually contains the manufacturer name and the rules on it), and took a look at the plunger solenoid.
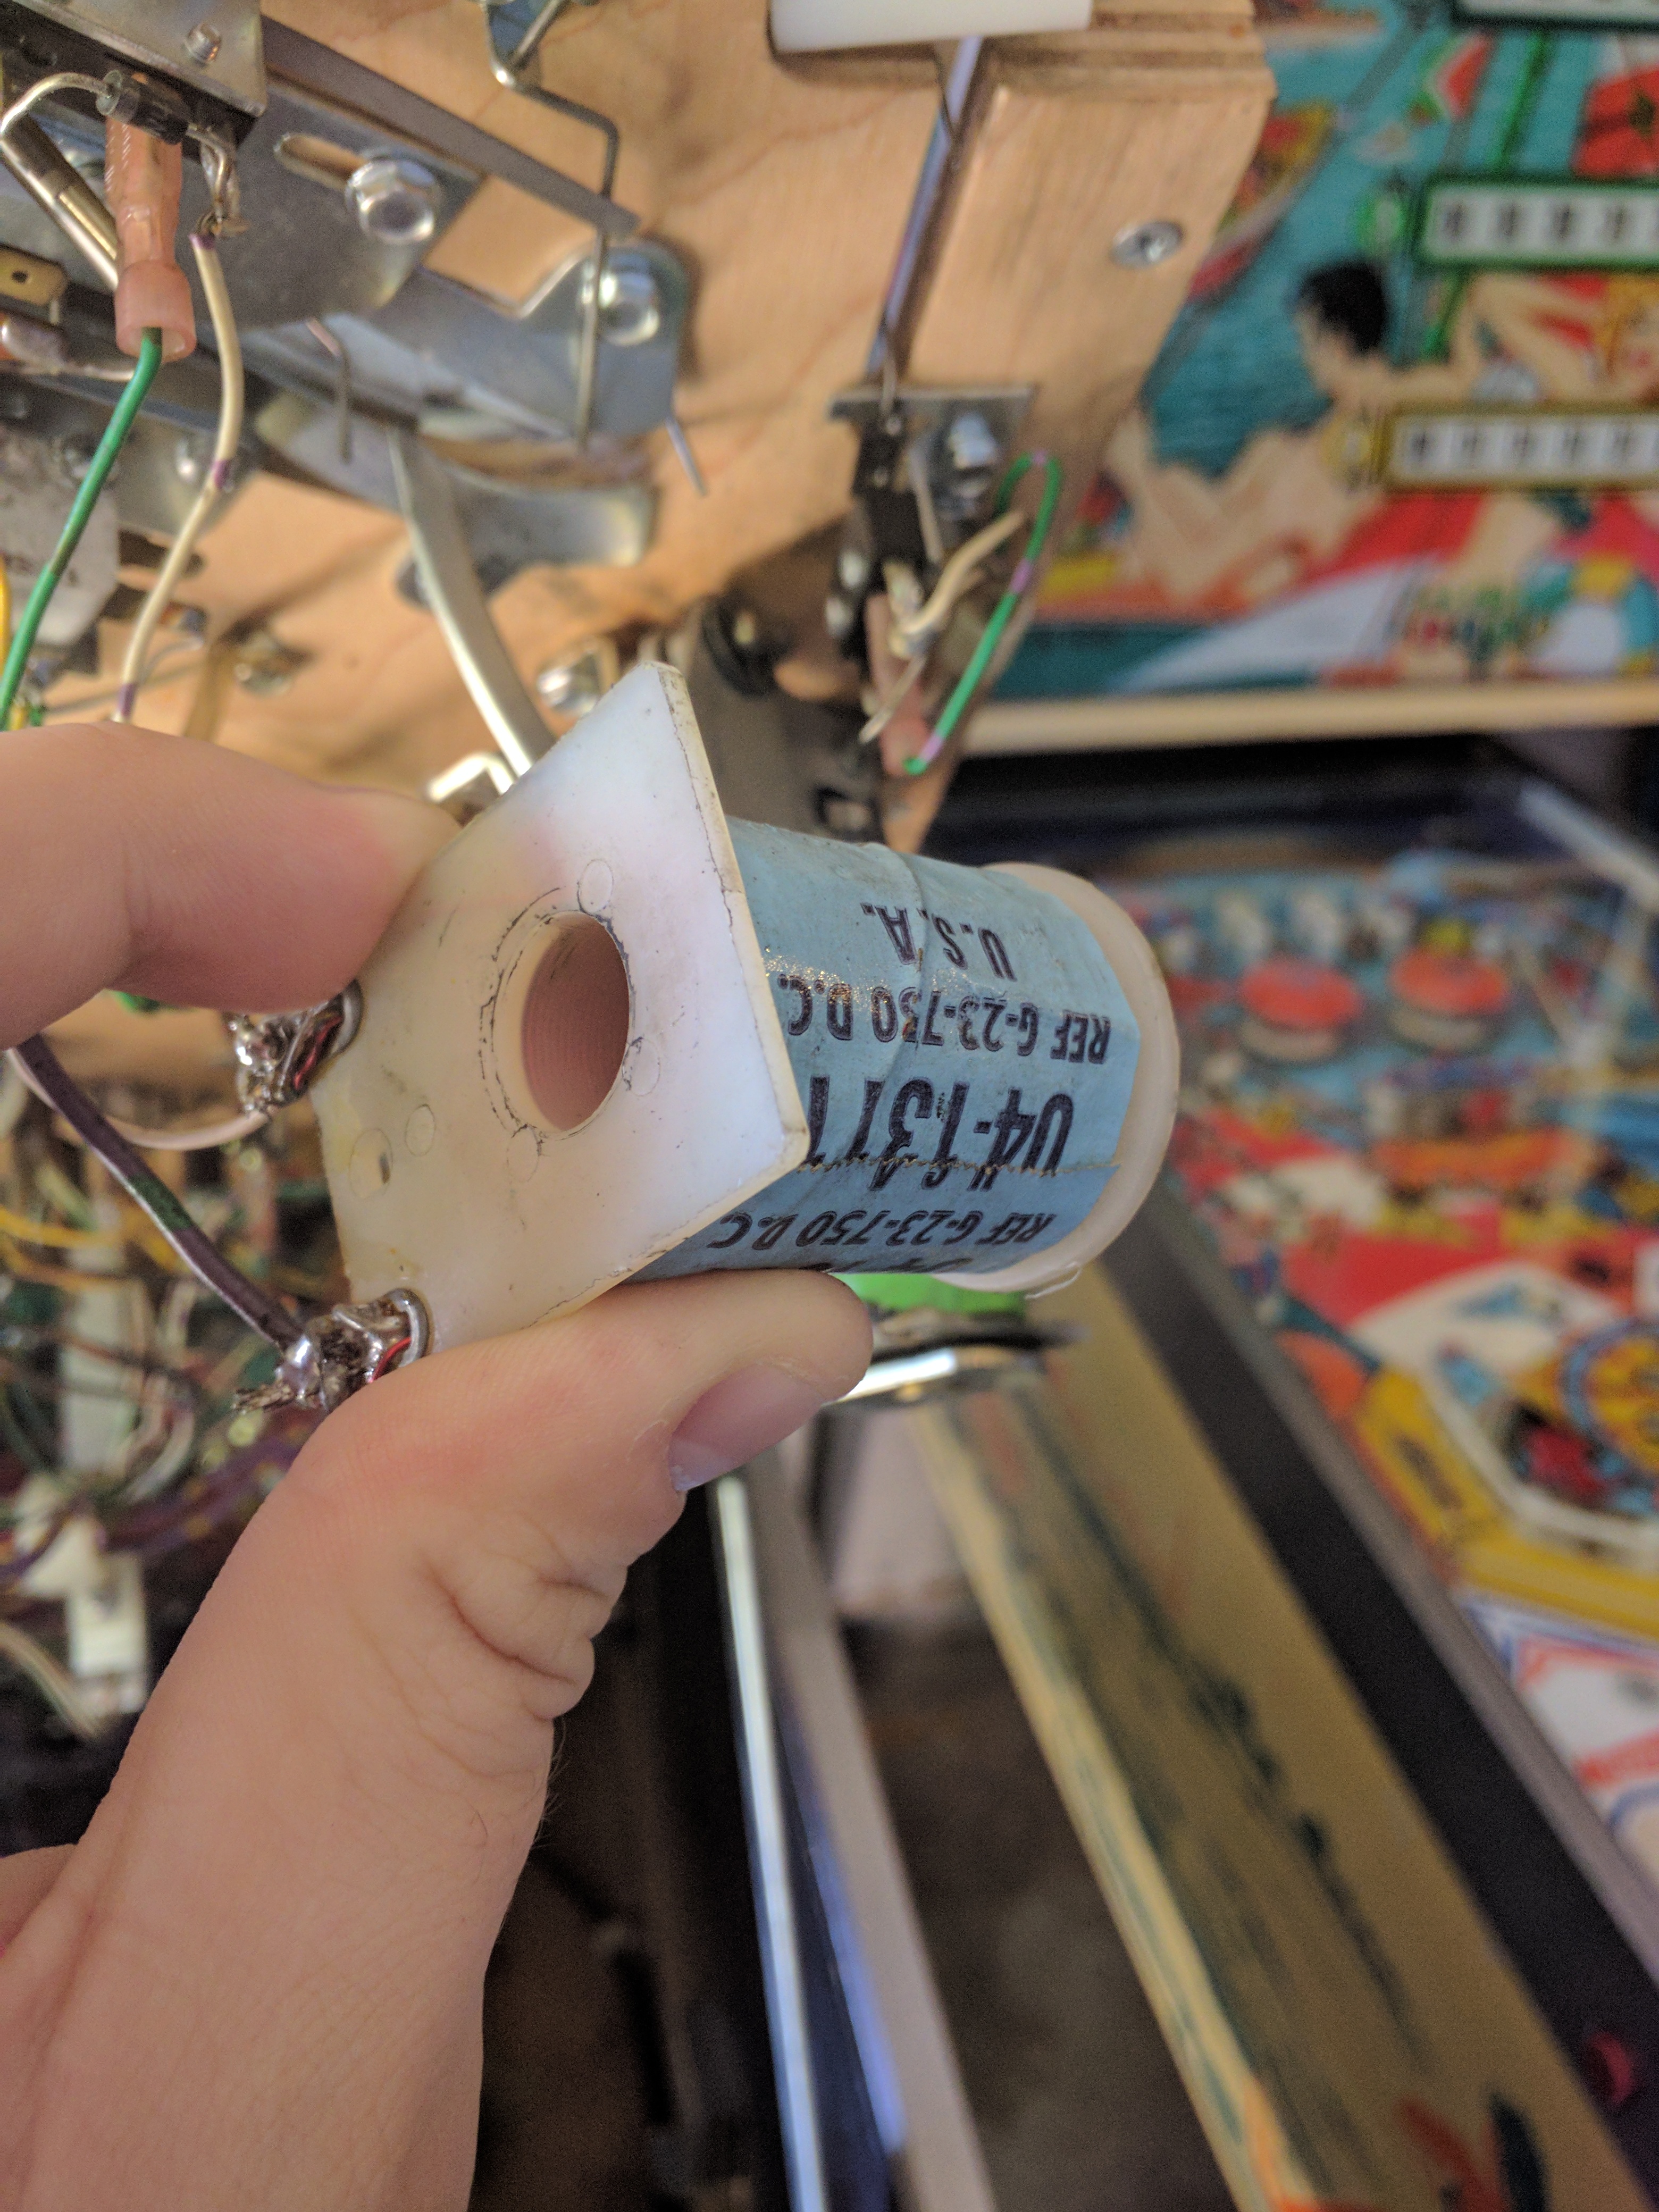
What is a solenoid?
A solenoid is one of the fundamental components of a pinball machine. It is an actuator that is generally composed of an electrical wire wound into a tight coil, with a metal rod inside of it.
On one side of the rod is a spring, to push it back out of the coil after it has moved. When this coil is energized, it creates a magnetic field that quickly draws the rod through it, until it is de-energized.
This can essentially be used to create very fast electromechanical actuators that can do various things like fire the ball into the playfield, pop it out of a hole, or activate one of the flippers.
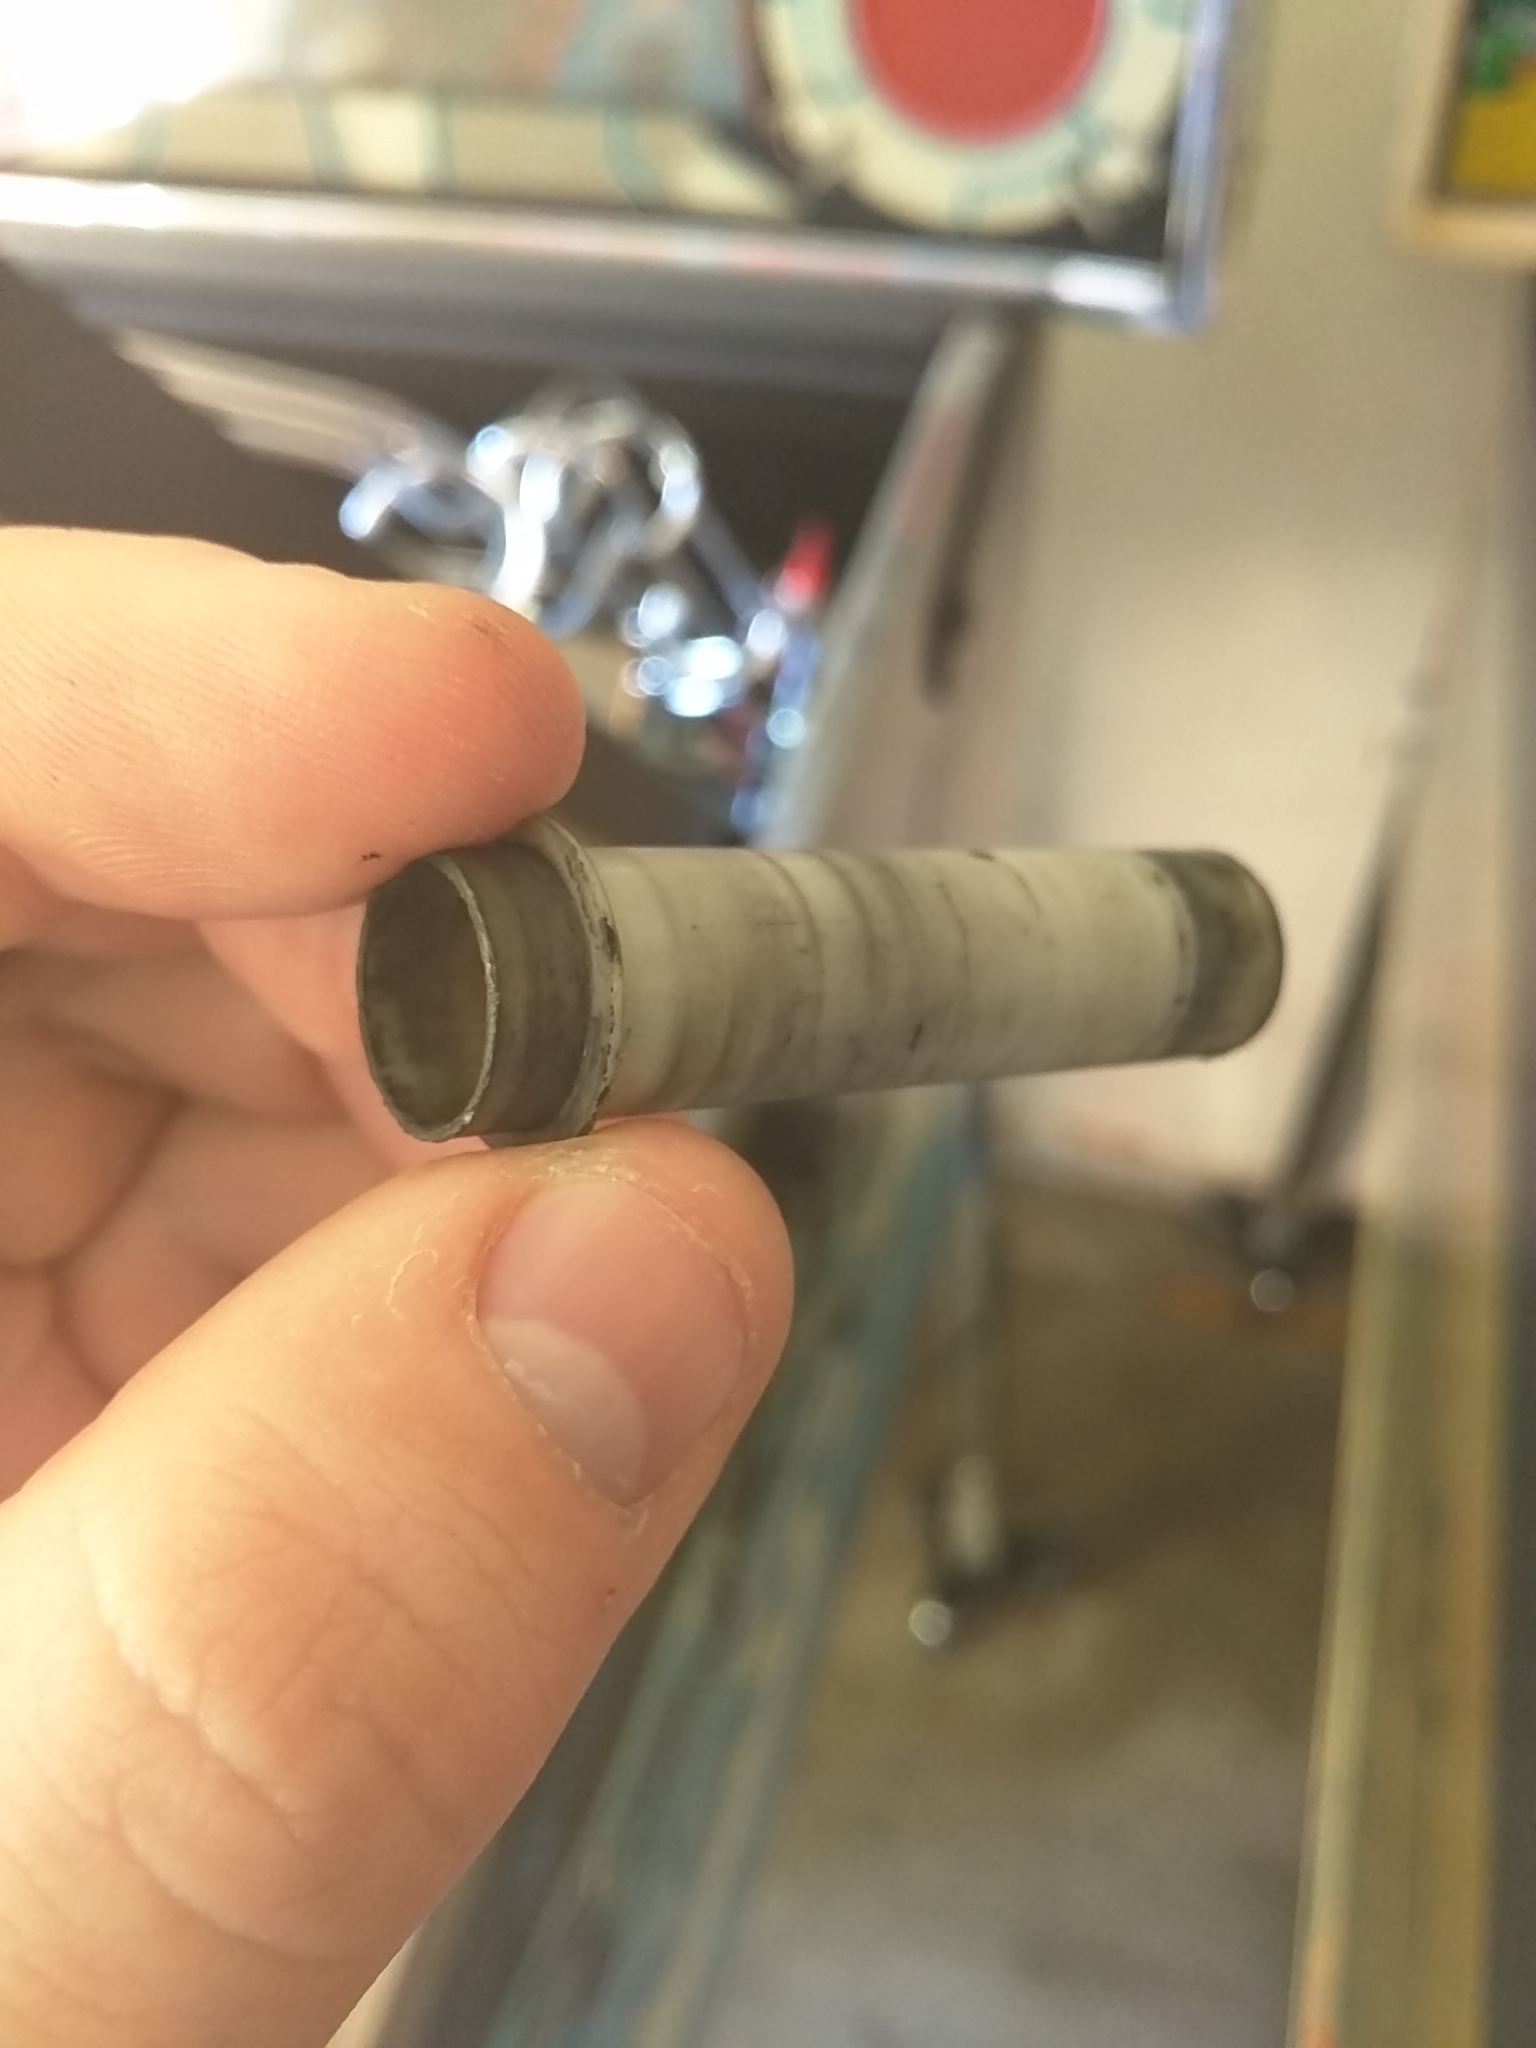
On the inside of the coil is a plastic tube that separates the rod and coil called the coil sleeve.
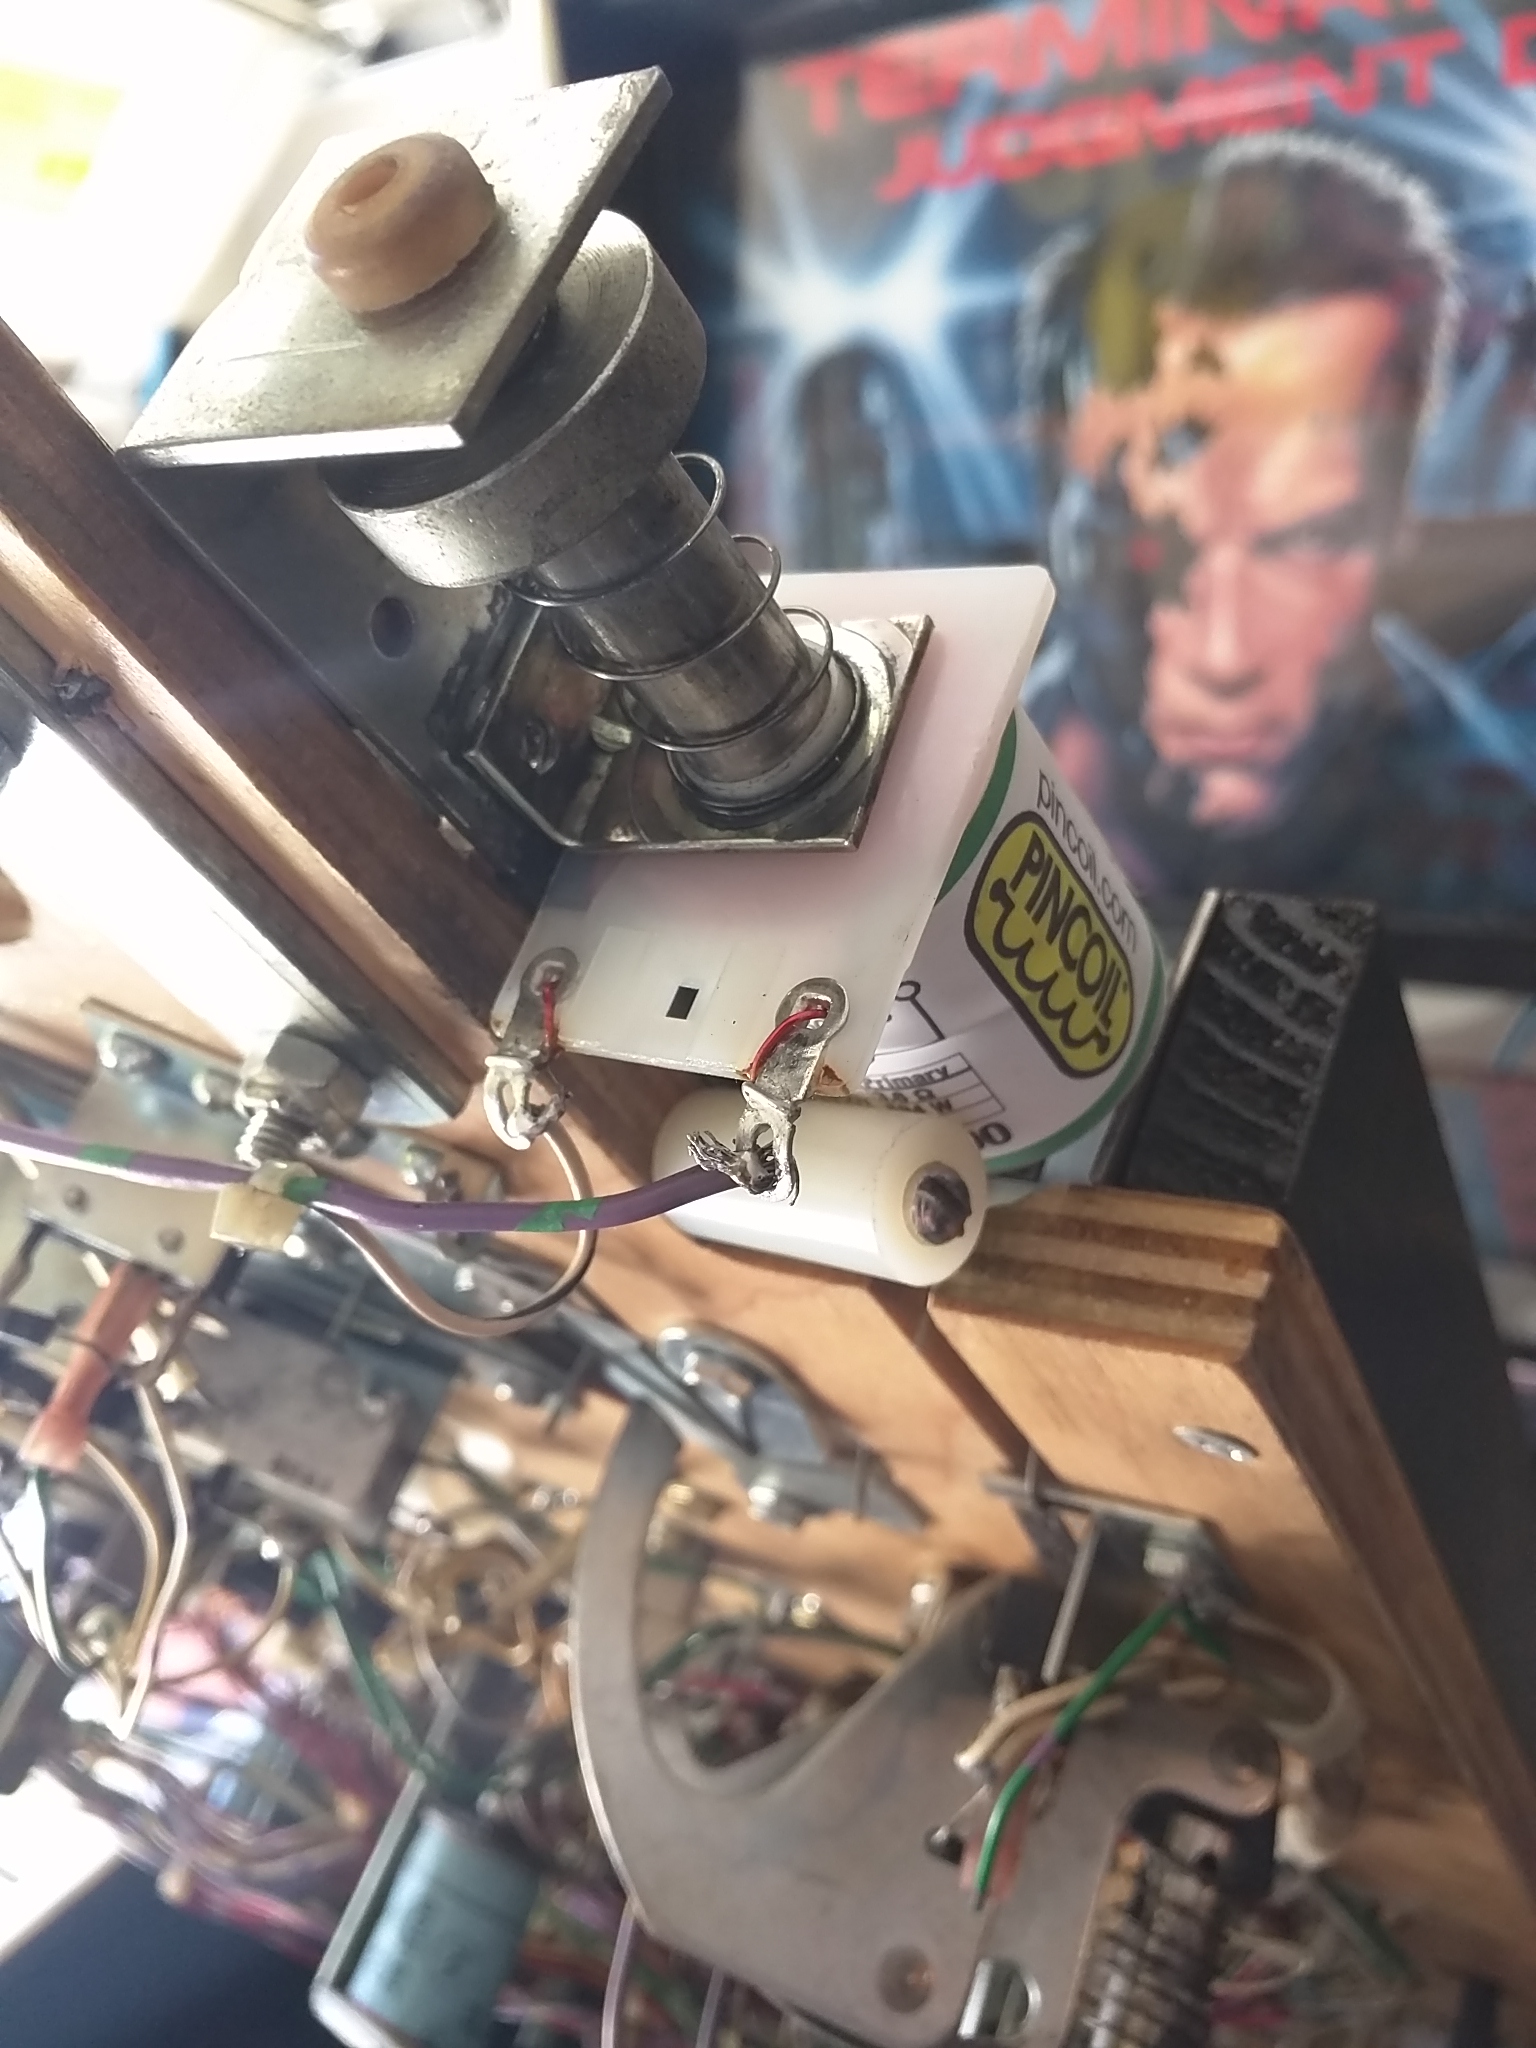
Pulling the plunger coil apart, I found that the coil sleeve inside of it was pretty filthy. A combination of heat, current, and grease will draw all kinds of grime into the coil, and with that much interference, it could very well affect the performance (or at least that’s my idea). I replace it with a new sleeve, reinstall the components and try a new game. Same thing.
Alright, maybe it’s the coil? I went ahead and desoldered the old coil, and soldered in a new one. Same thing.. I posted online, and was suggested to modify the shooter lane ball guide, to angle it downwards in order to compensate for the shot. After getting behind the guide, I can see that it screwed down twice, and after unscrewing it and manually pushing it downwards during a bunch of test shots, I determine that the ball guide would have to essentially be moved over a entire screw-hole’s length down. I figure that that amount of modification to just achieve the intended skill shot was more than I was willing to do, and decided to look back to see if there was something I missed.
Looking closely at the plunger during firing, I noticed that it moved slightly. I was also able to move it slightly side-to-side with my hand. With the potential to move, the plunger can hit the ball off-center, or not at full power. I also noticed that the metal plate in front of the plunger appeared to be bent, and confirmed this with the manual. I also went ahead and tightened down the entire assembly to the best of my ability.
Yes, I put the sleeve in backwards here.
Yes, I put the sleeve in backwards in the first picture. Did this fix the issue? Not.. entirely. The ball now usually hits the 4th target up. Sometimes the middle, sometimes the top one. After watching the PAPA video on T2, I noted that the plunger was pretty inconsistent in making skill shots. I decided that this was an improvement either way, and to leave it alone for now. If I can get a surefire way to hit the center target, I will certainly update the post.
Miscellaneous
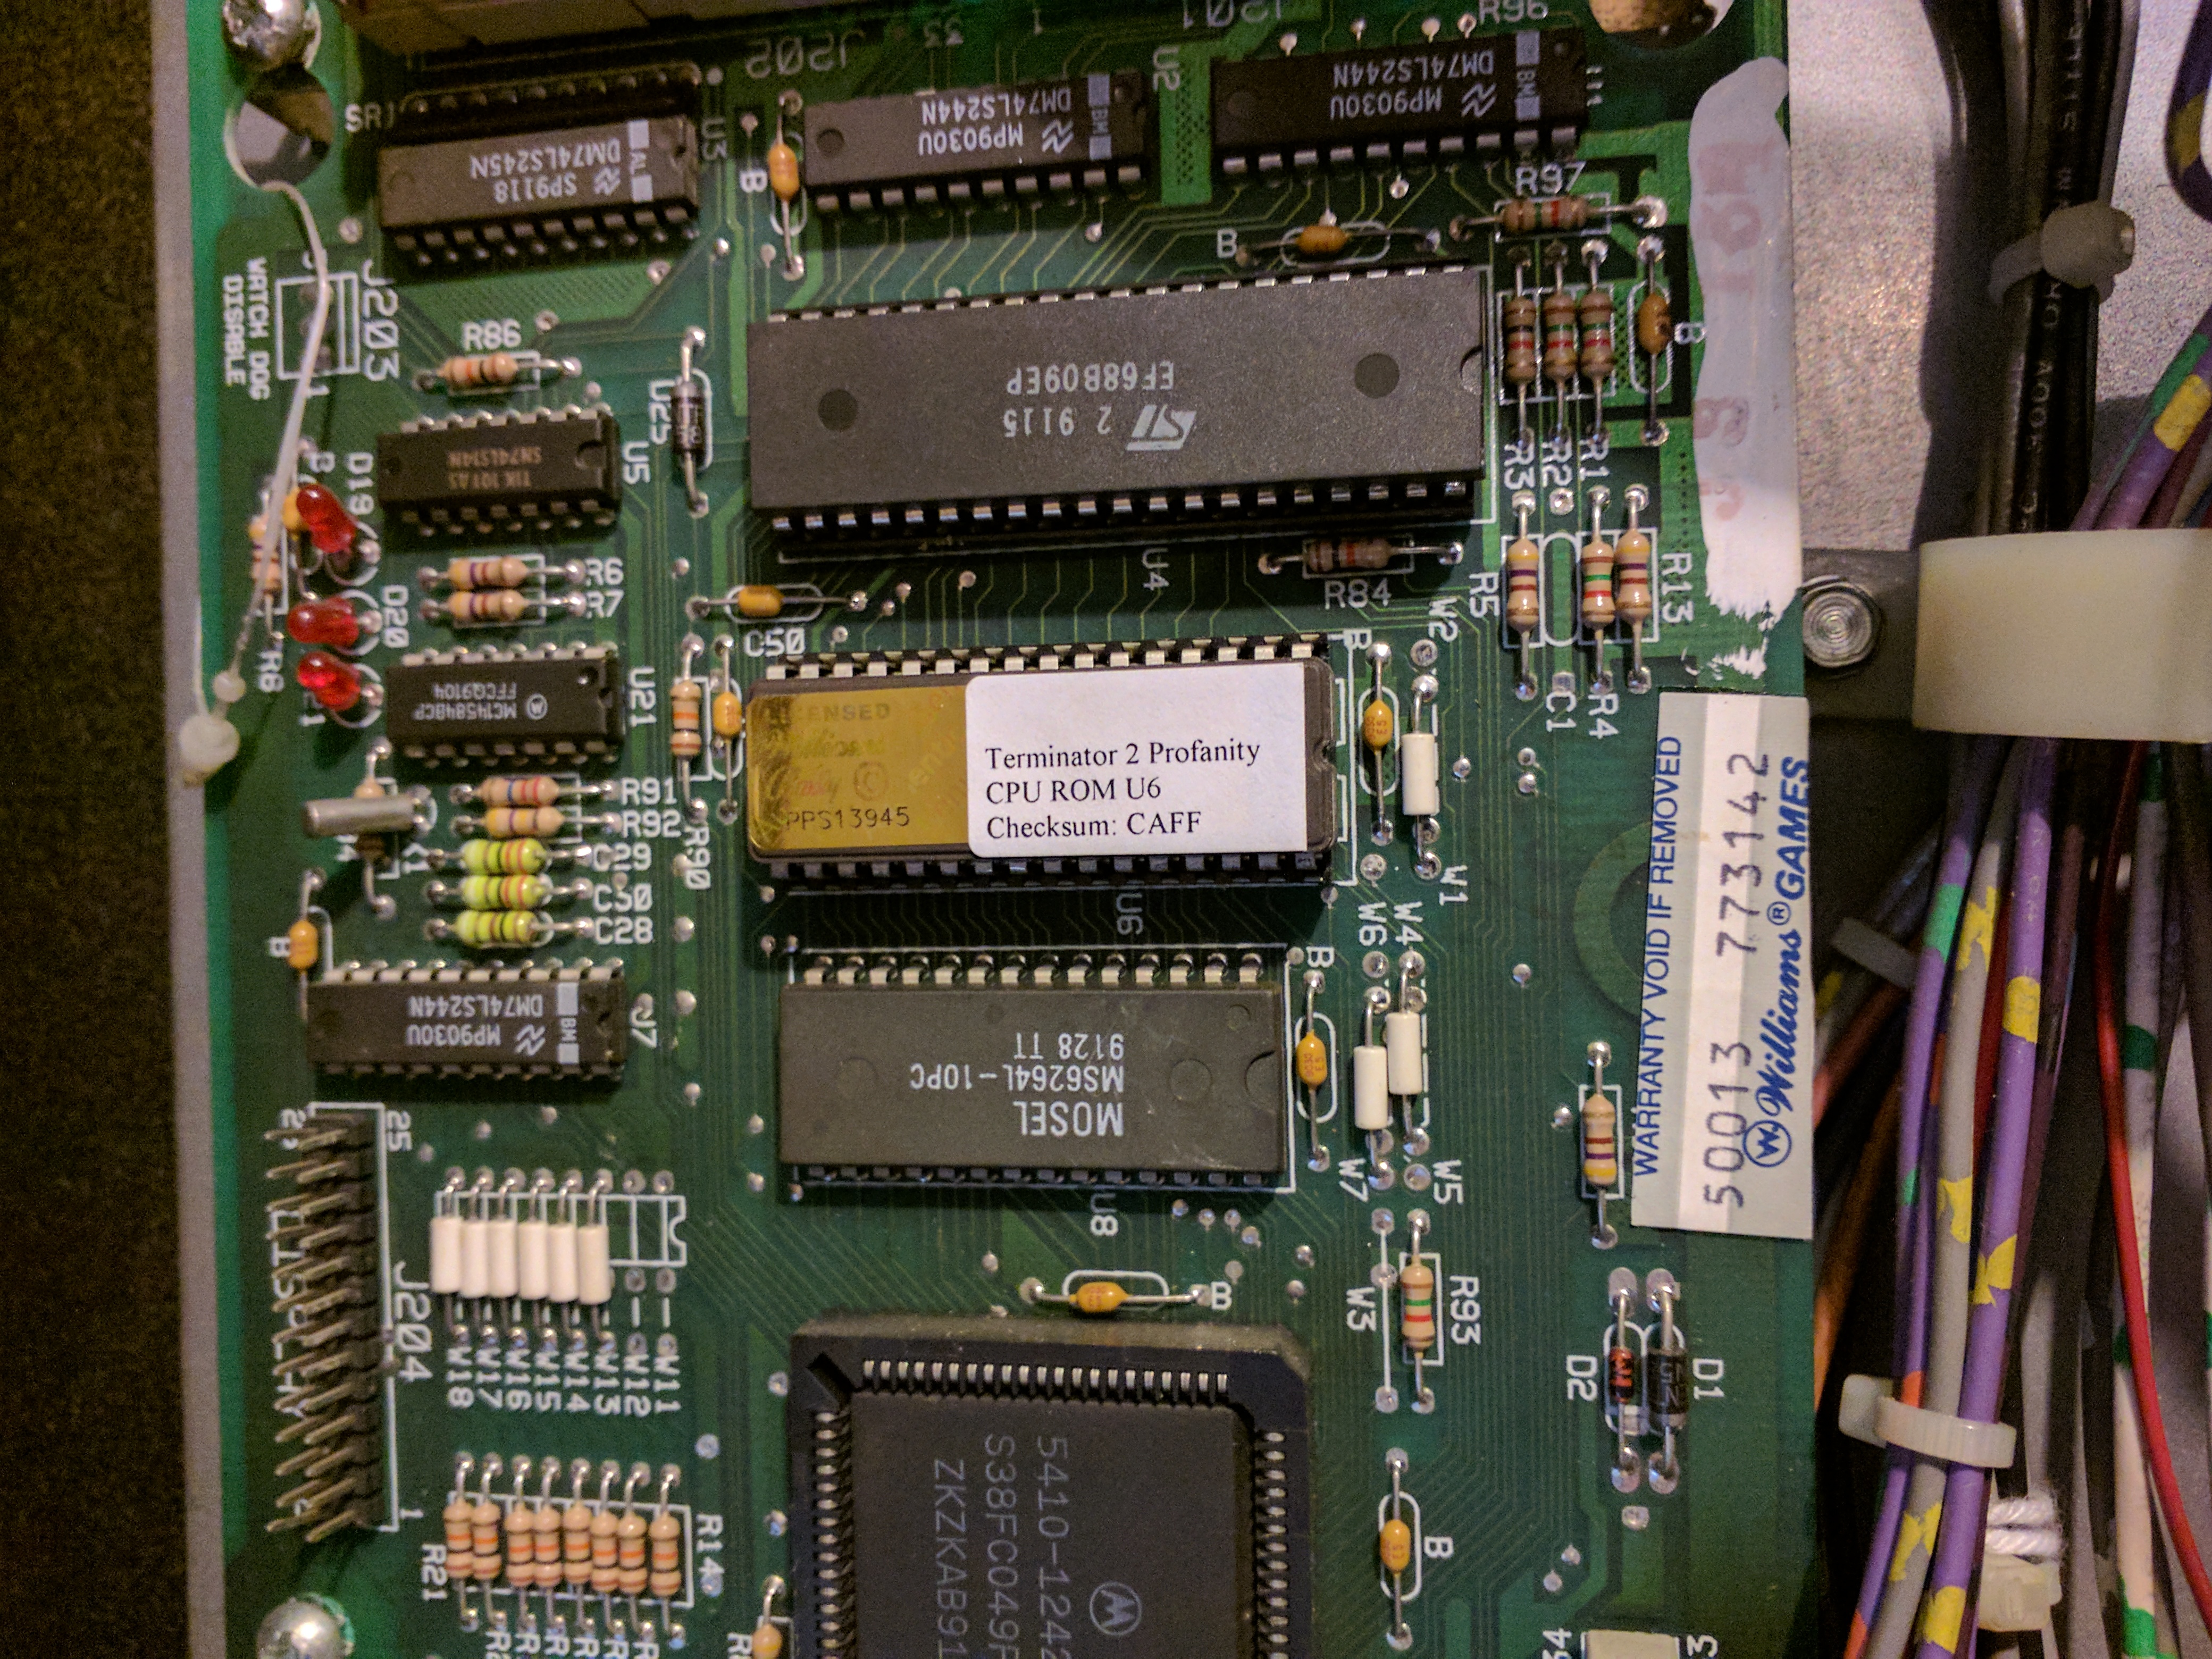
Profanity ROM
Hey, you’ve read this far! You’re a trooper. Here’s a couple other random things I found while working on the machine.I wasn’t really thinking about it when I bought it, but turns out the machine was equipped with the profanity ROM. What? Profanity? Barely. When getting the database shot, the screen cycles through a list of randomized awards (100K points, light hurry up, video mode, etc..). What this modded ROM supposedly does is add Arnold’s response of “F*ck you A**hole” as one of the awards. That’s great and all, but I thought it added a bit more! Note: in order to see the option, you need Profanity turned on in the feature adjustments, and will need the game set on free play.
How did Terminator 2 even get a profanity ROM? While I thought I read this in one of my books (after I went off and looked up the T2 entries in all the pinball books I had), it was actually the site silverball-magic.com by Maximillian Schultz that had the story.
Supposedly the lines for the game were recorded on the set of T2 (the movie), and the sound guy for the movie had the script of lines for Arnold to read. At the end, he asked Arnold if there was anything else he wanted to say. “Yeah, F*ck you, A**hole”.
The guys at Williams loved it, and included it in a private ROM for the database selection, just like the scene from Terminator 1. I highly recommend pinball fans check out Max’s site and read his stories on the machines that he has bought. It’s a fun read.
Lighting Woes
I mentioned that a few of the LEDs on the machine were still misbehaving after I fixed the bulk GI issue. This is an unfortunate issue with most pinball machines as they get old, and the wiring can get a little long in the tooth. What doesn’t help is that LEDs do not do variable brightness very well, so typically respond to voltage changes by becoming extremely dim, or just turning off.While it can be frustrating, there are a few things you can do about it. Sometimes the lights themselves just need to be tweaked with a bit. They may not be making proper contact with the socket. I’ve had lights that seem to just operate fine once pulled slightly out or rotated a bit. The problem with this is that vibrations and movement in the cabinet can just push them back to their prior position.You can use a steel brush to clean the contacts, or a pencil eraser. It’s unlikely, but the connections may need to be reflowed (the solder heated up and cooled down again to make a better connection). This was the case in one of the GI sockets on T2 for me.There’s also the possibility that the wiring itself is off as well. I had consistent issues with the left stand-up targets. Reseating the connector and securing one of the wires a little more solidly into the connector fixed the consistently out bottom light.
Skull Drop Target
When you want to hit the skull on the playfield to get the ball into the cannon and start multi-ball or score jackpot, you usually have to hit it twice. This is to first hit the drop target and knock it down, and then to actually enter the skull. My game has been occasionally getting the ball stuck right above the drop target, because it isn’t dropping far enough, and I have no choice but to sit and wait for a Ball Search.
This is an automated routine if no targets have been hit for a period of time (I think around 15 seconds or so), where the game believes the ball may be stuck, and triggers off all the solenoids in an attempt to free the ball from wherever it is stuck.
It will also cycle the cannon out and shoot it if you wait long enough.
The amusing part is that part of this search is raising the drop target back up, which always knocks the ball fully into the skull and starts my cannon shot, free-of-charge. While I do want to get this fixed, it is still technically workable, and I’m have a difficult time reaching the part of the board that houses the drop target mechanism.
The Game Shutdown
After finalizing a few fixes, I closed the game up and played a few good games on it. Leaving it running, I went to play Dracula a few games. After shutting it off, I went back to turn off T2, but noticed all the lights were already off.
Thinking I just forgot that I had already turned it off, I was about to walk out when I noticed the illuminated flipper buttons were still on.. Uh oh.
I shut the game down and turned it back on. The lights came on, but so did a loud whining noise! Not only that, but the display was just displaying junk, and I couldn’t start a game. I was sure that a board was shot, potentially the power driver board (hint: not cheap).
I started disconnecting boards to try to isolate the problem. Disabling the display board did not stop the sound, and I still couldn’t start a game. Disconnecting the sound board from the loop allowed me to start a game, and cut the noise.
Thinking maybe my sound board would need to be replaced, I reconnected it and gave it one more shot… and it worked? The game was back to normal and I’ve played several on it since. The point of this is.. don’t trust the ribbon cables!
What Now?
With a few of these things out of the way, I have a pretty solid game. There’s a couple of small issues that I still want to address at some point. This includes the skill shot, tweaking the cannon further, and the drop target issue. I also want to do some work on the cabinet. While I can probably get away with some touch ups, I think the side panels could really benefit from new decals overall.
As for mods, there’s couple that I’d like to try with T2, but nothing too drastic. I’m not a fan of adding a lot of modifications and lighting beyond an initial LED setup. I think the Hunter-Killer mod looks pretty nice. If Color-DMD ever does release a ROM for T2, I may jump on it, as well, even if the animations are a bit basic and wouldn’t benefit as much from a color upgrade like Dracula did (It is the first game designed with a DMD after all!)
(Update - They did finally release a T2 color ROM.. I’m not sure if I’m going to buy it or not yet)
Now onwards and upwards to my new Star Trek: TNG machine! Ok.. maybe not for a bit, but one day!